Author: 안산 열린외과병원 편집팀

  • Armpit Lump Causes: 4 Types and Warning Signs to Know

    Armpit Lump Causes: 4 Types and Warning Signs to Know

    SummaryMistaking an armpit lump for a simple pimple and squeezing it or ignoring it can lead to much higher treatment costs down the road. Understanding the main armpit lump causes can help you catch problems early. Explore the 4 possible causes — sebaceous cysts, lymphadenitis, accessory breast tissue, and lipomas — along with their warning signs and proper treatment options.

    While massaging your lymph nodes,
    have you ever touched your armpit
    and felt a hard lump underneath?

    Brushing it off as "just a big pimple"
    can sometimes lead to spiraling medical bills later.

    That’s because an armpit lump isn’t always a simple pimple —
    it can be a warning sign of a condition that needs treatment.
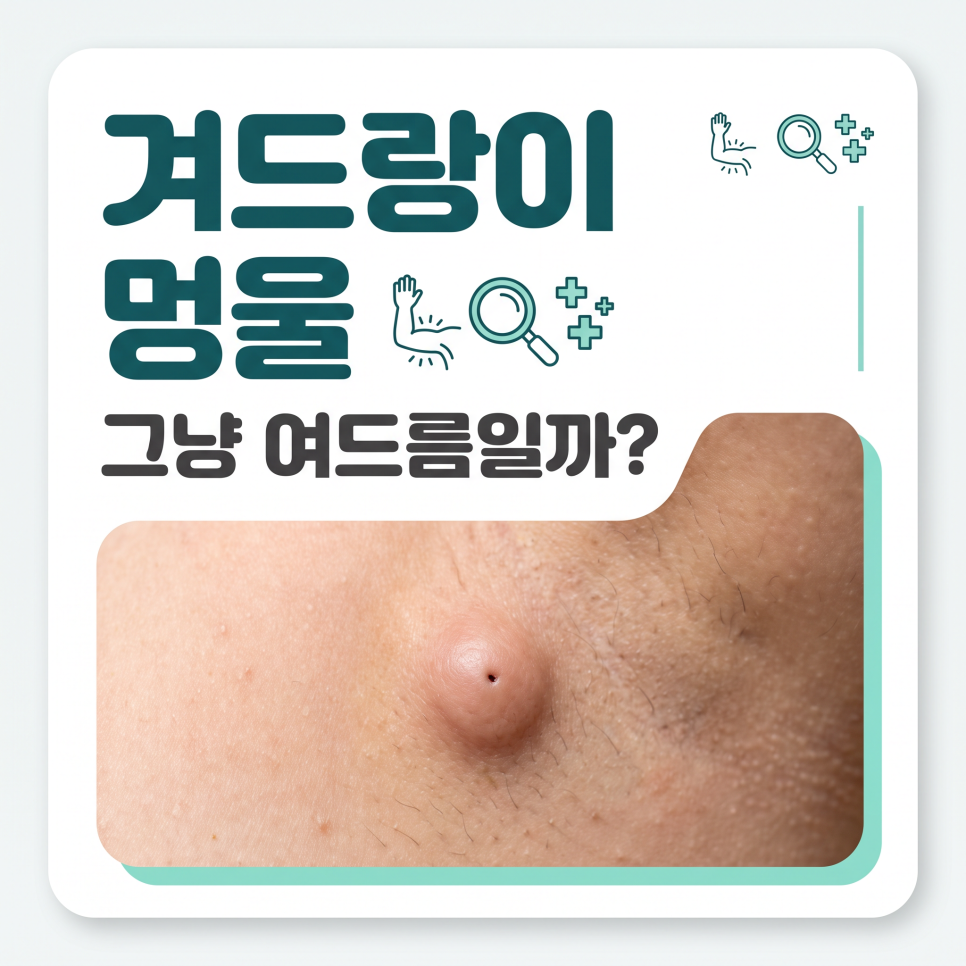
    armpit lump causes

    Key Takeaways
    An armpit lump can have many different causes, including sebaceous cysts, lymphadenitis, accessory breast tissue, and lipomas.
    It’s safest to monitor for pain and size changes and get an ultrasound exam for an accurate diagnosis.
    Some cases resolve on their own depending on the cause, but leaving it unchecked can increase the scope and cost of treatment.

    What Are the Main Armpit Lump Causes?

    To answer the question directly, armpit lump causes generally fall into one of four main categories.
    An armpit lump is a mass that forms in the skin or the tissue beneath it, and the right treatment depends entirely on its underlying cause.

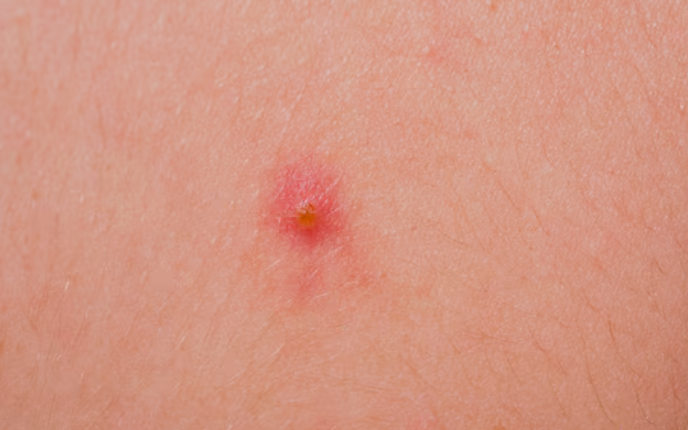
    A common cause is an epidermal cyst (sebaceous cyst), which forms when a hair follicle or sebaceous material builds up under the skin.
    According to Asan Medical Center’s disease encyclopedia, epidermal cysts typically grow slowly to about 1 to 5 cm and sometimes show a small central opening (punctum).
    Squeezing the cyst can release foul-smelling discharge, but doing so carelessly can worsen inflammation, so caution is needed.
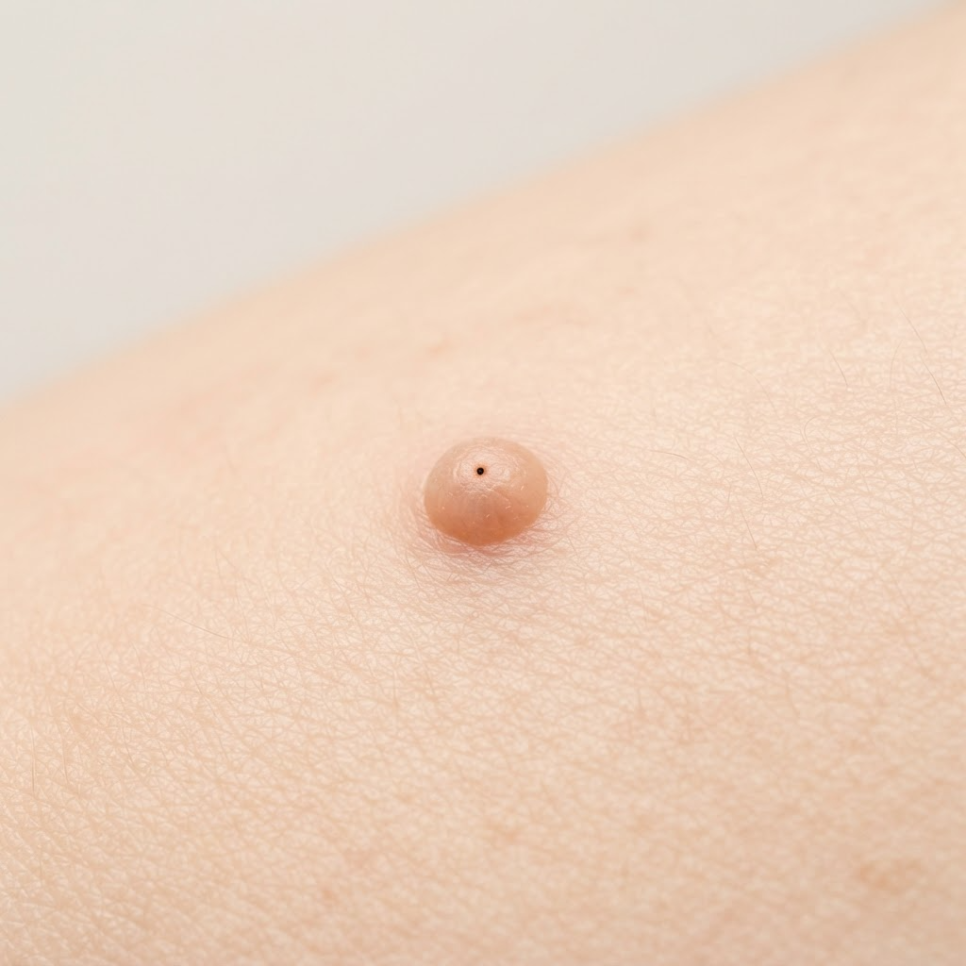
    armpit lump related image 2

    The second cause is lymphadenitis (swollen lymph nodes), where the lymph nodes enlarge as part of an immune response.
    When the body reacts to a cold, weakened immunity, or internal inflammation, the lymph nodes swell and can be felt as a firm lump.
    Asan Medical Center describes lymphadenitis as "an immune response in which the lymph nodes enlarge due to infection or, less commonly, malignant tumors."
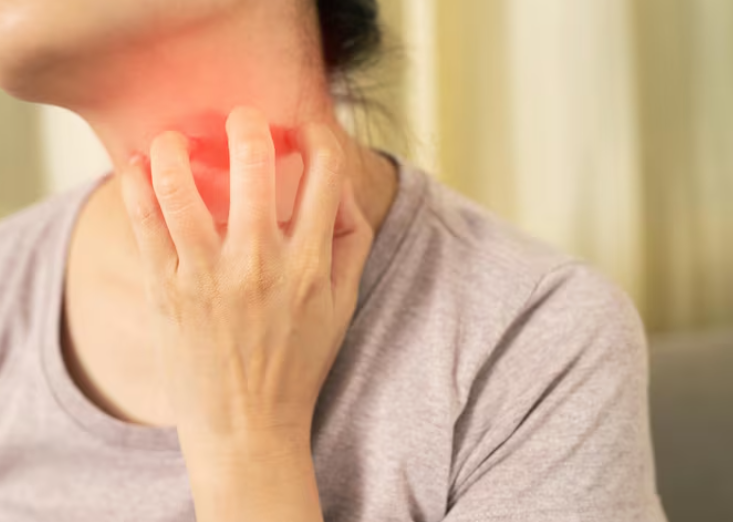
    armpit lump related image 3

    The third cause is accessory breast tissue, which occurs when mammary gland tissue remains in the armpit area.
    It develops when the "milk line" tissue running from the chest to the armpit during fetal development doesn’t fully regress, and its size and pain level change with the menstrual cycle and hormonal shifts.
    Finally, a soft, slow-growing, painless lipoma is another common cause.

    Type Characteristics Pain
    Epidermal/Sebaceous Cyst Close to skin surface, may discharge fluid Usually none
    Lymphadenitis Caused by immune response Painful when pressed
    Accessory Breast Tissue Size fluctuates with menstrual cycle Cyclical pain
    Lipoma Soft, slow-growing None
    Checklist
    ✅ Epidermal/Sebaceous cyst: Feels soft just beneath the skin and may discharge fluid
    ✅ Lymphadenitis: Occurs from an immune response and causes pain when pressed
    ✅ Accessory breast tissue: Residual mammary tissue that changes in pain and size with the menstrual cycle
    ✅ Lipoma: A soft, painless fatty lump that grows slowly

    Is a Painless Armpit Lump Safe to Ignore?

    No. In fact, a hard, painless lump deserves even more attention.
    A warning sign isn’t judged by how much it hurts, but by changes in the lump’s size, firmness, and whether it’s fixed in place.

    Warning Signs
    ⚠️ When it feels completely painless, hard, and fixed in place when touched
    ⚠️ When it gradually grows larger over time and nearby skin changes appear
    ⚠️ When fever, redness, or swelling around the armpit worsens
    • A normal lymph node is usually less than 1 cm in diameter, small, and moves freely.
    • When inflammation progresses, however, the lymph node adheres to surrounding tissue and becomes difficult to move.
    • If the size, firmness, or mobility changes, further testing should be considered.

    Lymph node enlargement occurs when the lymph nodes are infected or inflamed, or in cases involving a pus-filled abscess or cancer.

    The Korea Disease Control and Prevention Agency explains this through its National Health Information Portal, noting that localized lymph node enlargement accounts for 70 to 80 percent of all cases.
    Among these, swelling in the neck’s cervical lymph nodes is common, with the armpit and groin also being frequent sites.
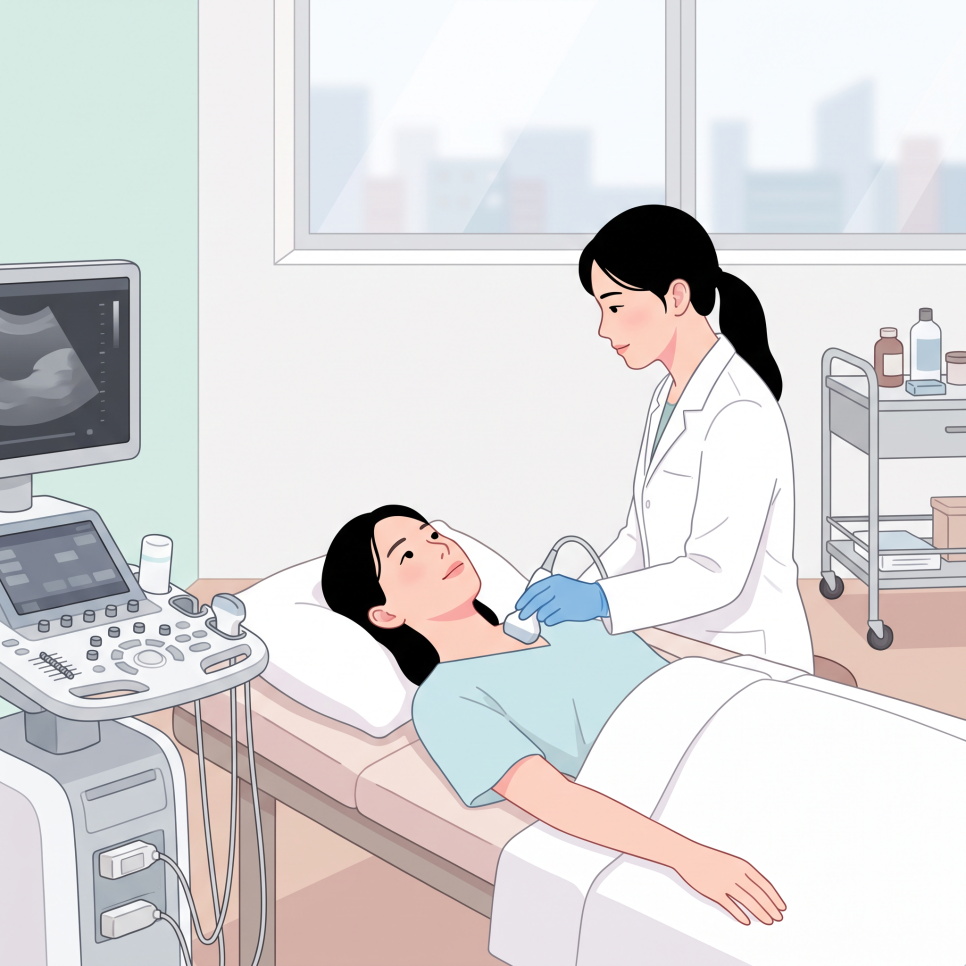
    armpit lump related image 4

    A painless lump is more likely to be a chronic cyst or lipoma, but in rare cases further testing is necessary.
    That’s why confirming the diagnosis with an ultrasound exam is a safer choice than self-diagnosis.


    How Does Treatment Differ by Cause?

    Knowing the exact cause is key to reducing recurrence and complications.
    Treatment for an armpit lump ranges from simple monitoring to surgical removal, depending entirely on the underlying condition.

    1. Lymphadenitis: May improve with adequate rest and immune care alone; anti-inflammatory pain relievers or antibiotics may be prescribed if needed.
    2. armpit lump related image 5

    3. Sebaceous cyst (epidermal cyst): Avoid squeezing it by hand; having it surgically removed under local anesthesia, including the cyst wall, can lower the risk of recurrence.
    4. armpit lump related image 6

    5. Accessory breast tissue: Since hormones play a major role, periodic monitoring is the standard approach, and surgical removal of the glandular tissue may be considered if pain or discomfort significantly affects daily life.
    Outcome
    Identifying armpit lump causes accurately and managing them appropriately may help some cases avoid major surgery, depending on the underlying condition.
    However, we recommend discussing the diagnosis and treatment plan with a medical professional before making any decisions.

    If you’re concerned about a lump or wound on your skin — not just in the armpit — seeing a specialist is important.
    Burn Treatment Specialists – [Ansan Open Surgery Hospital] Homepage has more information on surgical care.


    Frequently Asked Questions

    1. Is it okay to keep touching an armpit lump to check on it?
    Answer: Bacteria on your hands can cause a secondary infection or worsen inflammation, so it’s best to avoid pressing on or repeatedly touching the lump.

    2. If an armpit lump doesn’t hurt, is it fine to just leave it alone?
    Answer: Even without pain, it could be a chronic cyst, lipoma, or another condition, so it’s safer to monitor any size changes and confirm the diagnosis with an ultrasound exam.

    3. Why does my armpit lump only hurt during my period?

    Answer: It’s likely accessory breast tissue responding to changes in female hormones. This tissue tends to temporarily swell and become painful in sync with the menstrual cycle, then subside afterward.

    4. Which specialist should I see for an armpit lump?
    Answer: Visiting a breast surgeon, general surgeon, or dermatologist allows for an accurate diagnosis using tools like ultrasound, along with guidance tailored to the cause.

    armpit lump related image 7


    References

    · Korea Disease Control and Prevention Agency, "Lymph Node Enlargement," National Health Information Portal. Link
    · Asan Medical Center, "Lymphadenitis," Disease Encyclopedia. Link
    · Asan Medical Center, "Epidermal Cyst," Disease Encyclopedia. Link
    · Health Kyunghyang, "[Accessory Breast Story] Accessory Breast Tissue Is a Real Medical Condition," 2023. Link

    This article is provided for general health information purposes only and is not a substitute for individual diagnosis or treatment. If you have symptoms, please consult a medical professional.

  • Sitz Bath Benefits: 3 Correct Ways to Ease Hemorrhoid Pain

    Sitz Bath Benefits: 3 Correct Ways to Ease Hemorrhoid Pain

    SummarySitz bath benefits may help relieve hemorrhoid pain and swelling, but using the wrong water temperature or duration can backfire. This guide covers the correct sitz bath water temperature, timing, frequency, and precautions, based on medical information.

    sitz bath benefits

    Do you grit your teeth through a sharp sting and heavy discomfort every time you use the bathroom?

    Many people simply sit in hot water without a second thought,
    but getting the water temperature or timing wrong can actually make symptoms worse.

    From reducing swelling to easing pain, getting the real sitz bath benefits starts with knowing the correct method.

    Key Takeaways
    Sitz bath benefits come from relaxing the anal sphincter and improving blood circulation, which can help reduce hemorrhoid-related pain and swelling.
    The Korea Disease Control and Prevention Agency (KDCA) and related reports recommend water at 104–113°F (40–45°C), for 3–5 minutes per session, 2–3 times a day.
    However, poor posture or inadequate drying afterward can actually make symptoms worse, so care is needed.

    sitz bath benefits image 2

    Sitz Bath Benefits: Do They Really Help Hemorrhoid Symptoms?

    The short answer: sitz baths may help reduce hemorrhoid-related pain and swelling.

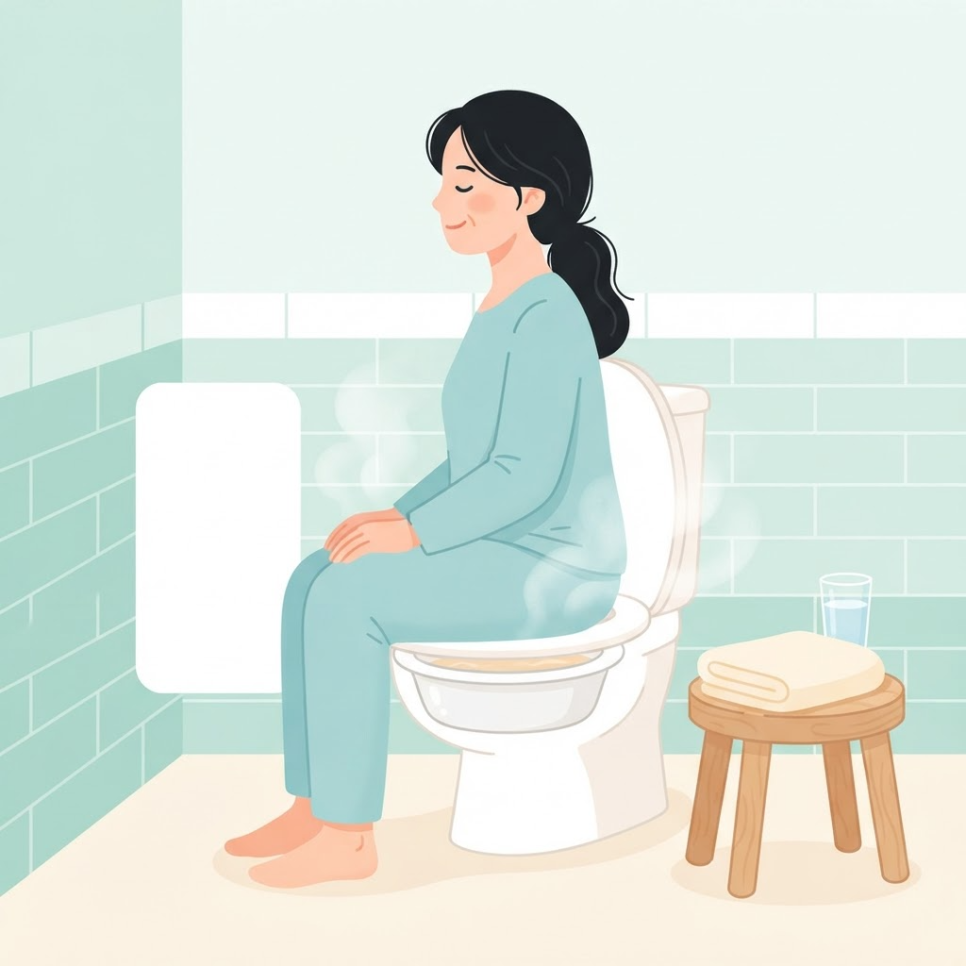
    A sitz bath is a conservative care method that involves soaking the anal area in warm water to support blood circulation.
    The area around the anus is prone to circulation problems during straining or stress.

    When warm water touches the skin, the sphincter relaxes, which lowers internal pressure and muscle spasm and can make bowel movements less painful.
    Improved blood flow in the area can also help bring swelling down.

    sitz bath benefits image 3

    Key Points
    1. Pain reduction through anal sphincter relaxation
    2. Relief of congestion and swelling through improved blood flow
    3. Prevention of secondary infection by keeping the area clean after bowel movements

    The KDCA’s National Health Information Portal describes hemorrhoids as follows:

    Hemorrhoids occur when the blood vessels around the anus stretch and swell to form a lump, making them the most common type of anal condition.

    The KDCA further notes that conservative care such as sitz baths, dietary changes, and medication can help relieve symptoms.

    For early-stage hemorrhoids or anal fissures in particular, a sitz bath is often considered a non-surgical, conservative option worth trying.
    With consistent practice, this may help reduce discomfort after bowel movements, supporting everyday comfort.


    sitz bath benefits image 4

    What Is the Correct Sitz Bath Method and Water Temperature?

    In short, lukewarm water at 104–113°F (40–45°C) for 3–5 minutes, 2–3 times a day, is the generally recommended safe guideline.

    A proper sitz bath keeps to the right water temperature and duration to minimize irritation of the anal mucosa.
    Water that’s too hot can damage the mucosa or even cause burns, so caution is needed.

    1. Fill a basin or sitz bath tub with lukewarm water at about 104–113°F (40–45°C).
    2. Use plain, clean water only—no disinfectant or salt.
    3. Soak the anal area for about 3–5 minutes.
    4. Pat the area dry gently with a towel, or dry it fully with cool air.
    5. Repeat 2–3 times a day, such as right after a bowel movement or before bed.

    sitz bath benefits image 5

    A randomized controlled trial published in an international journal found that patients who had warm-water sitz baths after hemorrhoidectomy
    showed significantly improved pain and anal burning sensation over a 4-week follow-up.

    This suggests that sitz baths are not just a folk remedy—sitz bath benefits have also been reported in clinical research.

    Checklist
    ✅ Is the water lukewarm, at 104–113°F (40–45°C)?
    ✅ Are you keeping the time under 5 minutes?
    ✅ Are you using plain, clean water with no additives?
    ✅ Are you drying the area thoroughly afterward?

    sitz bath benefits image 6

    Soaking for too long can raise pressure in the anal blood vessels and may actually worsen symptoms.
    The table below compares the correct method with habits to avoid.

    Category Recommended Habits to Avoid
    Water temperature 104–113°F (40–45°C), lukewarm Hot water
    Duration 3–5 minutes 10+ minutes (prolonged soaking)
    Additives Plain water only Adding salt or disinfectant
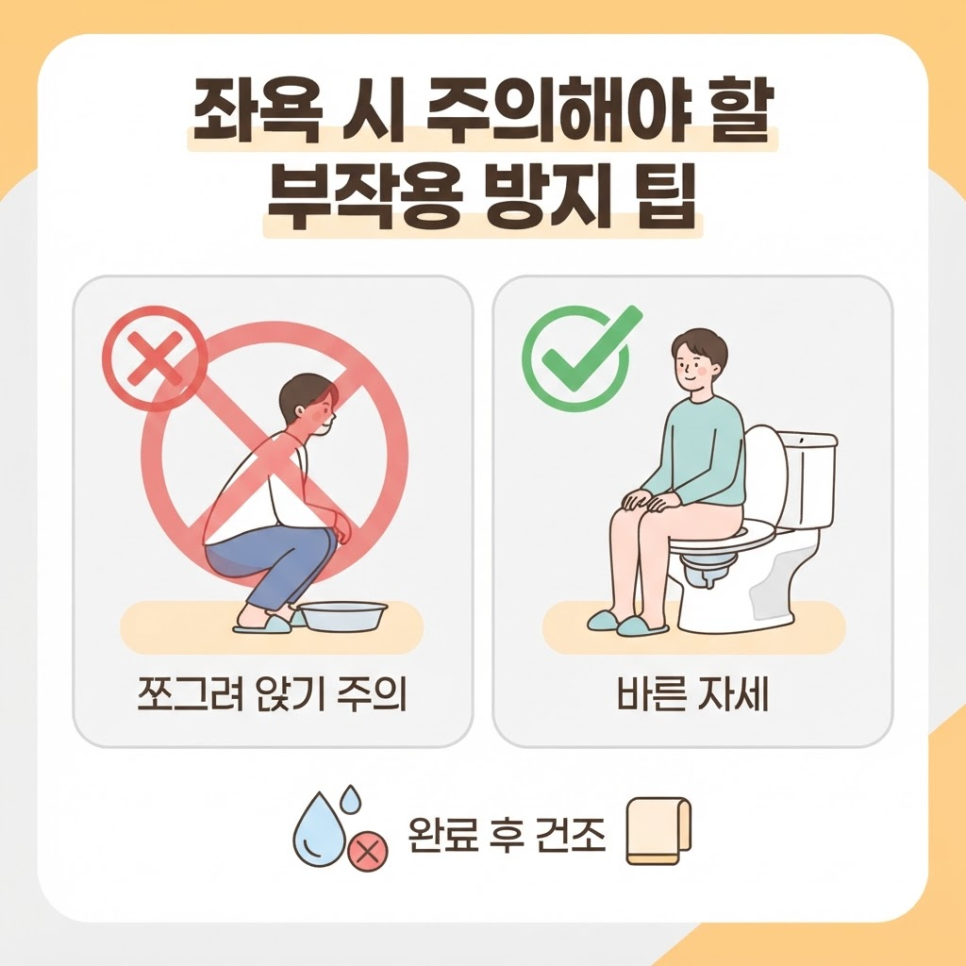
    Posture Sitting flat and level Squatting

    sitz bath benefits image 7

    What Precautions Should You Take During a Sitz Bath?

    In short, poor posture and inadequate drying are the main reasons a sitz bath can backfire.

    Squatting during a sitz bath can cause blood to pool in the anal area, raising the risk that hemorrhoids protrude further.
    It’s better to use a sitz bath basin that fits over the toilet, or to sit comfortably on a flat surface.

    Leftover moisture also raises the chance of skin issues such as eczema or itching.
    After a sitz bath, keeping the area dry and well-ventilated is especially important.

    Precautions
    Avoid squatting, since it increases pressure on the anus.
    If you have heavy discharge or have recently had surgery, follow your doctor’s guidance on whether a sitz bath is appropriate.

    sitz bath benefits image 8

    If symptoms persist or acute pain develops, don’t try to manage it with self-care alone.

    In these cases, it’s important to get an accurate diagnosis and ongoing care from a medical professional.
    If you’re in the Ansan area, consulting a specialized clinic for colorectal and anal conditions, such as the [Ansan Yeolin Surgical Clinic] homepage,
    is also an option.

    Small daily habit changes are the first step toward protecting your anal health.
    By keeping the right water temperature and timing and staying consistent, you may notice the sitz bath benefits over time.

    Frequently Asked Questions

    1. Does using a showerhead with warm water give the same sitz bath benefits?
    Strong shower water pressure can irritate the anal mucosa or sphincter. Soaking in a basin or sitz bath tub is generally considered a gentler approach that may reduce irritation.

    2. How many times a day should you do a sitz bath?
    Two to three times a day is generally appropriate. Doing it right after a bowel movement or before bed can help ease pain and keep the area clean.

    3. Does adding salt to the water improve disinfection?
    Adding salt can strongly irritate sensitive anal skin. It’s safer to use plain water with no additives.

    4. Is it okay to take a sitz bath during your period?
    During your period there’s a higher risk of infection, so it’s best to avoid sitz baths if possible. If needed, a light warm-water rinse is a safer alternative.


    References

    · Korea Disease Control and Prevention Agency (KDCA), “National Health Information Portal – Hemorrhoids,” KDCA. View source
    · Hankyung (Korea Economic Daily), “Sitz Baths That Last Too Long Can Worsen Hemorrhoids… 3–5 Minutes Is Ideal,” Hankyung, 2014. View source
    · Hidoc, “Have You Tried a ‘Sitz Bath’ to Prevent Hemorrhoids and Constipation?,” Hidoc. View source
    · National Library of Medicine (PubMed), “Effects of early warm water sitz bath on urinary retention and pain after haemorrhoidectomy: A randomized controlled trial,” 2024. View source


    This article is intended for general health information purposes only and is not a substitute for individual diagnosis or treatment. If you have symptoms, please consult a medical professional.
  • Burn First Aid: 3 Steps to Follow in the First 20 Minutes

    Burn First Aid: 3 Steps to Follow in the First 20 Minutes

    SummaryThe key to burn first aid is cooling the area under running water for 15 to 20 minutes immediately after the injury. This guide covers the correct response steps, home remedies to avoid, symptoms by burn stage, and when to see a doctor.

    Have you ever spilled hot soup and instinctively reached for ice?

    Actually, that reflex is a risky mistake that can deepen skin tissue damage.

    How you respond in the first few minutes after a burn can make a major difference in how deep the resulting scar becomes.

    burn first aid

    Key Takeaway
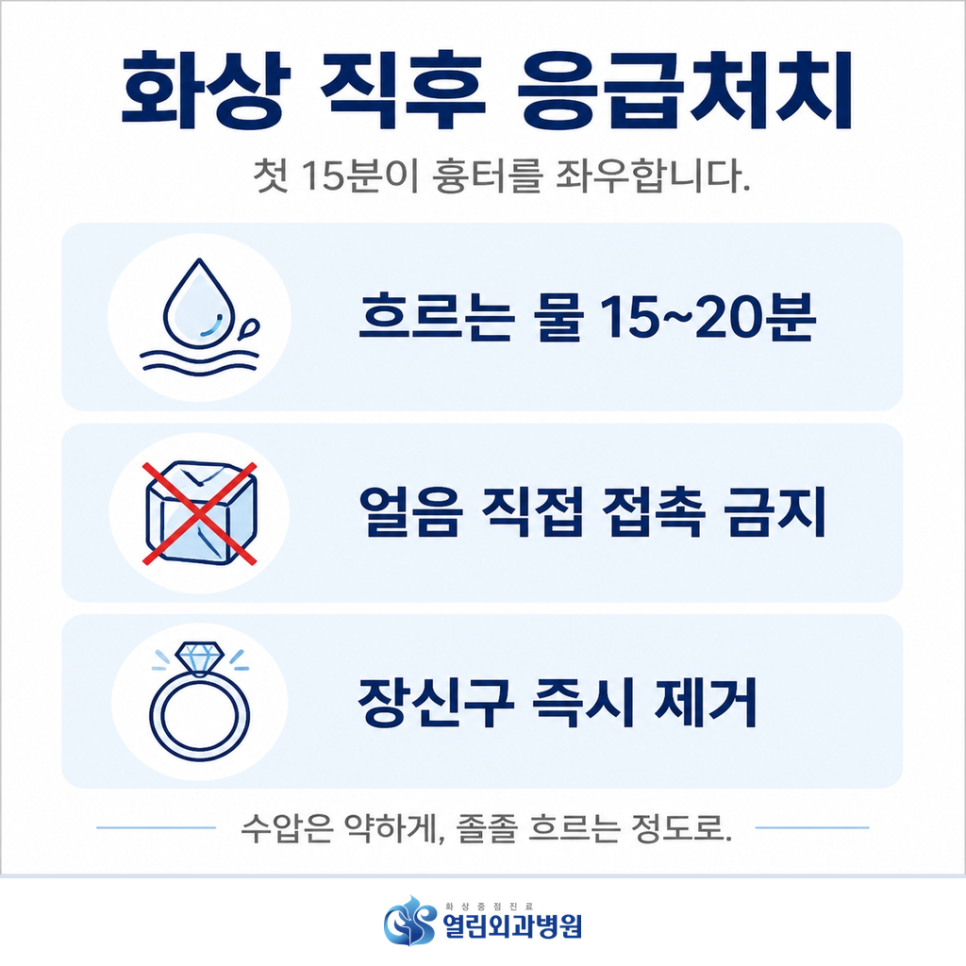
    The core of burn first aid is cooling the affected area under lukewarm running water for 15 to 20 minutes right after the injury.
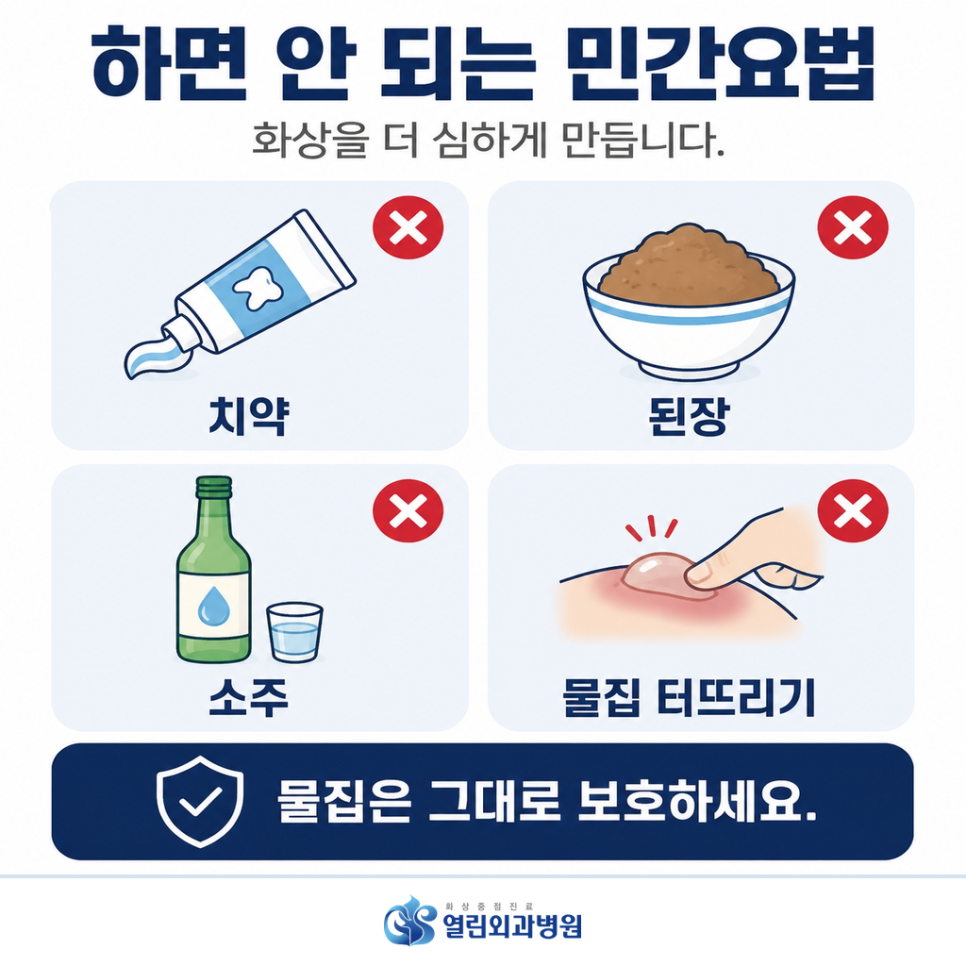
    Applying ice directly or using home remedies like soybean paste or toothpaste raises the risk of infection and further damage.
    This article walks through the full process of burn first aid—the correct response steps, symptoms by burn stage, and situations that call for a hospital visit.

    Key Points
    ✔ Cool the burn under running water for 15–20 minutes right away
    ✔ Ice and home remedies can make the damage worse
    ✔ Whether you need to see a doctor depends on blister size, location, and extent

    What’s the First Thing to Do When You Get a Burn?

    The first thing you should do is cool the burn under running water.
    Burn first aid refers to the process of stopping contact with the heat source and lowering skin temperature to prevent further damage.

    The National Health Information Portal also recommends cooling the burn under cool running water and not popping any blisters.

    “Cool the burned area under cool running water for at least 20 minutes, and do not pop any blisters.”

    This guidance comes from the Korea Disease Control and Prevention Agency via the National Health Information Portal.

    burn first aid illustration 2

    Lukewarm tap water, around 15–20°C (59–68°F), is generally recommended for cooling the burn.

    Water pressure matters too.
    Water that’s too forceful can further irritate the wound surface.

    So it’s safest to use a gentle, low-pressure stream of water for 15 to 20 minutes.

    Remove any jewelry right away, before swelling sets in.
    Once swelling occurs, it can restrict blood flow and cause bigger problems.

    Avoid forcibly removing clothing.
    Fabric stuck to the skin can worsen the injury if pulled off.
    It’s safer to cool the area with clothing still on, then cut the fabric away with scissors.

    burn first aid illustration 3

    Checklist
    ✅ Cool the burn under running water for 15–20 minutes
    ✅ Don’t apply ice directly (risk of vessel constriction)
    ✅ Remove jewelry immediately, before swelling starts
    ✅ Don’t pull off clothing—cool with water first, then cut it away with scissors

    burn first aid illustration 4


    Is It Safe to Put Toothpaste or Soybean Paste on a Burn?

    The short answer: it’s not recommended.
    A home remedy is a self-treatment method that hasn’t been medically verified.

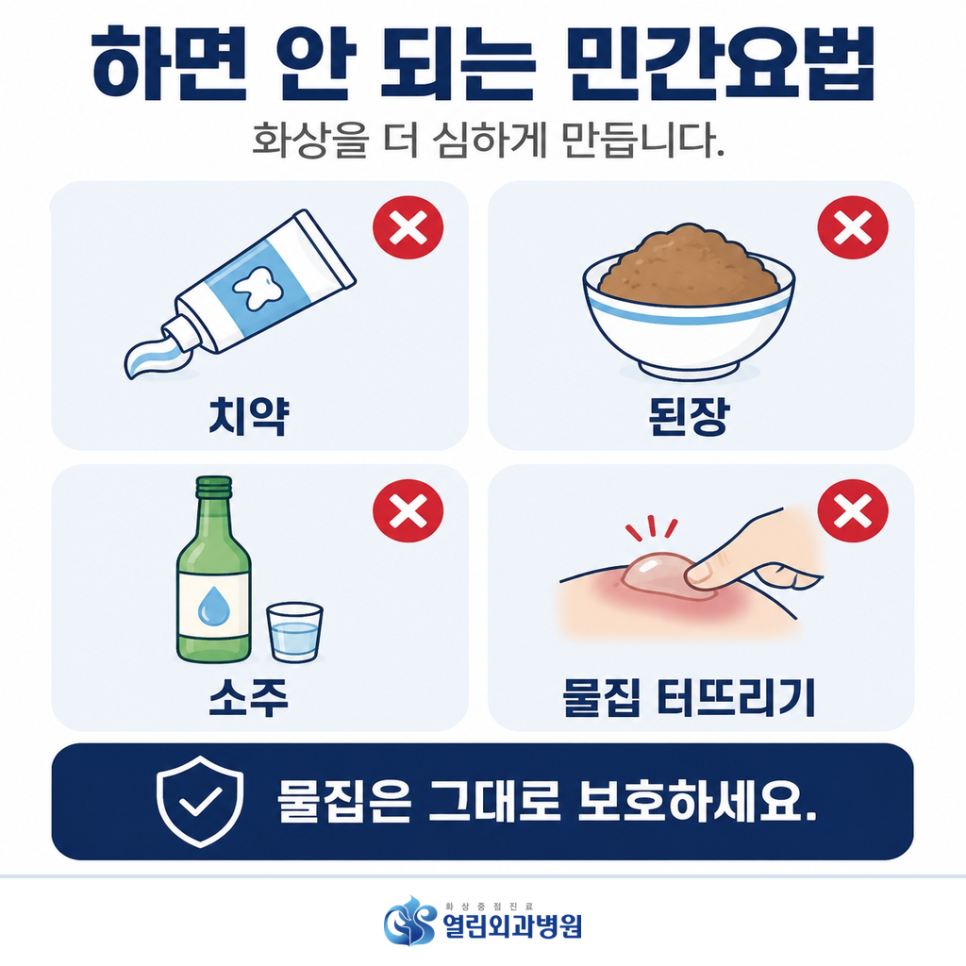
    In a panic, some people reach for toothpaste, soybean paste, or even sliced potatoes.

    But these substances can trap heat in the wound and raise the risk of bacterial infection.
    Pouring soju on a burn—hoping the alcohol’s evaporation will cool it—only irritates the already-damaged skin barrier further and makes the wound worse.

    burn first aid illustration 5

    Precautions
    🚫 Don’t apply toothpaste, soybean paste, cucumber, or other foods
    🚫 Don’t pour soju or alcohol directly on the wound
    🚫 Don’t pop blisters yourself
    🚫 Don’t self-apply unverified topical remedies

    Popping a blister with your fingers is just as risky.

    Blister fluid acts as a natural barrier that protects the wound from outside bacteria.
    Breaking it open can lead to secondary infection, slower healing, and more severe scarring.
    Leave blisters intact and keep them clean and protected.

    burn first aid illustration 6


    What Are the Degrees of Burns, and How Do Symptoms Differ?

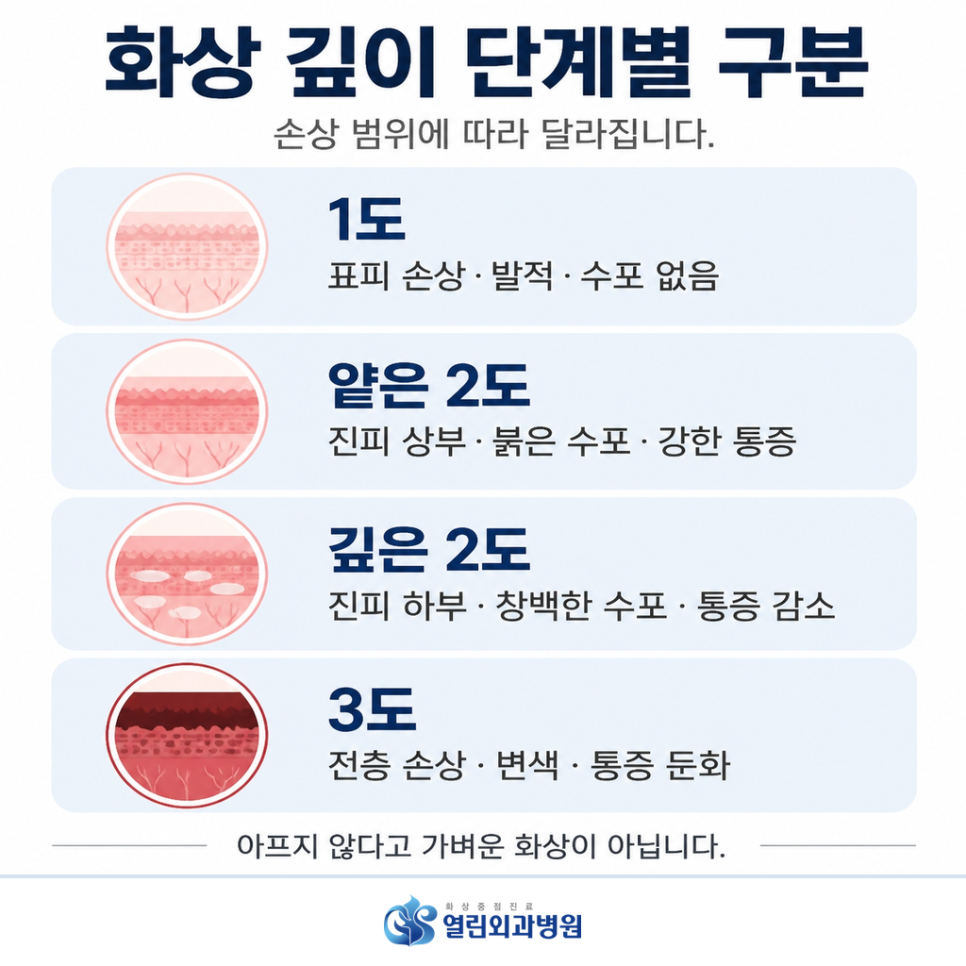
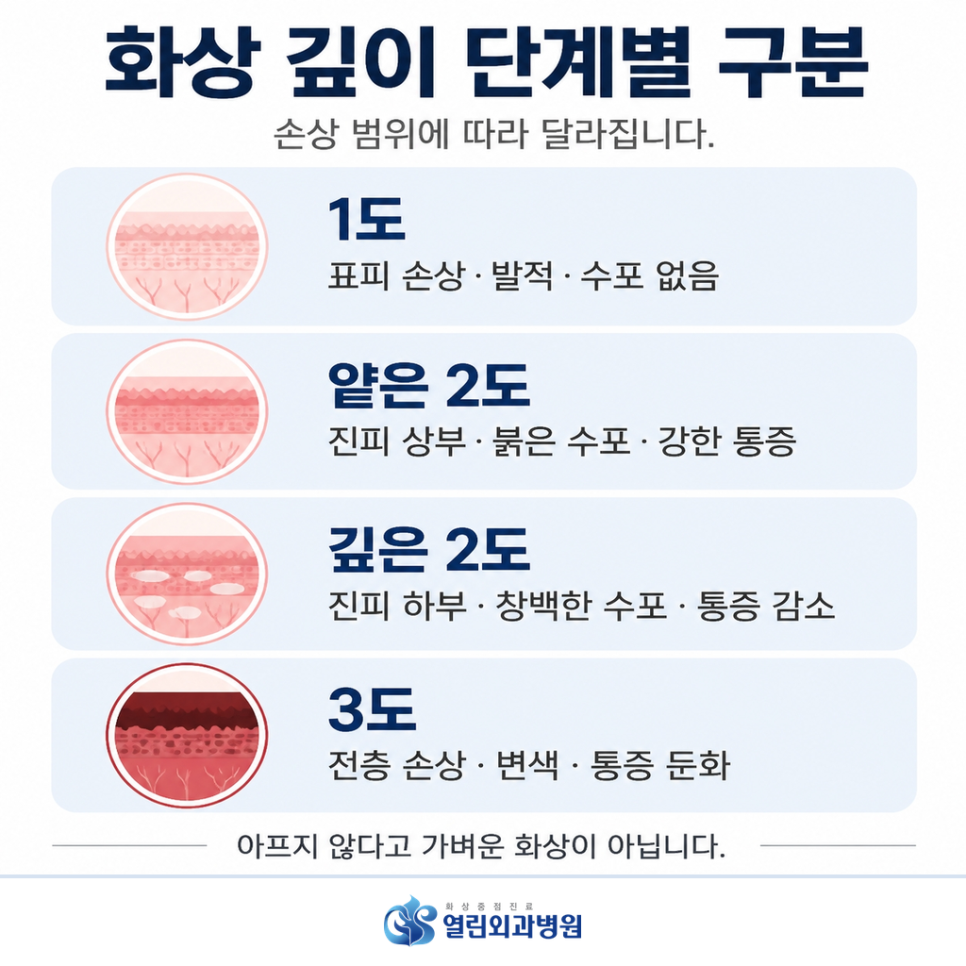
    Burns are classified from first to third degree based on how deep the damage goes.
    The deeper the burn, the longer the healing time and the greater the risk of scarring.

    Degree Depth of Damage Main Symptoms Pain
    1st Degree Epidermis Redness, no blisters Mild pain
    Superficial 2nd Degree Upper dermis Red blisters Severe pain
    Deep 2nd Degree Lower dermis Pale blisters Reduced pain
    3rd Degree Full-thickness skin Discoloration, eschar formation No pain (nerve damage)

    burn first aid illustration 7

    Second-degree burns damage the dermis and come with blisters and significant pain.
    Healing typically takes about 2 to 4 weeks, and scarring or skin discoloration can remain afterward.

    When damage reaches deep into the dermis, nerve endings can be destroyed, which paradoxically means less pain is felt.

    But less pain doesn’t mean the injury is less serious.
    Third-degree burns destroy the full thickness of the skin, causing discoloration, and generally do not heal on their own—professional treatment is recommended.

    burn first aid illustration 8


    When Should You See a Doctor After Burn First Aid?

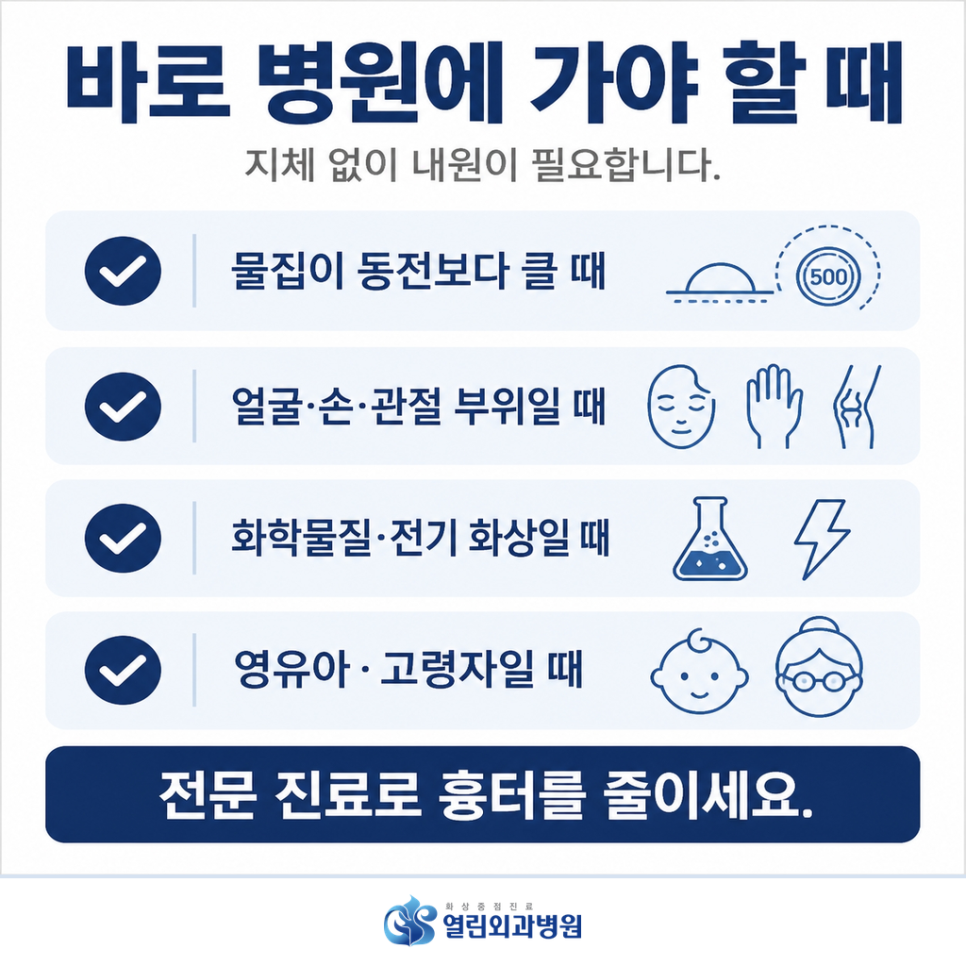
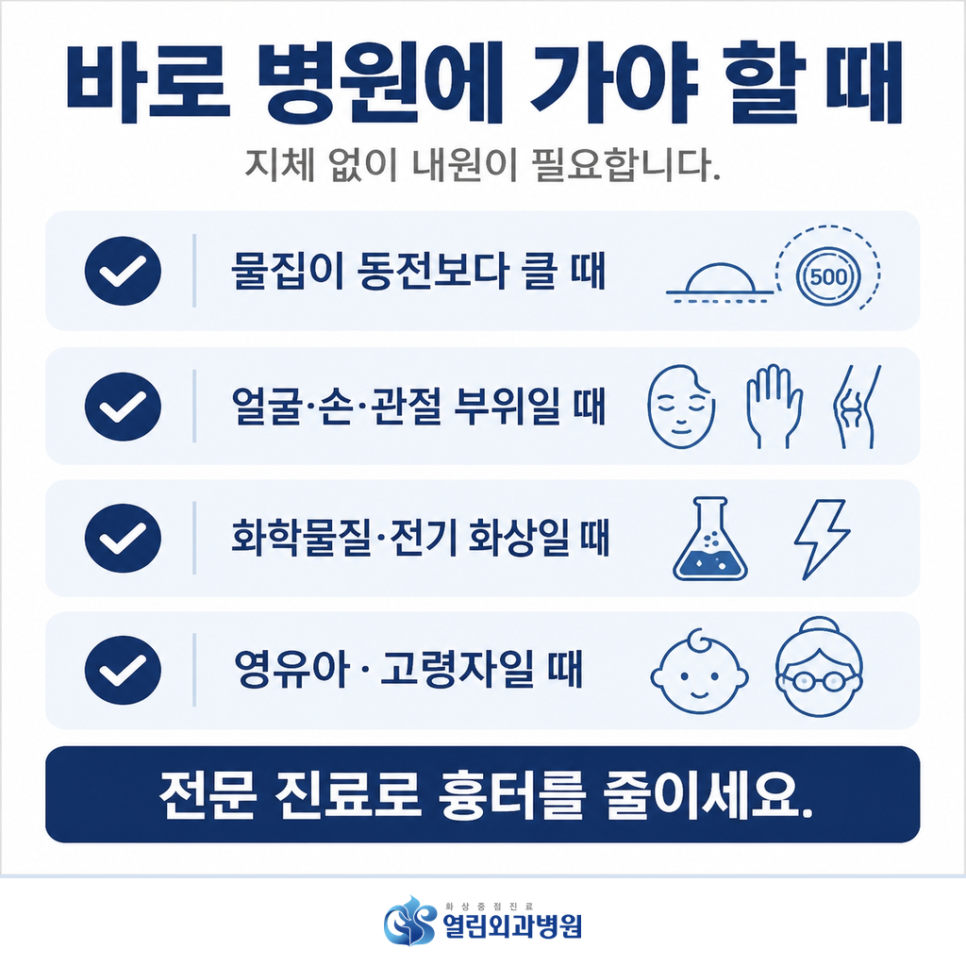
    If the burn is on the face, hands, feet, or a major joint, head to the hospital without delay.
    Burns over joints can cause the skin to tighten as it heals, which may limit range of motion.

    burn first aid illustration 9

    Burns covering a large area, or those affecting infants or older adults, also call for prompt medical attention.
    People with weaker immunity can experience whole-body effects even from a relatively small burn.

    When You Should See a Doctor Right Away
    🎯 The blister is larger than a coin
    🎯 The burn is on the face, hands, or a joint
    🎯 The injury was caused by chemicals or electricity
    🎯 The injury occurred in an older adult or a young child

    burn first aid illustration 10

    After first aid, it’s best to have your condition properly assessed at a medical facility for hygienic dressing and infection prevention.

    Our hospital operates a burn treatment system intended to make care available outside regular daytime hours.
    You can find more detailed treatment information at Burn Treatment — Ansan Open Surgery Hospital Home.


    Frequently Asked Questions

    1. When is the right time to apply ointment to a burn?
    Answer: Applying ointment while the burn still feels hot can trap heat in and worsen the damage. It’s best to cool the area thoroughly with cold water, pat it dry, and then apply an infection-prevention ointment.

    2. How should you care for a blister that has already popped?
    Answer: Don’t peel off the blister skin—leave it in place and gently clean the area with sterile saline. Then protect it with an appropriate dressing to reduce the risk of bacterial infection and visit a hospital.

    3. Why shouldn’t you put ice directly on a burn?
    Answer: Direct contact with ice causes skin blood vessels to constrict rapidly, restricting circulation and potentially causing secondary damage similar to frostbite. Running water at 15–20°C (59–68°F) is generally used to cool a burn instead.

    burn first aid illustration 11


    References

    · Korea Disease Control and Prevention Agency, “Burns,” National Health Information Portal, 2024. View source
    · National Emergency Medical Center, “Heat/Cold-Related Injuries – Burns,” National Emergency Medical Information Center (E-Gen), 2023. View source
    · Nate News, “‘Ouch, That’s Hot!’ Skip the Soju and Soybean Paste While Frying Pancakes — Burn First Aid Tips,” Nate News, 2026. View source

    burn first aid illustration 12

    This article is intended for general health information purposes and is not a substitute for individual diagnosis or treatment. If you have symptoms, please consult a medical professional.

  • Anal Cancer Symptoms: 4 Warning Signs Not to Confuse With Hemorrhoids

    Anal Cancer Symptoms: 4 Warning Signs Not to Confuse With Hemorrhoids

    SummaryAnal cancer symptoms closely resemble hemorrhoids, which makes this condition easy to miss in its early stages. This article covers the 4 key anal cancer symptoms — dark-colored bleeding, a persistent feeling of incomplete evacuation, a lump near the anus, and changes in bowel habits — along with the causes and a self-check checklist. If symptoms continue even after using hemorrhoid medication, be sure to look into this further.

    Many people notice a little blood on the tissue
    and think, “I’ve probably just been tired and my hemorrhoids flared up again,”
    brushing it off without much concern.

    But if bleeding and pain continue for weeks
    even after using ointment and medication, that’s a different story.

    It can look so similar to hemorrhoids that even specialists
    sometimes mistake it in the early stages — these are anal cancer symptoms.

    anal cancer symptoms

    Key Takeaways
    Anal cancer symptoms typically appear as dark-colored bleeding (rather than bright red), a persistent feeling of incomplete evacuation, a hard lump near the anus, and changes in bowel habits — and because they look similar to hemorrhoids, they’re easy to mistake for them.
    According to 2023 national cancer registry statistics, anal cancer is rare, accounting for just 0.1% (365 cases) of all cancer diagnoses. Still, if symptoms persist for more than 2 weeks despite hemorrhoid treatment, you should see a specialist.

    What Exactly Is Anal Cancer?

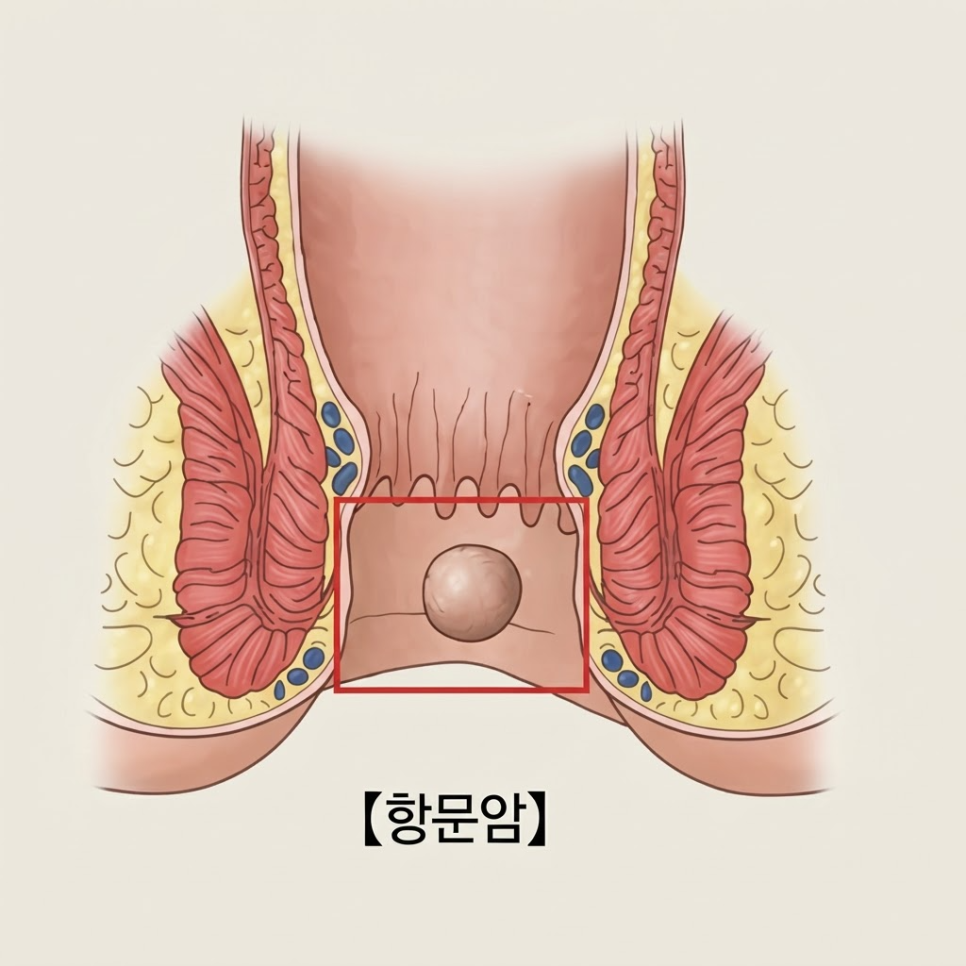
    To put it simply, anal cancer is a malignant tumor that develops in the anal canal and the skin around the anus.
    Unlike colorectal cancer, it’s a condition many people have never even heard of, but it is a documented disease.

    Here’s how South Korea’s National Cancer Information Center defines it.

    Anal cancer is a malignant tumor (cancer) that develops in the anus. It is a rare cancer, typically diagnosed around age 60.

    The center adds that squamous cell carcinoma and cloacogenic carcinoma are the most common types.

    anal cancer symptoms illustration 2

    Because it’s located at the very end of the digestive tract, a tumor here tends to cause noticeable changes in bowel movements right away.
    Depending on where it develops, it can also start out as a small lump or as a sore that doesn’t heal easily.

    📊 Anal Cancer by the Numbers
    · According to 2023 national cancer registry statistics, anal cancer accounted for 365 cases, or 0.1% of all cancer diagnoses.
    · The crude incidence rate was 0.7 cases per 100,000 people, according to the same statistics.
    · By age group, people in their 60s made up 32.3% of cases, the largest share, followed by those in their 70s and 50s.
    · By sex, there were 224 cases in women and 141 in men, meaning the condition was somewhat more common in women according to this data.

    How Do You Tell Anal Cancer Symptoms Apart From Hemorrhoids?

    The point that trips up the most people is telling this apart from hemorrhoids (piles).
    In short, anal cancer symptoms often differ from hemorrhoids in the color of the bleeding and how long it lasts.

    Typical hemorrhoids usually cause bright red bleeding along with pain.

    anal cancer symptoms illustration 3

    Anal cancer symptoms, on the other hand, tend to show a somewhat different bleeding pattern.
    Dark-colored blood mixed into the stool, or a persistent sense of something foreign in the area, are common features.

    anal cancer symptoms illustration 4

    ⚠️ See a Doctor Right Away If You Notice These Symptoms
    If you have an ongoing feeling of incomplete evacuation even after a bowel movement, or you feel a hard lump around the anal opening, it’s hard to assume it’s just hemorrhoids.

    🚨 Warning Signs You Shouldn’t Ignore

    • Pain and bleeding continue even with hemorrhoid medication or other treatment
    • A sudden change in bowel habits (frequent diarrhea or severe constipation)
    • A lump you can feel in the lymph nodes around the anus or groin
    • Unexplained weight loss along with an ongoing feeling of incomplete evacuation

    The table below summarizes the differences between the two conditions.

    Category Hemorrhoids Anal Cancer Symptoms
    Bleeding color Bright red Dark-colored, mixed with mucus
    Pain Sharp pain during bowel movements Dull pain or no symptoms
    Lump Soft; can be pushed back in Hard; gradually grows larger
    Duration Improves within days to weeks with treatment Persists over 2 weeks despite treatment

    What Causes Anal Cancer, and What’s on the Self-Check Checklist?

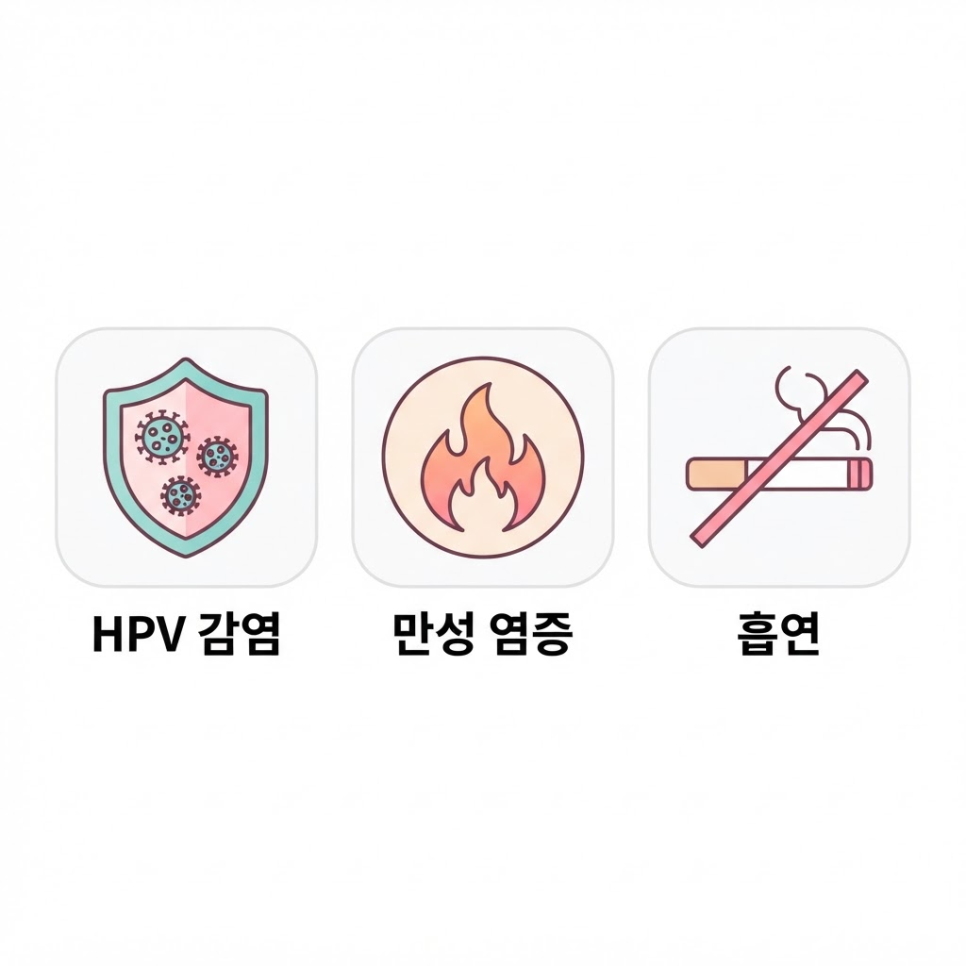
    To put it simply, the leading causes of anal cancer are human papillomavirus (HPV) infection, chronic anal inflammation, and smoking.
    Risk may rise when ongoing irritation occurs alongside a weakened immune system.

    According to statistics from the United States, more than 90% of anal cancer cases are linked to HPV infection, with HPV types 16 and 18 identified as the leading causes.
    Region-specific figures vary, but HPV is consistently recognized as a major risk factor.

    anal cancer symptoms illustration 5

    📋 Self-Check Checklist

    • Blood on the tissue after a bowel movement has continued for more than 2 weeks
    • A lump near the anus is getting bigger over time
    • Stool has become noticeably thinner than before
    • Anal itching or increased discharge won’t go away

    If two or more of these apply to you, don’t put it off — an early evaluation with a specialist is recommended.
    Getting a regular colonoscopy as part of your health checkups may also help with prevention.

    anal cancer symptoms illustration 6

    🚀 Gut-Healthy Habits You Can Start Today
    Eating plenty of fiber-rich vegetables and staying well hydrated can help keep your bowels moving smoothly.
    Quitting smoking, keeping regular bowel habits, and HPV vaccination can also support anal health.

    If pain or bleeding around the anus continues for more than 2 weeks, it’s safer to see a colorectal specialist
    rather than try to judge it on your own.
    [Ansan Yeollin Surgery Hospital] website has more information about care there.


    Frequently Asked Questions

    1. Can hemorrhoids eventually turn into cancer over time?
    No. Hemorrhoids (piles) and malignant tumors develop through completely different mechanisms. However, they can look similar in their early stages, which makes them easy to confuse.

    2. Should I still be concerned if there’s no pain?
    Yes. In the early stages, there’s often little to no pain — just some bleeding or a sense of something foreign. The absence of pain doesn’t mean you can rule it out.

    3. What tests are needed for an accurate diagnosis?
    A digital rectal exam, anoscopy, and biopsy can be used to diagnose it. Endoscopy or imaging tests may also be done if needed.

    4. What’s the best way to help prevent it?
    HPV vaccination, quitting smoking, and keeping regular bowel habits may help. Regular checkups can also play a role in prevention.

    5. Is anal cancer much rarer than hemorrhoids?
    According to 2023 national cancer registry statistics, anal cancer accounts for about 0.1% of all cancers, a lower reported incidence than hemorrhoids, which are widely reported as common.

    anal cancer symptoms illustration 7


    References

    · National Cancer Information Center, “Anal Cancer,” National Cancer Center, accessed 2026. Link
    · Korea Central Cancer Registry, “2023 National Cancer Registration Statistics,” National Cancer Center, 2026. Link
    · Korea Disease Control and Prevention Agency, “Human Papillomavirus (HPV) Vaccination,” KDCA Immunization Helper, accessed 2026. Link
    · Healtho, “How Much Do You Know About HPV, the Virus That Causes Cancer?,” Healtho, accessed 2026. Link


    This article is intended for general health information purposes only and is not a substitute for individual diagnosis or treatment. If you have symptoms, please consult a specialist.

  • Local Flap Surgery Recovery Time: 6 Months and 3 Key Differences From Skin Grafts

    Local Flap Surgery Recovery Time: 6 Months and 3 Key Differences From Skin Grafts

    SummaryHow long does local flap surgery recovery time take? This guide covers the differences from skin grafting, the stage-by-stage recovery timeline, and the care habits that can help support flap survival — all organized around local flap surgery recovery time.

    When a deep burn leaves a large skin defect, simple suturing alone tends to pull the skin too tightly, causing the wound to reopen.
    In cases like this, doctors often recommend a reconstructive procedure called local flap surgery.

    Since this surgical approach isn’t widely known, understanding local flap surgery recovery time and how it differs from skin grafting ahead of time can be a big help when planning your treatment.

    Key Takeaways
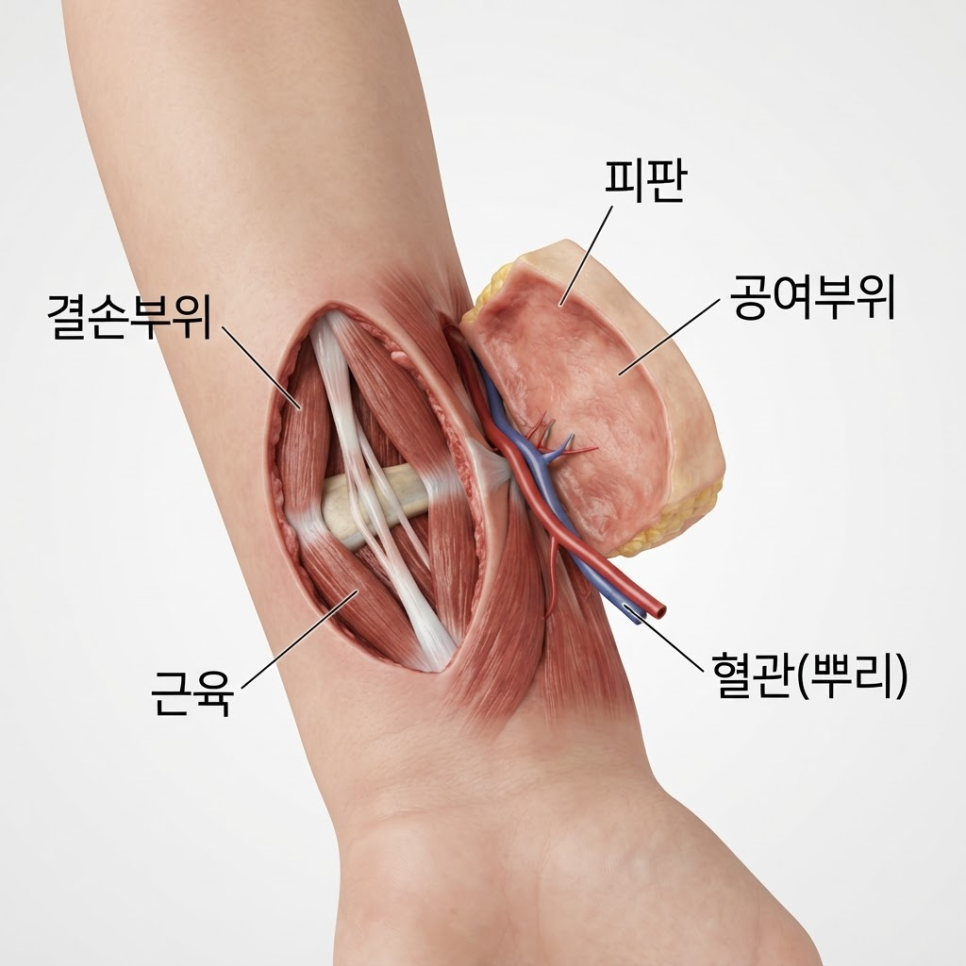
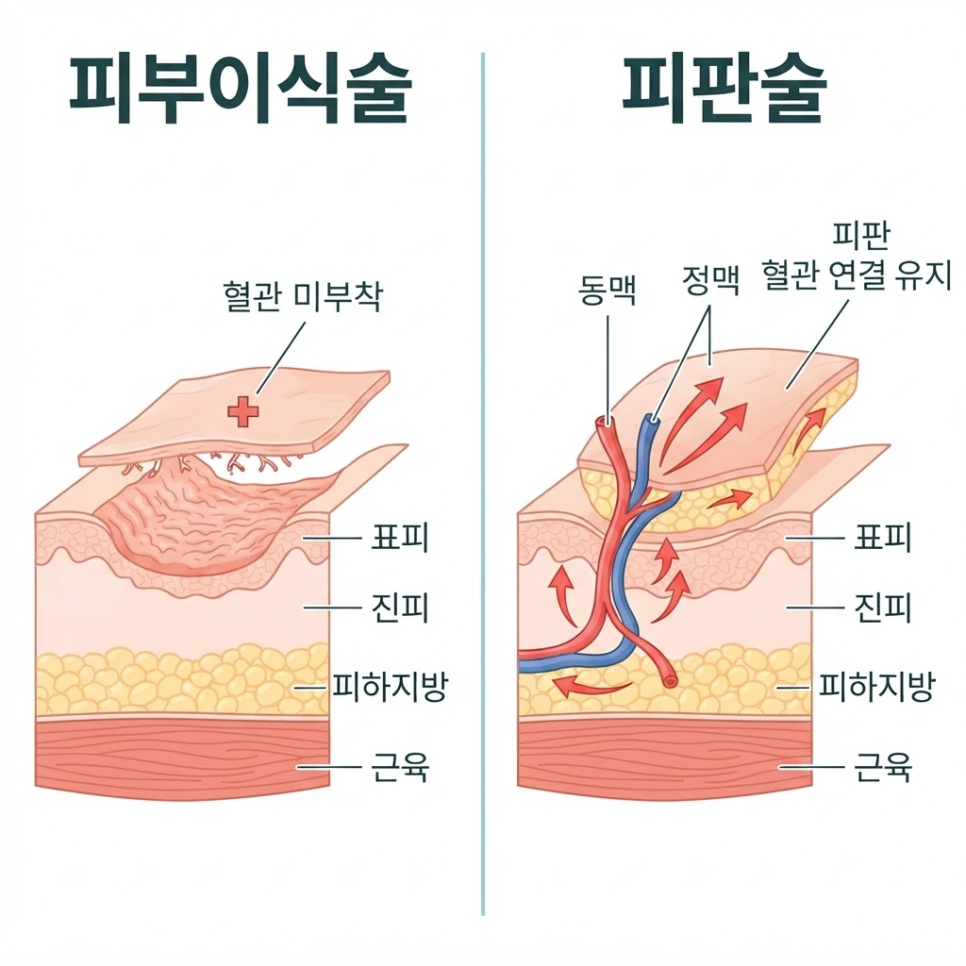
    Local flap surgery is a reconstructive technique that moves tissue while keeping its blood supply intact, structurally different from skin grafting, where blood flow is completely severed.
    Local flap surgery recovery time generally falls into two phases: 3 to 6 months for tissue stabilization, and up to a commonly cited 1 to 1.5 years for the burn scar to fully mature.
    Blood flow management during the first 1-2 weeks after surgery can significantly affect flap survival.

    This article walks through the surgical principles behind local flap surgery, how it compares with skin grafting, the stage-by-stage recovery process, and the care habits that can help improve flap survival.
    If you’re preparing for burn reconstruction, the information below can serve as a practical reference for your decisions.

    local flap surgery recovery time

    What Is Local Flap Surgery, and How Is It Different From Skin Grafting?

    Local flap surgery is a procedure that reconstructs a tissue defect by moving nearby healthy skin while keeping its blood vessels intact.
    Skin grafting, by contrast, involves completely detaching skin and transplanting it with no blood supply, so the two techniques differ at a fundamental, structural level.

    When a burn reaches third-degree depth or deeper, it destroys not only the epidermis and dermis but also the underlying subcutaneous tissue.
    In these cases, natural healing or simple suturing alone usually isn’t enough, and surgical reconstruction becomes necessary.

    According to Asan Medical Center’s disease encyclopedia, third-degree and deeper burns are generally treated with surgical options such as skin grafting and flap surgery.

    Key Points
    ✔️ Relatively stable tissue survival: Maintaining blood supply may help lower the risk of tissue necrosis.
    ✔️ Functional and aesthetic reconstruction: When applied to joint areas, it may help prevent skin contracture, and color and texture tend to closely match the surrounding skin.
    ✔️ Customized design: Depending on the location and size of the defect, flaps can be designed as rotation, transposition, or advancement types.

    local flap surgery recovery time - image 2

    Aspect Local Flap Surgery Skin Grafting
    Blood supply Moved while intact Completely severed, then re-established
    Survival stability May be more stable due to maintained blood flow Depends on new vessel formation at the recipient site
    Common application sites Functional areas such as joints Large-area defects
    Skin texture Similar to surrounding skin May differ from the donor site

    local flap surgery recovery time - image 3

    Third-degree burns damage the epidermis, dermis, and subcutaneous tissue, often requiring surgical treatment such as skin grafting or flap surgery.

    The Korea Disease Control and Prevention Agency’s National Health Information Portal provides similar guidance on deep, third-degree-and-above burns.
    For this reason, precisely diagnosing the depth and location of the injury should come before setting a treatment plan.

    local flap surgery recovery time - image 4


    How Long Does Local Flap Surgery Recovery Time Take?

    Local flap surgery recovery time refers to how long it takes for the relocated tissue to rebuild microvessels in its new position and for the scar to mature.
    At minimum, tissue stabilization takes about 3 to 6 months; full scar maturation can take a year or longer.

    The first week after surgery is the golden window for closely monitoring the flap’s blood circulation.
    If the flap becomes unusually pale or takes on a bluish tint during this period, it should be checked by your medical team right away.

    1. Days 1-5 after surgery: Monitoring flap blood circulation and color, managing swelling
    2. Days 10-14 after surgery: Removing surface sutures and assessing initial wound healing
    3. Months 1-3 after surgery: Tissue stabilization, pressure therapy to help ease burn scarring
    4. 6+ months after surgery: Flap reaches maturity, skin flexibility gradually returns

    local flap surgery recovery time - image 5

    According to a Busan Ilbo interview with a burn specialist, it typically takes about 1 to 1.5 years for burned skin to fully stabilize and mature. It’s worth noting that this figure isn’t specific to local flap surgery — it’s a general description of burn recovery overall.
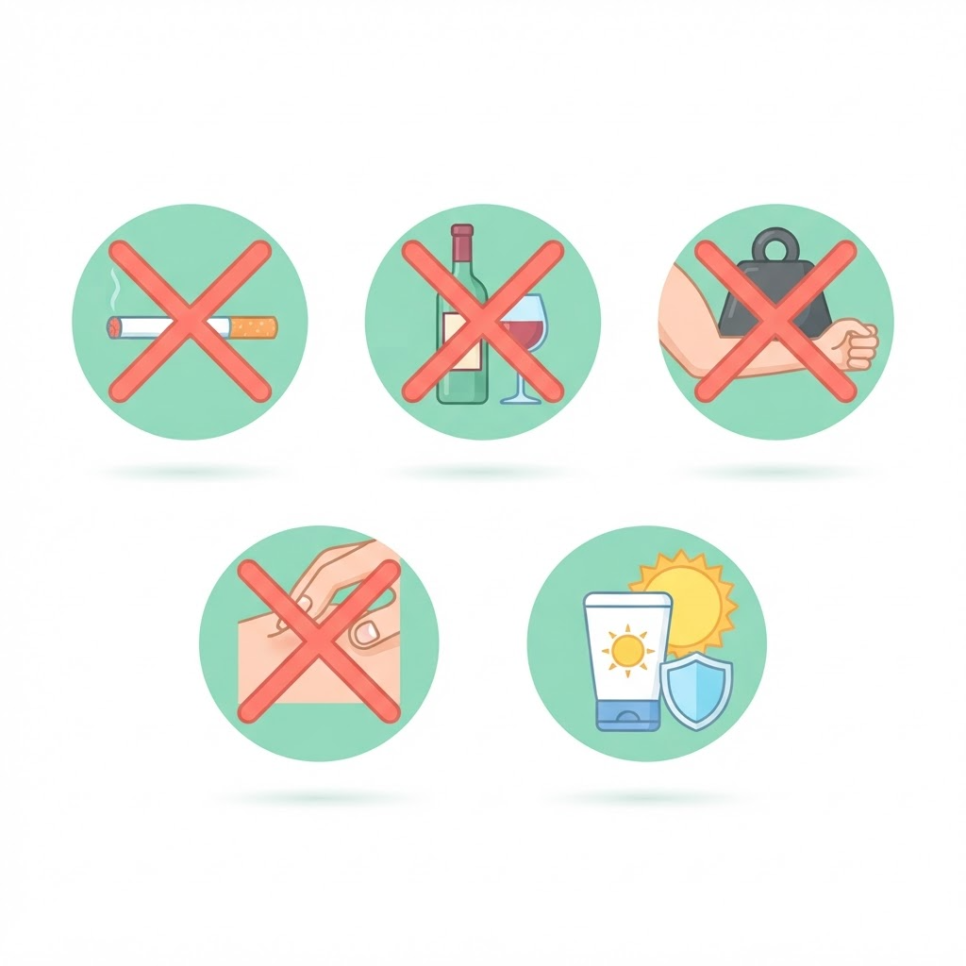
    The same article notes that sunscreen should be applied diligently for at least 6 months to a year after sutures are removed.

    In other words, even after a wound looks healed on the surface, the blood vessels and scar tissue underneath continue to change.


    How Can You Improve Flap Survival Rates During Recovery?

    Blood flow management during the first 1-2 weeks after surgery can have a significant impact on flap survival.
    The relocated microvessels are very fragile, so how well they’re cared for early on can substantially affect how fast recovery progresses later.

    Checklist
    ✅ Keep a posture that avoids putting direct pressure on the surgical site
    ✅ Avoid smoking and alcohol completely, since both can restrict tissue blood flow
    ✅ Avoid self-directed massage or strong friction on the area entirely
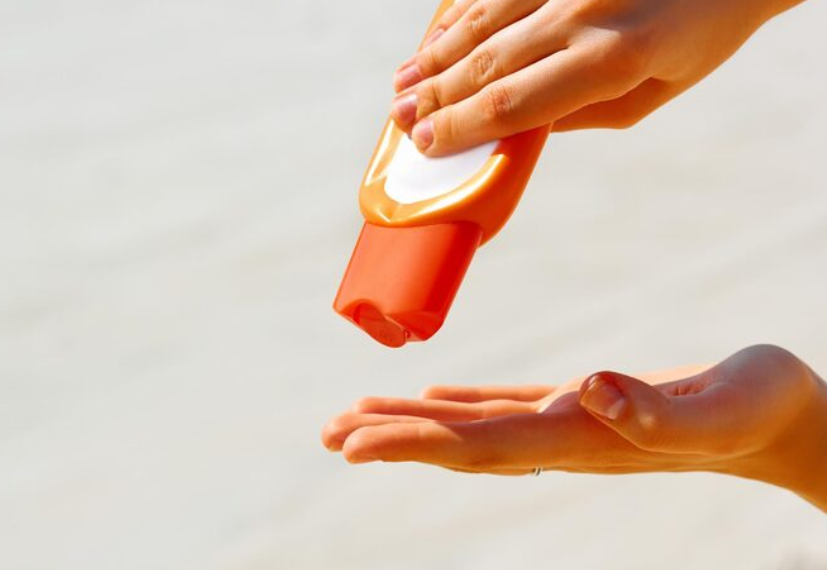
    ✅ Apply sunscreen and scar care products consistently after sutures are removed
    ✅ Follow the prescribed disinfection schedule and take medications exactly as directed

    local flap surgery recovery time - image 6

    Precautions
    Itching or pain may occur intermittently during healing.
    Scratching the area or forcibly picking at scabs can lead to infection or worsen scarring.
    It’s best to disinfect the area carefully and maintain cleanliness according to your medical team’s instructions.

    In burn reconstruction, the months of care after surgery often matter more than the procedure itself.
    If you’d like to track your recovery stage by stage with a medical team, you can find more information on the [Ansan Open Surgery Hospital] burn treatment homepage.

    local flap surgery recovery time - image 7


    Frequently Asked Questions

    1. When can I start disinfecting the wound and washing my face?
    You can generally take a light shower or wash your face starting the day after all sutures have been removed. Before that, avoid letting water touch the wound directly, and follow your medical team’s instructions for disinfection.

    2. Is it normal for the surgical site to feel tight or hard?

    As scar tissue matures during recovery, the skin can temporarily feel hard or tight. This is a normal part of the healing process, and it typically softens gradually over time.

    3. What warning signs should I watch for during recovery?
    If the flap turns noticeably dark red or unusually pale, or if you notice a strong odor or pain accompanied by warmth, this could indicate a circulation problem or infection, and you should seek medical attention immediately.

    4. Can I go about daily life during local flap surgery recovery time?
    In the early period after surgery, you should avoid pressure and friction on the area, but from around the 1-3 month tissue-stabilization stage, you can gradually resume daily activities under your medical team’s guidance.


    References

    · Asan Medical Center, “Tissue Reconstruction Using Flap Surgery,” Asan Medical Center Disease Encyclopedia. View source
    · Asan Medical Center, “Tissue Reconstruction Using Skin Grafts,” Asan Medical Center Disease Encyclopedia. View source
    · Korea Disease Control and Prevention Agency, “Burns,” National Health Information Portal. View source
    · Busan Ilbo, “Burn Skin Care: The 3-6 Months After Wound Healing Matter Most,” 2020. View source


    This article is intended for general health information purposes only and is not a substitute for individual diagnosis or treatment. If you have symptoms, please consult a medical professional.

  • Flat Iron Burn Scar: 15-Minute Golden Window First Aid & Prevention Guide

    Flat Iron Burn Scar: 15-Minute Golden Window First Aid & Prevention Guide

    SummaryFor a flat iron burn scar, the golden window is cooling the area under running cold water for 15 to 20 minutes right after contact. This guide covers the first aid steps, how to care for blisters, skin recovery habits that help reduce discoloration, and ways to prevent flat iron burns in the first place.

    You’re rushing to get ready in the morning, styling your bangs, when the hot plate of your flat iron brushes against the back of your neck.
    The sting only lasts a moment, but a few hours later the spot turns red, swells, and even blisters.

    It was just a light touch, so why does the mark linger so long?
    A flat iron burn scar starts with a split second of carelessness, but how deep the mark ends up depends heavily on what you do right after it happens.

    flat iron burn scar

    Key Takeaways
    To help reduce a flat iron burn scar, an important first step is cooling the area under running cold water for 15 to 20 minutes right after contact.
    Leave blisters intact and cover them with a clean dressing; once the skin has re-epithelialized, staying consistent with sun protection and moisturizing can help reduce discoloration and scarring.
    Flat iron plates can reach up to 215°C (419°F), so accidental contact is a risk not only while it’s in use but also right after you turn it off.

    Why Can a Flat Iron Burn Turn Into a Second-Degree Burn So Fast?

    A flat iron is a high-heat tool that can damage skin all the way down to the dermis with just a brief touch.
    A flat iron burn is thermal skin damage caused by momentary contact with plates or heating elements that reach roughly 150–200°C (300–390°F).

    When the Korea Consumer Agency measured the plate temperature of flat irons on the market, it found that the peak temperature during use reached 215°C (419°F).
    Even after the device was switched off, the plates stayed above 100°C (212°F) for about 5 minutes.

    That’s why an unguarded brush against the back of the hand or neck right after use can easily cause a burn.
    Thin-skinned areas like the face, neck, and back of the hand are especially prone to oozing or blistering because heat transfers to them faster.

    Flat iron burn scar illustration 2

    Flat iron burn scar illustration 3

    According to the Korea Consumer Agency, 200 of 268 burn injuries among children under age 10 — 74.6% — occurred on the hands and arms.
    Younger children, who are less able to sense and avoid danger, were more likely to be injured by directly touching or grabbing a hot flat iron.

    The plate’s peak temperature rose to 215°C, and it remained above 100°C for about 5 minutes even after the power was switched off.

    Based on these findings, the Korea Consumer Agency advised households with children not to put a flat iron away immediately after use, but to leave it somewhere out of reach until it has fully cooled down.

    Key Points
    ✅ The thinner the skin, the faster heat transfers and the deeper the damage tends to be.
    ✅ The first priority is identifying early on whether it’s a first-degree burn (epidermis only) or a second-degree burn (with blistering).

    What’s the Golden-Window First Aid for Reducing a Flat Iron Burn Scar?

    Cooling the burn for 15 to 20 minutes immediately after it happens can play a major role in how deep the resulting scar may be.
    Golden-window first aid means using running cold water right after a burn to remove residual heat and help keep the damage from spreading deeper into the dermis.

    Cool the burned area thoroughly under running cold water for at least 15 to 20 minutes, and do not pop any blisters.

    That’s how the Korea Disease Control and Prevention Agency (KDCA) describes it in the burn guidance on its National Health Information Portal.
    That said, if the burn covers a large area, it’s better to let water run evenly over it rather than submerging the whole body, to avoid the risk of hypothermia.

    Flat iron burn scar illustration 4

    Precautions
    ⚠️ Applying ice directly to the wound can irritate the tissue and worsen the damage.
    ⚠️ Avoid home remedies like toothpaste or soju entirely — they only increase the risk of infection.

    Flat iron burn scar illustration 5

    Checklist
    ✅ Cool the area under running tap water for 15 to 20 minutes
    ✅ Never apply ice directly or use home remedies
    ✅ Leave blisters intact and protect them with clean gauze
    ✅ Use a gentle, low-irritation foam dressing

    How Do You Manage Burn Marks and Discoloration for Scar-Free Healing?

    Care needs to continue even after re-epithelialization, when new skin has formed over the wound.
    Re-epithelialization refers to the process in which a new epidermis regenerates over damaged skin and the wound closes.

    According to Asan Medical Center, second-degree burns are classified as superficial or deep, depending on how far the damage extends.
    A superficial second-degree burn damages only part of the dermis and typically heals in about 2 weeks, while a deep second-degree burn affects most of the dermis, takes 2 to 4 weeks to heal, and can leave a scar.

    Type Depth of Damage Recovery Time Likelihood of Scarring
    Superficial second-degree burn Partial dermis About 2 weeks Low
    Deep second-degree burn Most of the dermis 2–4 weeks Possible

    If the skin is exposed to UV rays while it’s still red, melanin production can become overactive and leave a dark discoloration.
    That’s why it’s important to apply sunscreen thoroughly whenever you go outside and keep moisturizing consistently.

    Flat iron burn scar illustration 6

    Key Points
    ✅ Once the wound has fully closed, consistently using scar ointments or sheet-type care products can help fade marks.
    ✅ Keeping SPF 30+ sunscreen on throughout the healing phase can help lower the risk of discoloration.
    Recovery Care Guide
    · Wound stage: Absorb exudate and block bacteria (use a moist wound dressing)
    · Skin regeneration stage: Sun protection (SPF 30+) and continuous moisturizing
    · Maintenance stage: Use silicone-based products to help stabilize the tissue

    What Habits Help Prevent Flat Iron Burns?

    Preventing an accident in the first place matters far more than treating a burn afterward.
    Practicing the habits below can help lower your risk of ending up with a flat iron burn scar.

    1. Rest the flat iron on a silicone stand or mat while using it or letting it cool
    2. Wear a hair band, and heat-resistant gloves if needed, when styling near your neck or ears
    3. Set the temperature to 150–180°C (300–355°F) instead of an unnecessarily high 200°C+ (390°F+)
    4. Avoid rushed movements and make sure you have a clear view in the mirror before styling
    5. Unplug it right after use and keep it out of reach of children and pets

    Flat iron burn scar illustration 7

    If a mark has already developed or you’re unsure how to manage it, consulting a specialist is also worth considering.
    Burn Treatment Information — [Ansan Yeollin Surgery Clinic] Home has more information you can check out.


    Frequently Asked Questions

    1. What should I do if a blister has already popped?
    A popped blister carries a higher risk of secondary infection. Gently rinse it with tap water or saline, disinfect it, and keep the area clean with a moisture-absorbing wound dressing.

    2. Can a mark that’s already turned red still be managed?
    Redness right after re-epithelialization is a normal part of tissue regeneration. Applying sunscreen and moisturizer consistently during this stage can help reduce the chance of it progressing into discoloration.

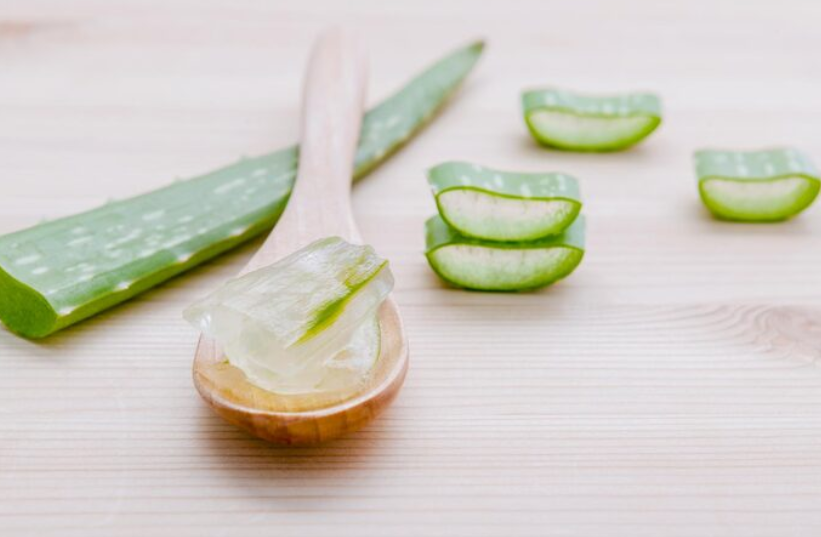
    3. Is it okay to use aloe soothing gel from home?
    It may help cool the area, but if the skin is still oozing or the wound is open, the ingredients can cause irritation or infection. Before the wound closes, it’s safer to use saline or a dedicated wound dressing.

    Flat iron burn scar illustration 8


    References

    · Korea Disease Control and Prevention Agency, “Burns,” National Health Information Portal. View source
    · Korea Consumer Agency, “Watch Out for Flat Iron Burns in Children,” Consumer Safety Information. View source
    · Asan Medical Center, “Burn,” Disease Encyclopedia. View source


    This article is intended to provide general health information and is not a substitute for individual diagnosis or treatment.
    If you’re experiencing symptoms, please consult a medical professional.

  • Sunburn Blisters: Should You Pop Them? 4-Step First Aid Guide

    Sunburn Blisters: Should You Pop Them? 4-Step First Aid Guide

    SummaryWondering whether it’s safe to pop sunburn blisters? Here’s everything you need to know — how blisters form, the step-by-step first aid routine, how to use aloe vera, what never to do, and when to see a doctor.

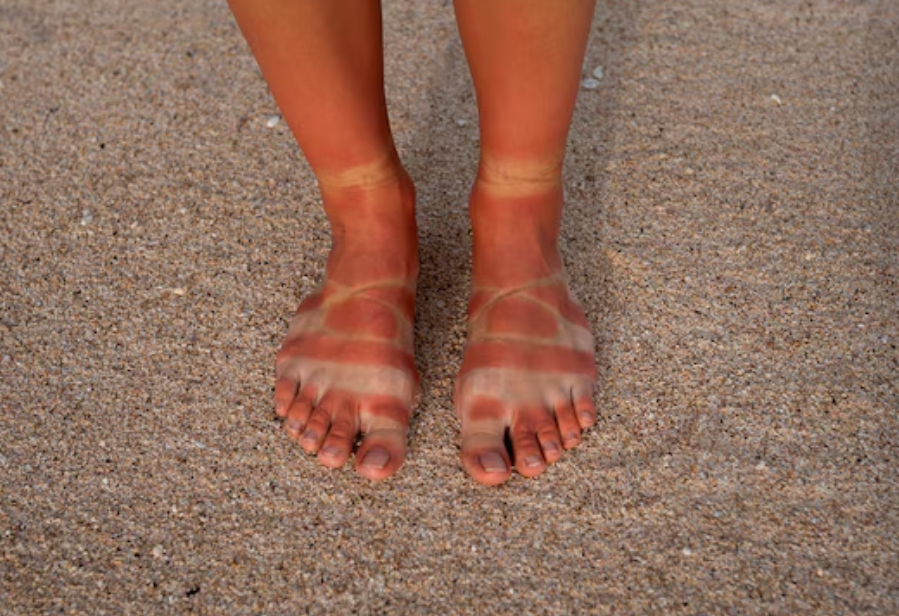
    Ever spent a full day at the beach and woken up the next morning with shoulders so sunburned that a blister has actually formed?
    Many people hesitate over whether to pop it themselves or just leave it alone, and that hesitation often makes the damage worse.

    Dermatologists note that popping sunburn blisters carelessly significantly raises the risk of secondary infection.

    Key Takeaway
    Sunburn blisters form when UV-damaged skin protects itself by filling the space between the epidermis and dermis with fluid.
    Never pop the blister. The key first-aid step is to cool it with cold water for 10 to 20 minutes, then replenish moisture with aloe vera gel or a similar product.
    If a blister is larger than the palm of your hand, or is accompanied by pus or fever, you should see a doctor.

    Sunburn blister

    What Exactly Are Sunburn Blisters?

    Sunburn blisters are a defensive response in which skin damaged by intense UV (UVB) rays protects itself by filling the space between the epidermis and dermis with fluid.
    In simple terms, it’s a natural bandage your body makes on its own.

    According to the Korea Disease Control and Prevention Agency’s National Health Information Portal, sunburn symptoms typically begin 4 to 6 hours after UV exposure and peak between 12 and 24 hours later.
    If a blister forms during this window, it generally means the burn has already progressed to a second-degree burn.

    Sunburn blister illustration 2

    Key Points
    ✔ The fluid inside a blister acts as a barrier that keeps bacteria out.
    ✔ New skin is regenerating underneath that protective barrier.
    ✔ Popping it on purpose destroys that protective function.

    Allowing blisters to heal — instead of popping them — may help protect against infection.

    The American Academy of Dermatology (AAD) explains in its official patient guidance that letting blisters heal naturally, rather than popping them, is what helps prevent infection.


    Why Shouldn’t You Pop Sunburn Blisters?

    To put it simply: the moment you pop a blister, its protective barrier disappears, creating an easy path for bacteria to penetrate deep into the skin.
    As a result, healing takes longer and the chances of scarring increase.

    Category If Popped If Left Alone
    Protective barrier Disappears Stays intact
    Secondary infection risk Significantly increases Relatively low
    Scarring risk Increases Decreases
    Recovery time Longer Proceeds as expected

    That said, blisters often pop on their own from friction with clothing or from being pressed on while you sleep.
    If that happens, don’t forcibly peel off the skin — just follow the care steps covered in the next section.


    How Do You Treat Sunburn Blisters? 4-Step First Aid

    The first thing to do is quickly cool down the heat in your skin.
    Just follow these steps in order — it’s easier than it sounds.

    1. Cover the burned area gently with a cold, damp towel for about 10 to 20 minutes. Mayo Clinic warns that applying ice directly to the skin can cause additional tissue damage.
    2. Rinse the area under lukewarm running water several times a day, about 10 minutes each time, to keep cooling it down.
    3. Once the heat has eased somewhat, replenish moisture with a gentle, low-irritation aloe vera soothing gel.
    4. Wear loose, breathable clothing so nothing presses against the blister.

    Sunburn blister illustration 3

    Sunburn blister illustration 4

    Checklist
    ✅ Cool the heat with lukewarm or cool water for 10-20 minutes
    ✅ Don’t apply ice directly to the skin
    ✅ Gently hydrate with a low-irritation aloe vera gel
    ✅ Wear breathable clothing instead of anything tight over the blister

    What’s the Right Way to Care for Popped Sunburn Blisters — and What Should You Avoid?

    If a blister has already popped, the most important thing is not to forcibly peel off the loosened skin with your hands.
    Gently dab away any fluid with sterile gauze, apply an antibiotic ointment, and cover it with a foam-type bandage to block outside irritation.

    Sunburn blister illustration 5

    Key Points
    ✔ Rinse a popped blister with running water or saline solution.
    ✔ Don’t tear off the skin — apply antibiotic ointment, then cover with sterile gauze.
    ✔ Keep the area out of direct sunlight until it has fully healed.

    One thing that’s easy to overlook in all this is staying hydrated.
    Since adequate hydration is essential for skin regeneration, drinking water more often than usual can support recovery.

    Sunburn blister illustration 6

    Outcome
    When you follow through with cold-water first aid, proper hydration, and blister protection, most sunburn symptoms tend to gradually ease within 3 to 7 days.
    Things to Absolutely Avoid
    ⚠ Avoid greasy products like petroleum jelly (they can trap heat in the skin)
    ⚠ Never pop a blister with a needle or fingernail
    ⚠ Don’t use heating pads or warm water on the burned area
    ⚠ Avoid re-exposing the area to UV rays until it has healed

    If a blister is larger than the palm of your hand, comes with chills or fever, or shows signs of infection like yellow pus, seeing a specialist should take priority over self-care.
    Knowing in advance where you can receive burn treatment can help you respond faster in these situations.
    Visit the homepage of Ansan Yeorin Surgical Hospital for burn treatment information.

    Sunburn blister illustration 7


    Frequently Asked Questions

    1. What’s the real reason you shouldn’t pop sunburn blisters?
    The skin covering a blister acts as a natural barrier against bacteria. Removing it significantly raises the risk of secondary infection and scarring.

    2. My blister keeps getting rubbed by my clothes and feels like it’s about to pop. What should I do?
    Loosely cover it with a cushioned burn bandage or gauze so it isn’t compressed, and wear loose, breathable clothing over it.

    3. What should I do if a blister pops by accident?
    Rinse it with clean running water or saline solution, avoid tearing off the skin, apply antibiotic ointment, and cover it with sterile gauze.

    4. Can I apply aloe vera gel right away if a blister forms?

    If the blister is still intact, aloe vera gel can help once the heat has cooled down. However, it may irritate an open wound that’s leaking fluid, so a dedicated ointment is safer in that case.

    5. When should I consider seeing a doctor?
    If the blister is larger than the palm of your hand, comes with chills or fever, or shows signs of infection such as yellow pus, it’s recommended that you see a specialist right away.


    References

    · Korea Disease Control and Prevention Agency, “Sunburn,” National Health Information Portal, 2026. Link
    · American Academy of Dermatology, “How to Treat Sunburn,” AAD.org, 2024. Link
    · Mayo Clinic Staff, “Sunburn: First Aid,” Mayo Clinic, 2024. Link
    · Seoul National University Hospital, “Sunburn,” Medical Information, Seoul National University Hospital. Link

    This article is intended for general health information purposes only and is not a substitute for individual diagnosis or treatment. If you have symptoms, please consult a medical professional.
  • Burn First Aid: 4 Steps to Take in the First 20 Minutes

    Burn First Aid: 4 Steps to Take in the First 20 Minutes

    SummaryThe key to burn first aid is cooling the area under running cool water for 15 to 20 minutes. Many people confuse this with icing a burn or mishandle blisters. Ansan Burn Hospital breaks down why home remedies like toothpaste or soybean paste can be risky, how burn degrees are classified, and when it’s time to see a doctor.

    The moment you spill hot soup on yourself, is reaching for ice your first instinct?

    This reflex, which many people assume is correct, can actually make skin damage worse.

    How you handle the first few minutes after a burn can affect how deep the resulting scar becomes.

    Key Takeaway
    The key to burn first aid is cooling the area under running cool water for 15 to 20 minutes.
    Applying ice directly, or using home remedies like toothpaste or soybean paste, can make the damage go deeper.
    This article walks through what to do immediately after a burn, what to avoid, how burns are classified by degree, and when to seek medical care.

    Burn first aid

    What’s the First Step in Burn First Aid?

    The first thing to do right after a burn is cool the area under running cool water.
    Burn first aid is the process of stopping contact with the heat source and lowering skin temperature to prevent further damage.

    The moment skin touches a hot pot or spilled soup, the heat trapped inside doesn’t disappear on its own.
    If that heat isn’t drawn out quickly, the damage can spread into deeper layers of skin.

    That’s why cooling the burn is the very first thing to do.

    Burn first aid illustration 2

    1. Run tap water over the affected area for 15 to 20 minutes to cool it down.
    2. Keep the water pressure gentle, like a light trickle, rather than a strong stream.
    3. Remove rings, watches, and other jewelry right away, before swelling sets in.
    4. If clothing is stuck to the skin, don’t force it off—cool the area with water first, then cut the fabric away with scissors.

    “Burned skin should be cooled under running cool water for at least 15 to 20 minutes. Applying ice directly can cause blood vessels to constrict rapidly, which may actually deepen tissue damage.”

    This is how Korea’s Disease Control and Prevention Agency describes burn first aid on its National Health Information Portal.

    Key Point: Proper Cooling Guidelines
    ✅ Run water over the area for 15 to 20 minutes to remove trapped heat.
    ✅ Don’t apply ice directly to the wound (risk of blood vessel constriction).
    ✅ Remove jewelry immediately, before swelling begins.

    Burn first aid illustration 3


    Is It Really Okay to Apply Toothpaste or Soybean Paste?

    Home remedies like toothpaste, soybean paste, or soju can actually make a burn worse.
    A home remedy is a self-treatment method passed down informally, without medical verification.

    In the panic of the moment, it’s tempting to reach for whatever’s in the kitchen.
    But toothpaste, soybean paste, and potato juice trap heat inside the wound.

    These substances can also introduce bacteria and lead to infection.
    Pouring soju or other alcohol on a burn is no better.
    Alcohol further irritates skin whose barrier is already damaged.

    Burn first aid illustration 4

    Burn first aid illustration 5

    Caution: Things You Should Never Do
    🚫 Applying toothpaste, soybean paste, cucumber, or other food items
    🚫 Pouring soju or alcohol directly on the wound
    🚫 Popping a blister with your fingers
    🚫 Self-applying unverified topical products

    There’s a reason you shouldn’t pop a blister.
    Blister fluid acts as a natural barrier that protects the wound from bacteria.

    Forcing a blister open is thought to increase the risk of deeper scarring.
    Leave blisters intact and keep the area clean instead.

    Burn first aid illustration 6


    How Are Burn Degrees Classified?

    Burns are classified from first-degree to third-degree based on how deep the damage goes.
    Burn degree is a classification based on how much of the epidermis and dermis has been damaged.

    First-degree burns affect only the epidermis, causing redness and a stinging sensation.
    From second-degree burns onward, blisters form and pain intensifies.

    However, when damage reaches deep into the dermis, nerve endings can be destroyed, which may actually reduce pain.
    Less pain doesn’t mean less damage, so the area should be examined carefully.

    Burn first aid illustration 7

    Degree Depth of Damage Main Symptoms
    First-degree Epidermis Redness, pain, no blisters
    Superficial second-degree Upper dermis Red blisters, intense pain
    Deep second-degree Lower dermis Pale blisters, reduced pain
    Third-degree Full skin thickness Discoloration, painless due to nerve damage

    Burn first aid illustration 8


    When Should You Go to the Hospital Right Away?

    Burns on the face, hands, or joints, or burns covering a large area, call for prompt medical attention.
    A burn that needs immediate care is one where natural healing is unlikely or there’s a meaningful risk of losing function.

    According to a report by The Seoul Shinmun, about 67% of burn accidents in Korea happen at home.
    The same report found that infants and toddlers aged 0 to 4 made up 29% of all burn patients in Korea.

    Infants and older adults, who tend to have weaker immune systems, can experience wider-reaching effects from even a small burn.
    Burns near joints can cause the skin to contract as it heals, which may limit range of motion.

    Checklist: When to Seek Care Right Away
    ✅ The blister is larger than a coin
    ✅ The burn is on the face, hands, or a joint
    ✅ The burn was caused by a chemical or electrical source
    ✅ The burn occurred in an older adult or a young child

    Burn first aid illustration 9

    Burn first aid illustration 10

    Finishing first aid isn’t the end of the process.
    A proper evaluation and dressing from a medical professional can help minimize scarring.

    We recommend having your burn assessed at the Burn Treatment page of Ansan Open Surgery Hospital, which has experience treating burns.

    Burn first aid illustration 11

    Burn first aid illustration 12


    Frequently Asked Questions

    1. When should you apply ointment to a burn?
    Applying ointment while the burn still feels hot can trap heat inside and worsen the damage. It’s best to cool the area thoroughly with cool water, pat it dry, and then apply an infection-prevention ointment.

    2. How should you care for a blister that has already popped?
    Don’t peel away the loose skin—leave it in place and gently clean the area with sterile saline. After that, protect it with an appropriate dressing and see a doctor to be safe.

    3. Why shouldn’t you put ice directly on a burn?
    Direct contact with ice causes skin blood vessels to constrict sharply, which restricts circulation and can cause secondary damage similar to frostbite. Always cool a burn with running cool water instead.


    References

    · Korea Disease Control and Prevention Agency, “Burns,” National Health Information Portal, KDCA. View source
    · Ministry of the Interior and Safety, “First Aid – Burns,” Korea Safety (안전24), MOIS. View source
    · The Seoul Shinmun, “29% of Burn Patients Are Ages 0–4… 67% Occur at Home,” The Seoul Shinmun, 2018. View source
    · Hidoc, “‘Don’t Pop the Blister’… A Surgeon Explains How to Handle Burns,” Hidoc, 2025. View source


    This article is intended for general health information purposes only and is not a substitute for individual diagnosis or treatment. If you have symptoms, please consult a medical professional.
  • Acute Hemorrhoid Symptoms: 3 Warning Signs and Emergency Relief

    Acute Hemorrhoid Symptoms: 3 Warning Signs and Emergency Relief

    SummaryAcute hemorrhoid symptoms usually start with a thrombosed external hemorrhoid, a blood clot forming in a vein around the anus. This guide covers the causes, a self-check list, emergency relief methods like warm sitz baths, and when it’s time to see a doctor.

    Were you perfectly fine last night, only to be startled by a sharp, stabbing pain the moment you sat down in a chair this morning?

    Many people brush this off as a simple muscle ache and try to wait it out,
    but it’s often actually acute hemorrhoid symptoms caused by a sudden blood clot in a vein around the anus.

    Acute hemorrhoid symptoms most often begin with a thrombosed external hemorrhoid, where a clot suddenly forms inside a vein near the anus.
    This article walks through the causes, a self-check list, emergency relief steps you can try at home, and when it’s time to see a doctor.

    acute hemorrhoid symptoms

    What Causes Acute Hemorrhoid Symptoms That Strike Suddenly?

    Most acute hemorrhoid symptoms occur because of a thrombosed external hemorrhoid, a sudden blood clot forming inside a vein around the anus.
    A thrombosed external hemorrhoid is a condition in which a blood clot forms in a vein at the edge of the anus, causing the tissue to swell and triggering intense pain.

    Even people who’ve never had hemorrhoid symptoms before can experience a sudden spike in anal blood vessel pressure from fatigue, sitting on a cold surface for a long time,
    drinking too much alcohol, or straining hard during a bowel movement because of constipation.

    That’s exactly why people say, “I was fine yesterday, and then it just happened out of nowhere.”

    Key Points
    · Straining for more than 5 minutes during a bowel movement sharply raises pressure in the anal blood vessels.
    · Sitting on cold surfaces for long periods, heavy drinking, and accumulated fatigue also encourage clot formation.

    acute hemorrhoid symptoms illustration 2


    Acute Hemorrhoid Symptoms of a Thrombosed External Hemorrhoid: A Checklist

    A thrombosed external hemorrhoid is marked by a firm lump you can feel around the anus within just a few hours, with pain that peaks rapidly.
    Unlike chronic hemorrhoids, the pain intensifies so quickly that walking or even sitting can become difficult.

    Checklist
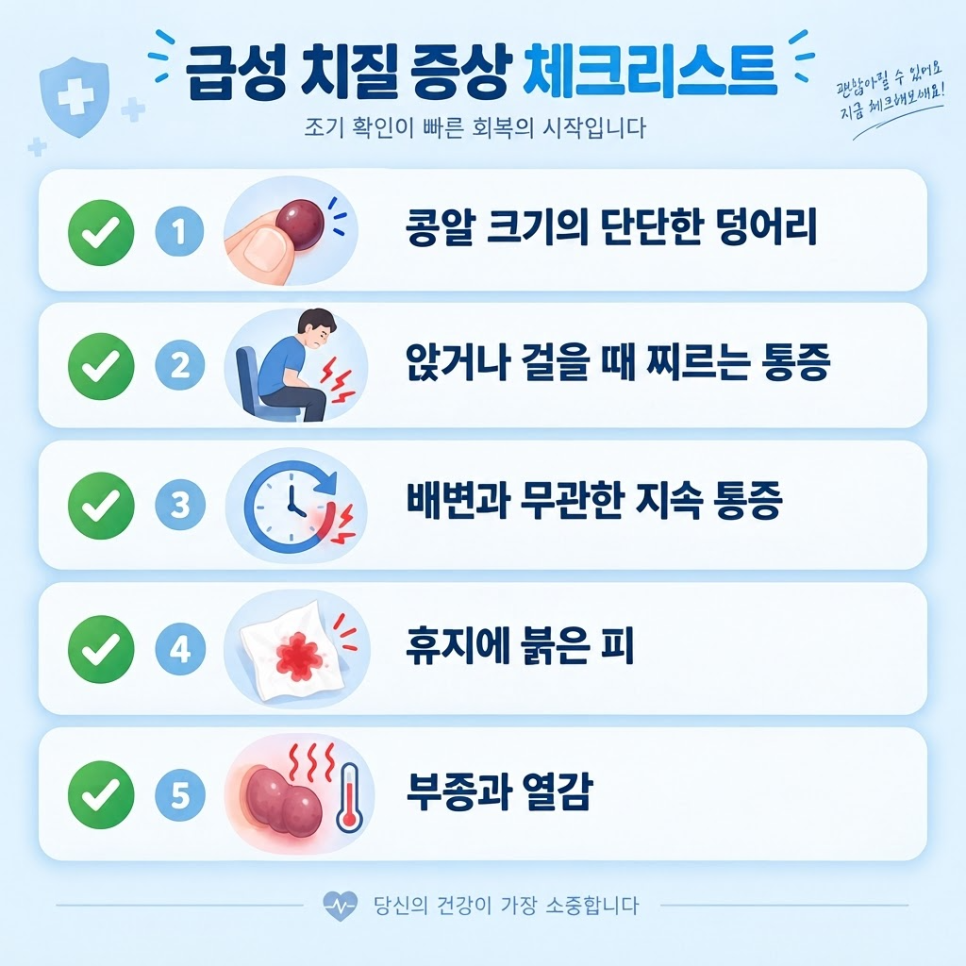
    ✅ You can feel a firm lump the size of a pea or kidney bean at the anal opening
    ✅ You feel a stabbing pain when sitting in a chair or walking
    ✅ The pain continues regardless of whether you’ve had a bowel movement
    ✅ You notice blood on the toilet paper or bleeding from the surface of the lump
    ✅ The area around the anus is tightly swollen and feels warm to the touch
    Category Acute (Thrombosed External Hemorrhoid) Chronic Hemorrhoids
    Pain onset Worsens sharply within hours Develops gradually, recurs over time
    Lump Firm and painful to the touch Protrudes after bowel movements, then retracts
    Impact on daily life Hard to sit or walk Uncomfortable but can still walk

    acute hemorrhoid symptoms illustration 3


    What Emergency Relief Methods Can You Try at Home Right Away?

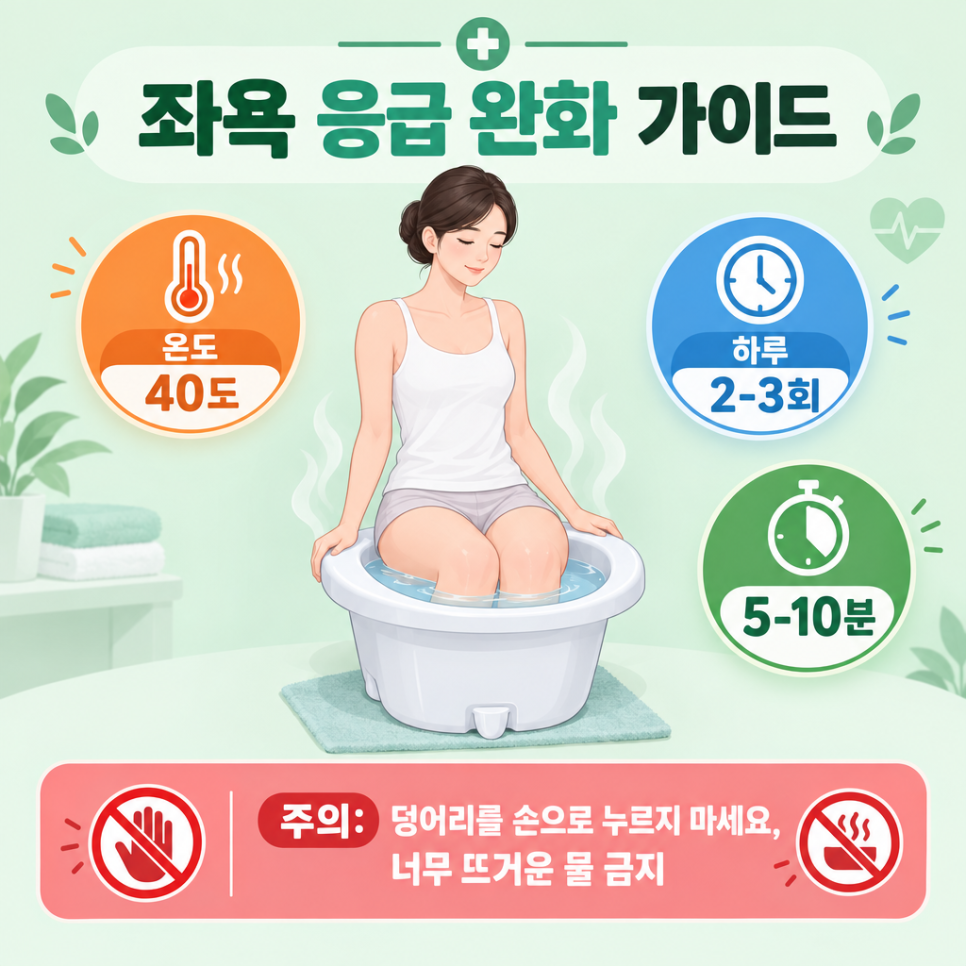
    A warm sitz bath is a method of soaking the anal area in warm water at about 100–104°F (38–40°C) to relax the sphincter muscle and improve blood flow.
    Sitz baths are known to promote circulation, which may help dissolve the clot and support healing of the affected tissue.

    1. Prepare warm water at about 100–104°F (38–40°C).
    2. Soak for 5–10 minutes, 2–3 times a day.
    3. Doing this right after a bowel movement tends to work even better.
    4. Dry the area completely afterward to keep it from staying damp.

    acute hemorrhoid symptoms illustration 4

    ⚠️ Caution
    Never try to force the lump back in or squeeze it with your hands.
    Doing so can rupture the blood vessel or worsen inflammation, potentially leading to a secondary infection — avoid irritating the area at all costs.

    acute hemorrhoid symptoms illustration 5


    When Do You Absolutely Need to See a Doctor?

    If the pain lasts more than 48 hours or the bleeding increases, a professional diagnosis is needed.
    In its early stage, a thrombosed external hemorrhoid often improves on its own with rest, medication, and warm sitz baths.

    acute hemorrhoid symptoms illustration 6

    But if the pain keeps getting worse or lasts more than 48 hours, don’t try to tough it out on your own — see a doctor.
    Missing the early treatment window can extend your recovery time, so prompt evaluation is recommended.

    If symptoms are severe or keep recurring, it’s safest to consult a colorectal surgery specialist.
    You can find more information about the hospital at Burn Treatment, [Ansan Yeolin Surgery Hospital] Home.

    acute hemorrhoid symptoms illustration 7

    🚀 Management Tips
    Combining early, appropriate care with lifestyle changes may help reduce pain more quickly, though results vary from person to person.
    Staying well hydrated and getting enough fiber to prevent constipation is key to lowering the chance of recurrence.

    Frequently Asked Questions

    1. If I have acute hemorrhoid symptoms, do I always need surgery?
    Answer: Not necessarily. Acute thrombosed external hemorrhoids often improve in the early stage with medication, conservative care, and warm sitz baths. The right treatment approach is determined after an in-person exam.

    2. Do alcohol or spicy food make symptoms worse?
    Answer: Yes, they can play a role. Alcohol dilates the blood vessels around the anus and raises the risk of clot formation, while spicy food can irritate bowel movements and put extra strain on anal tissue.

    3. How many times a day should I do a sitz bath?
    Answer: About 2–3 times a day, for 5–10 minutes each, is generally appropriate. Soaking for too long can actually irritate the tissue or interfere with circulation.

    4. Should I push a sudden lump back in with my hand?

    Answer: No — never press hard on it or try to push it in. This can damage the blood vessel or cause severe pain, so it’s safer to leave it alone and get it checked by a doctor.

    acute hemorrhoid symptoms illustration 8


    References

    · Asan Medical Center, “Hemorrhoids,” Disease Encyclopedia, Asan Medical Center Health Information. View source
    · Seoul National University Hospital, “Hemorrhoid,” Medical Information, Seoul National University Hospital Health Information. View source

    This article is intended for general health information purposes only and is not a substitute for individual diagnosis or treatment. If you’re experiencing symptoms, please consult a medical professional.

  • Sebaceous Cyst Removal: 3 Reasons You Should Never Pop It Yourself

    Sebaceous Cyst Removal: 3 Reasons You Should Never Pop It Yourself

    SummaryWhy do sebaceous cysts form, and how are they different from acne? Here’s a rundown on why popping a cyst yourself is risky, the excision techniques that can help minimize scarring, the principle behind removing the cyst wall to help reduce recurrence, and the potential complications of self-extraction.

    Ever felt a bump on your face or neck,
    and pressed on it thinking it was just a pimple?

    Then had blood and pus suddenly burst out, catching you completely off guard?
    More people go through this than you’d expect.

    A cyst that isn’t removed at its root tends to fill back up over time,
    often leaving behind an even larger scar.

    Today we’re covering what causes a sebaceous cyst to form,
    and the proper way to have one removed while minimizing scarring.

    sebaceous cyst removal in Ansan

    In this article, we’ll look at what actually causes a sebaceous cyst to form and how it differs from acne,
    then walk through the excision techniques used to help reduce scarring during sebaceous cyst treatment.

    We’ll also cover the principle behind removing the cyst wall to help lower the chance of recurrence, and why self-extraction carries risk.

    sebaceous cyst - image 2

    What Is a Sebaceous Cyst?

    A sebaceous cyst is a benign, sac-like growth that forms when sebum builds up beneath the skin.
    A sebaceous cyst forms when the opening of an oil gland becomes blocked, trapping sebum and dead skin cells beneath the skin instead of letting them drain normally, which creates a sac.

    As trapped sebum accumulates, it forms a larger sac under the skin,
    and because it keeps filling with more sebum, it can feel like a soft or firm lump to the touch.

    sebaceous cyst - image 3

    💡 Key Point
    Completely removing the cyst sac is generally necessary to help reduce the chance of recurrence.
    Draining only the contents tends to be a temporary fix, not a lasting solution.

    A cyst may start out feeling soft, but it can gradually become firmer over time.
    Rather than pressing on it yourself, getting an accurate diagnosis first is the safer approach.


    How Is a Sebaceous Cyst Different From Acne?

    Acne is inflammation near the top of a pore, while a sebaceous cyst is a sac that forms deep in the dermis — so the two conditions differ from the root cause up.
    Typical acne involves pus-filled inflammation near the upper part of a pore, while a sebaceous cyst involves a sac that forms deep within the dermis.

    sebaceous cyst - image 4

    sebaceous cyst - image 5

    Category Acne Sebaceous Cyst
    Location Upper pore Sac deep in the dermis
    When squeezed Only the upper portion of the oil gland drains Sebaceous material can leak from a tiny central opening
    If left untreated Scarring risk is relatively low If infected, the scarred area can expand
    📋 Acne vs. Sebaceous Cyst Checklist
    ✅ Acne: Inflammation at the pore opening; squeezing drains only the upper part of the oil gland
    ✅ Sebaceous cyst: A sac beneath the skin, often with a tiny visible opening at the center
    ✅ When a cyst is squeezed: Sebaceous material with a distinct odor often leaks out
    ✅ If left untreated: Bacterial infection can cause the scarred area to grow larger

    Forcing a cyst open can cause the sac to rupture and spread beneath the skin.
    This can damage surrounding tissue and trigger a stronger inflammatory response.


    What Excision Techniques Help Minimize Scarring From Sebaceous Cyst Removal?

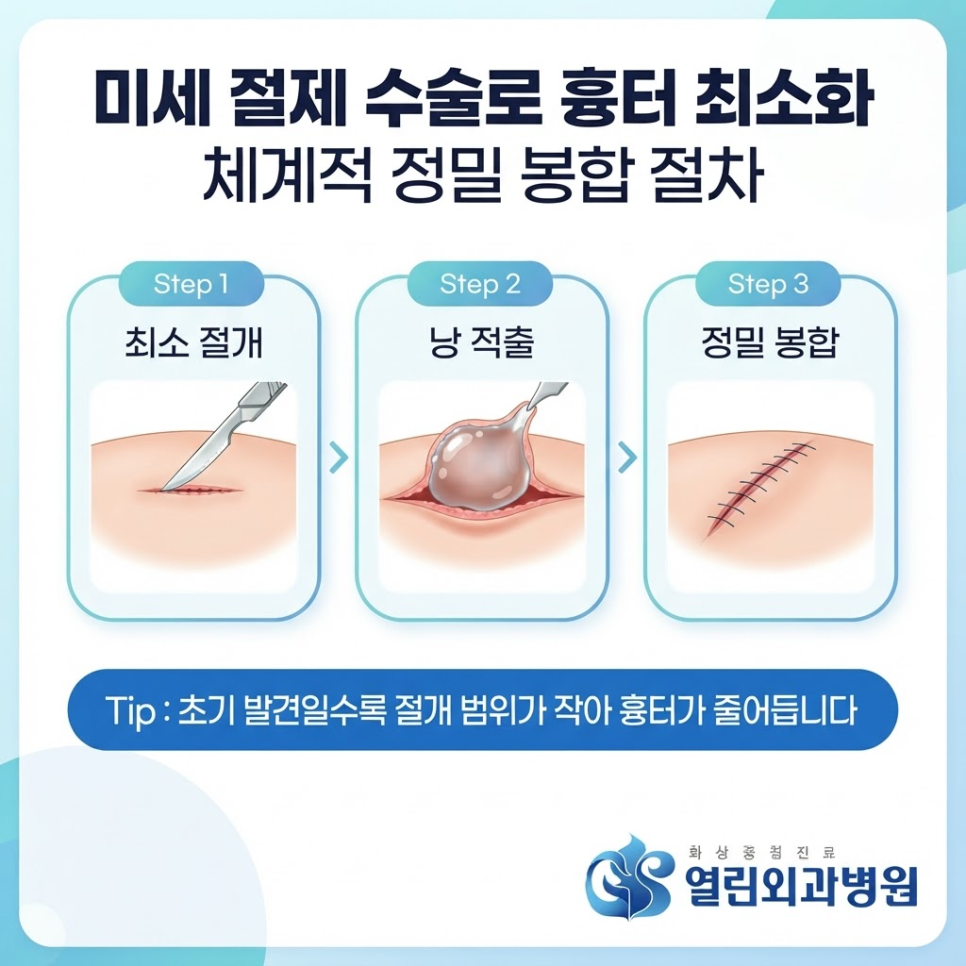
    Having a cyst removed early with minimal excision, before it grows larger, can help minimize scarring.
    On visible areas like the face or neck, concerns about a lasting mark are naturally greater.

    sebaceous cyst - image 6

    Advances in medical technique now allow the entire cyst wall to be drawn out and removed through a minimal incision — a method known as minimal excision.

    💡 Key Point
    Seeking treatment early tends to be more favorable for scar management.
    Treating a cyst before it grows larger can help keep the incision and suture marks smaller.

    sebaceous cyst - image 7

    🚀 What Surgical Treatment Can Offer
    A systematic, minimal excision approach can help limit the extent of tissue damage.
    Fine suture material can help make the resulting scar less noticeable.

    Available medical sources generally note that choosing a precise excision technique that removes the cyst completely is important for helping reduce the risk of recurrence.
    If you’re looking for a clinic in the Ansan area that offers systematic diagnosis and post-surgical care, you can find more information at Burn Care, [Ansan Yeorin Surgical Clinic] Home.


    Why Is Popping a Cyst by Hand Risky?

    Squeezing a cyst at home with unsanitary hands or tools carries real risk.
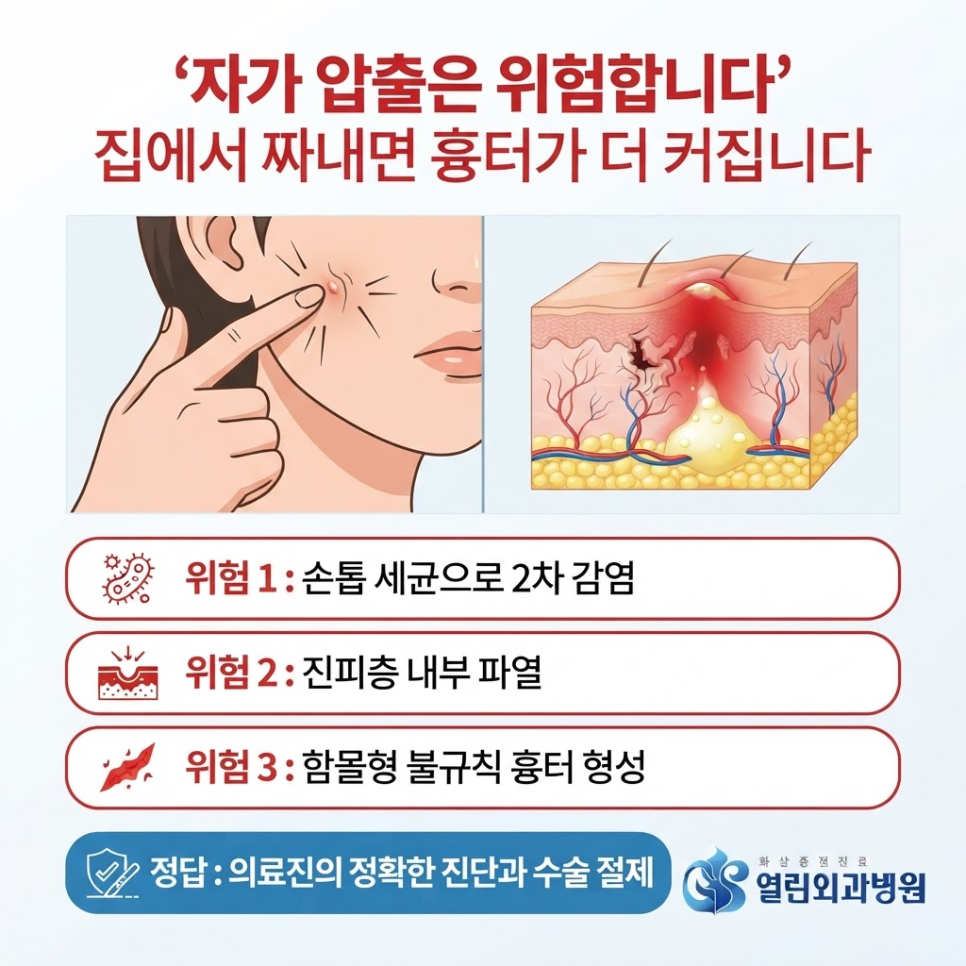
    Bacteria under the fingernails can enter through the pore and lead to a secondary infection.

    sebaceous cyst - image 8

    If the sac ruptures beneath the skin, it can leave an ulcer or a depressed scar.
    In some cases, this can result in a larger, more irregular mark than surgical treatment would.

    ⚠️ Caution
    Self-extraction can damage the dermis and lead to excessive pigmentation.
    Getting medical excision before the cyst becomes inflamed is the safer route.

    Rather than forcing extraction based on your own judgment, it’s advisable to get an accurate diagnosis from a medical professional and address the underlying cause.
    After surgery, thorough disinfection and consistent use of a healing ointment are recommended.
    Using sun protection alongside this can also help reduce the chance of pigmentation at the surgical site.


    Frequently Asked Questions

    1. Can a sebaceous cyst go away completely with medication or injections alone?
    Antibiotics or anti-inflammatory injections can temporarily ease inflammation and pain, but they don’t remove the cyst sac itself from the dermis.
    Because of this, recurrence is common, and surgical removal is generally needed to address the underlying cause.

    2. I’m concerned surgery might leave a large scar.
    Depending on the size and location of the cyst, a minimal excision technique may be an option.
    Because the sac is removed through an incision smaller than the cyst itself, followed by precise suturing, the resulting scar can often be kept relatively small.
    3. Can I shower or go about daily life right after sebaceous cyst surgery?
    Since the procedure is done under local anesthesia, many patients are able to return to daily activities the same day.
    That said, a waterproof bandage is needed to keep the suture site dry, and follow-up disinfection may be required for several days.

    4. If a cyst has ruptured and is very painful, can it be operated on right away?
    If inflammation is severe and the cyst has already ruptured, draining the area and calming the inflammation first — before removing the cyst wall — tends to be the approach that helps minimize tissue damage and scarring.

    sebaceous cyst - image 9

    sebaceous cyst - image 10


    References

    · Asan Medical Center, \”Epidermal Cyst,\” Disease Encyclopedia, Asan Medical Center. Read more
    · Seoul Times News, \”[Medical Column] Laser Minimal Excision Reduces Recurrence Compared to Cyst Extraction,\” Seoul Times News, 2025. Read more


    This article is intended for general health information purposes only and is not a substitute for individual diagnosis or treatment.
    If you’re experiencing symptoms, please consult a medical professional.