Tag: Scar Care

  • Local Flap Surgery Recovery Time: 6 Months and 3 Key Differences From Skin Grafts

    Local Flap Surgery Recovery Time: 6 Months and 3 Key Differences From Skin Grafts

    SummaryHow long does local flap surgery recovery time take? This guide covers the differences from skin grafting, the stage-by-stage recovery timeline, and the care habits that can help support flap survival — all organized around local flap surgery recovery time.

    When a deep burn leaves a large skin defect, simple suturing alone tends to pull the skin too tightly, causing the wound to reopen.
    In cases like this, doctors often recommend a reconstructive procedure called local flap surgery.

    Since this surgical approach isn’t widely known, understanding local flap surgery recovery time and how it differs from skin grafting ahead of time can be a big help when planning your treatment.

    Key Takeaways
    Local flap surgery is a reconstructive technique that moves tissue while keeping its blood supply intact, structurally different from skin grafting, where blood flow is completely severed.
    Local flap surgery recovery time generally falls into two phases: 3 to 6 months for tissue stabilization, and up to a commonly cited 1 to 1.5 years for the burn scar to fully mature.
    Blood flow management during the first 1-2 weeks after surgery can significantly affect flap survival.

    This article walks through the surgical principles behind local flap surgery, how it compares with skin grafting, the stage-by-stage recovery process, and the care habits that can help improve flap survival.
    If you’re preparing for burn reconstruction, the information below can serve as a practical reference for your decisions.

    local flap surgery recovery time

    What Is Local Flap Surgery, and How Is It Different From Skin Grafting?

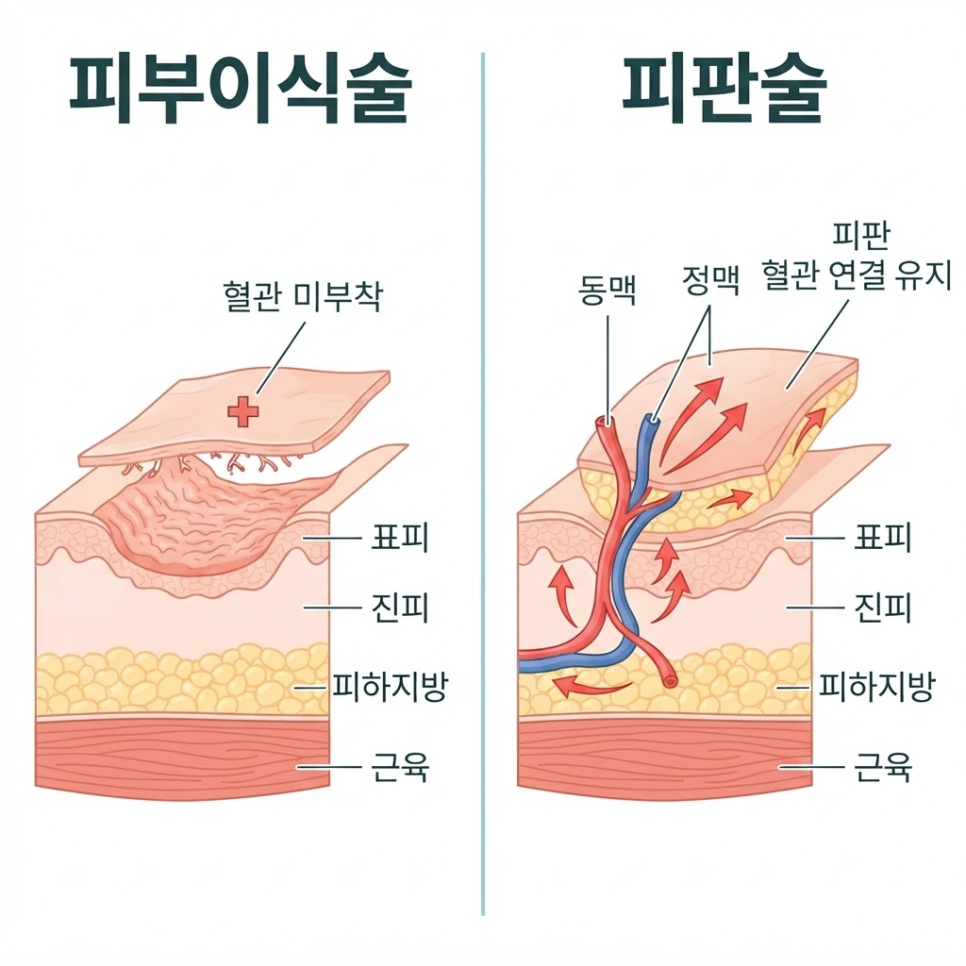
    Local flap surgery is a procedure that reconstructs a tissue defect by moving nearby healthy skin while keeping its blood vessels intact.
    Skin grafting, by contrast, involves completely detaching skin and transplanting it with no blood supply, so the two techniques differ at a fundamental, structural level.

    When a burn reaches third-degree depth or deeper, it destroys not only the epidermis and dermis but also the underlying subcutaneous tissue.
    In these cases, natural healing or simple suturing alone usually isn’t enough, and surgical reconstruction becomes necessary.

    According to Asan Medical Center’s disease encyclopedia, third-degree and deeper burns are generally treated with surgical options such as skin grafting and flap surgery.

    Key Points
    ✔️ Relatively stable tissue survival: Maintaining blood supply may help lower the risk of tissue necrosis.
    ✔️ Functional and aesthetic reconstruction: When applied to joint areas, it may help prevent skin contracture, and color and texture tend to closely match the surrounding skin.
    ✔️ Customized design: Depending on the location and size of the defect, flaps can be designed as rotation, transposition, or advancement types.
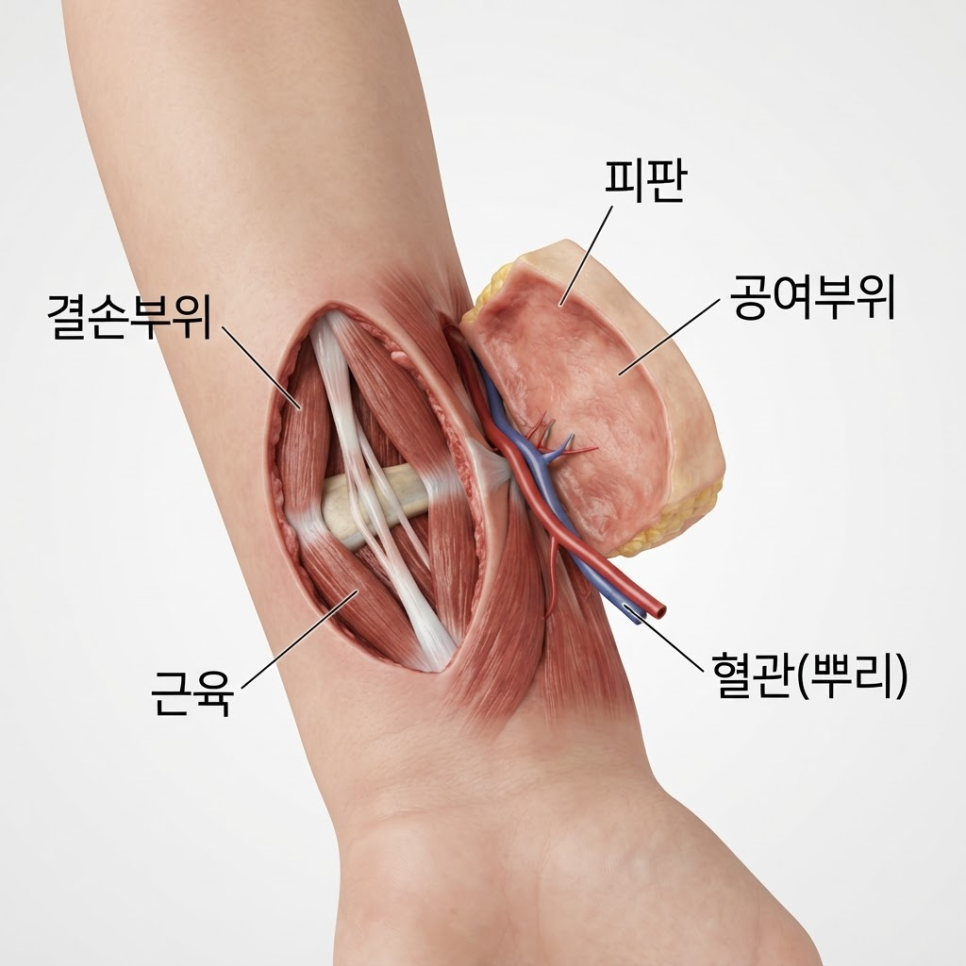
    local flap surgery recovery time - image 2

    Aspect Local Flap Surgery Skin Grafting
    Blood supply Moved while intact Completely severed, then re-established
    Survival stability May be more stable due to maintained blood flow Depends on new vessel formation at the recipient site
    Common application sites Functional areas such as joints Large-area defects
    Skin texture Similar to surrounding skin May differ from the donor site

    local flap surgery recovery time - image 3

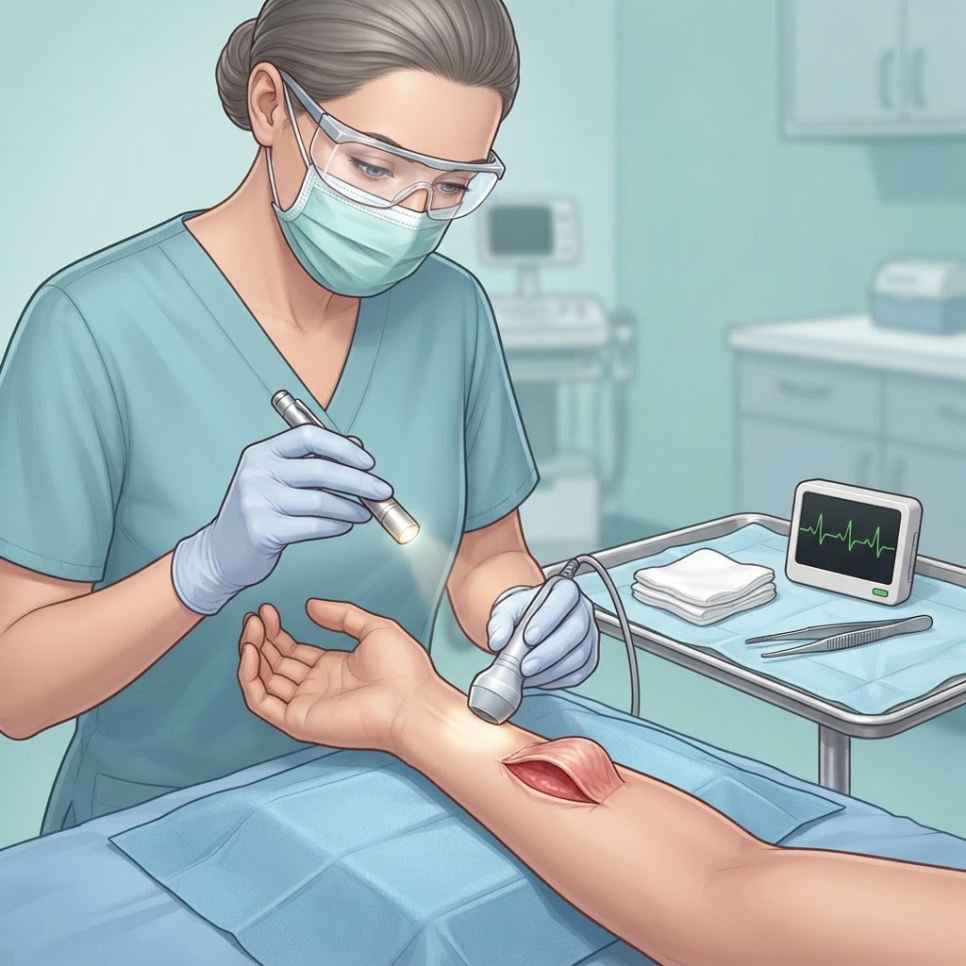
    Third-degree burns damage the epidermis, dermis, and subcutaneous tissue, often requiring surgical treatment such as skin grafting or flap surgery.

    The Korea Disease Control and Prevention Agency’s National Health Information Portal provides similar guidance on deep, third-degree-and-above burns.
    For this reason, precisely diagnosing the depth and location of the injury should come before setting a treatment plan.
    local flap surgery recovery time - image 4


    How Long Does Local Flap Surgery Recovery Time Take?

    Local flap surgery recovery time refers to how long it takes for the relocated tissue to rebuild microvessels in its new position and for the scar to mature.
    At minimum, tissue stabilization takes about 3 to 6 months; full scar maturation can take a year or longer.

    The first week after surgery is the golden window for closely monitoring the flap’s blood circulation.
    If the flap becomes unusually pale or takes on a bluish tint during this period, it should be checked by your medical team right away.

    1. Days 1-5 after surgery: Monitoring flap blood circulation and color, managing swelling
    2. Days 10-14 after surgery: Removing surface sutures and assessing initial wound healing
    3. Months 1-3 after surgery: Tissue stabilization, pressure therapy to help ease burn scarring
    4. 6+ months after surgery: Flap reaches maturity, skin flexibility gradually returns

    local flap surgery recovery time - image 5

    According to a Busan Ilbo interview with a burn specialist, it typically takes about 1 to 1.5 years for burned skin to fully stabilize and mature. It’s worth noting that this figure isn’t specific to local flap surgery — it’s a general description of burn recovery overall.
    The same article notes that sunscreen should be applied diligently for at least 6 months to a year after sutures are removed.

    In other words, even after a wound looks healed on the surface, the blood vessels and scar tissue underneath continue to change.


    How Can You Improve Flap Survival Rates During Recovery?

    Blood flow management during the first 1-2 weeks after surgery can have a significant impact on flap survival.
    The relocated microvessels are very fragile, so how well they’re cared for early on can substantially affect how fast recovery progresses later.

    Checklist
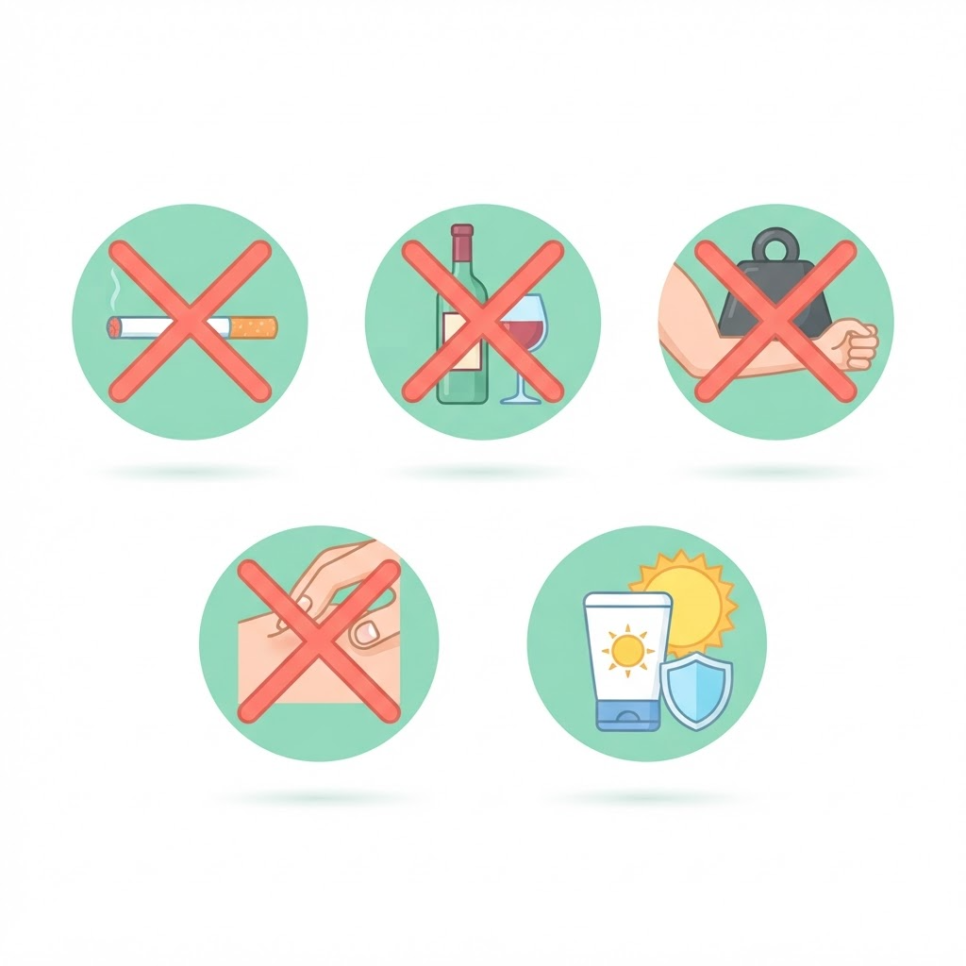
    ✅ Keep a posture that avoids putting direct pressure on the surgical site
    ✅ Avoid smoking and alcohol completely, since both can restrict tissue blood flow
    ✅ Avoid self-directed massage or strong friction on the area entirely
    ✅ Apply sunscreen and scar care products consistently after sutures are removed
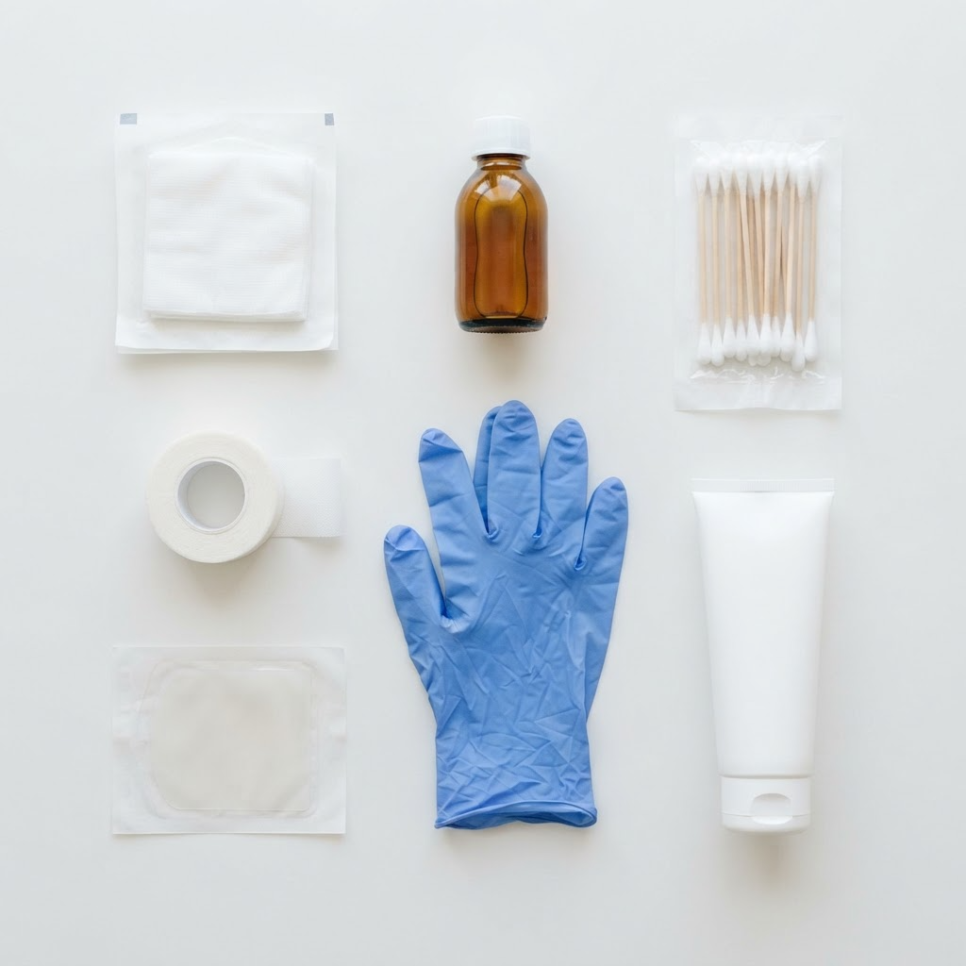
    ✅ Follow the prescribed disinfection schedule and take medications exactly as directed
    local flap surgery recovery time - image 6

    Precautions
    Itching or pain may occur intermittently during healing.
    Scratching the area or forcibly picking at scabs can lead to infection or worsen scarring.
    It’s best to disinfect the area carefully and maintain cleanliness according to your medical team’s instructions.

    In burn reconstruction, the months of care after surgery often matter more than the procedure itself.
    If you’d like to track your recovery stage by stage with a medical team, you can find more information on the [Ansan Open Surgery Hospital] burn treatment homepage.
    local flap surgery recovery time - image 7


    Frequently Asked Questions

    1. When can I start disinfecting the wound and washing my face?
    You can generally take a light shower or wash your face starting the day after all sutures have been removed. Before that, avoid letting water touch the wound directly, and follow your medical team’s instructions for disinfection.

    2. Is it normal for the surgical site to feel tight or hard?

    As scar tissue matures during recovery, the skin can temporarily feel hard or tight. This is a normal part of the healing process, and it typically softens gradually over time.

    3. What warning signs should I watch for during recovery?
    If the flap turns noticeably dark red or unusually pale, or if you notice a strong odor or pain accompanied by warmth, this could indicate a circulation problem or infection, and you should seek medical attention immediately.

    4. Can I go about daily life during local flap surgery recovery time?
    In the early period after surgery, you should avoid pressure and friction on the area, but from around the 1-3 month tissue-stabilization stage, you can gradually resume daily activities under your medical team’s guidance.


    References

    · Asan Medical Center, “Tissue Reconstruction Using Flap Surgery,” Asan Medical Center Disease Encyclopedia. View source
    · Asan Medical Center, “Tissue Reconstruction Using Skin Grafts,” Asan Medical Center Disease Encyclopedia. View source
    · Korea Disease Control and Prevention Agency, “Burns,” National Health Information Portal. View source
    · Busan Ilbo, “Burn Skin Care: The 3-6 Months After Wound Healing Matter Most,” 2020. View source


    This article is intended for general health information purposes only and is not a substitute for individual diagnosis or treatment. If you have symptoms, please consult a medical professional.

  • Sebaceous Cyst Removal: 3 Reasons You Should Never Pop It Yourself

    Sebaceous Cyst Removal: 3 Reasons You Should Never Pop It Yourself

    SummaryWhy do sebaceous cysts form, and how are they different from acne? Here’s a rundown on why popping a cyst yourself is risky, the excision techniques that can help minimize scarring, the principle behind removing the cyst wall to help reduce recurrence, and the potential complications of self-extraction.

    Ever felt a bump on your face or neck,
    and pressed on it thinking it was just a pimple?

    Then had blood and pus suddenly burst out, catching you completely off guard?
    More people go through this than you’d expect.

    A cyst that isn’t removed at its root tends to fill back up over time,
    often leaving behind an even larger scar.

    Today we’re covering what causes a sebaceous cyst to form,
    and the proper way to have one removed while minimizing scarring.

    sebaceous cyst removal in Ansan

    In this article, we’ll look at what actually causes a sebaceous cyst to form and how it differs from acne,
    then walk through the excision techniques used to help reduce scarring during sebaceous cyst treatment.

    We’ll also cover the principle behind removing the cyst wall to help lower the chance of recurrence, and why self-extraction carries risk.

    sebaceous cyst - image 2

    What Is a Sebaceous Cyst?

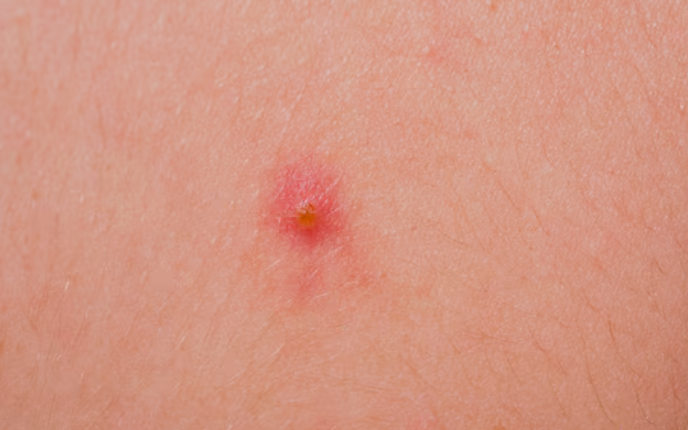
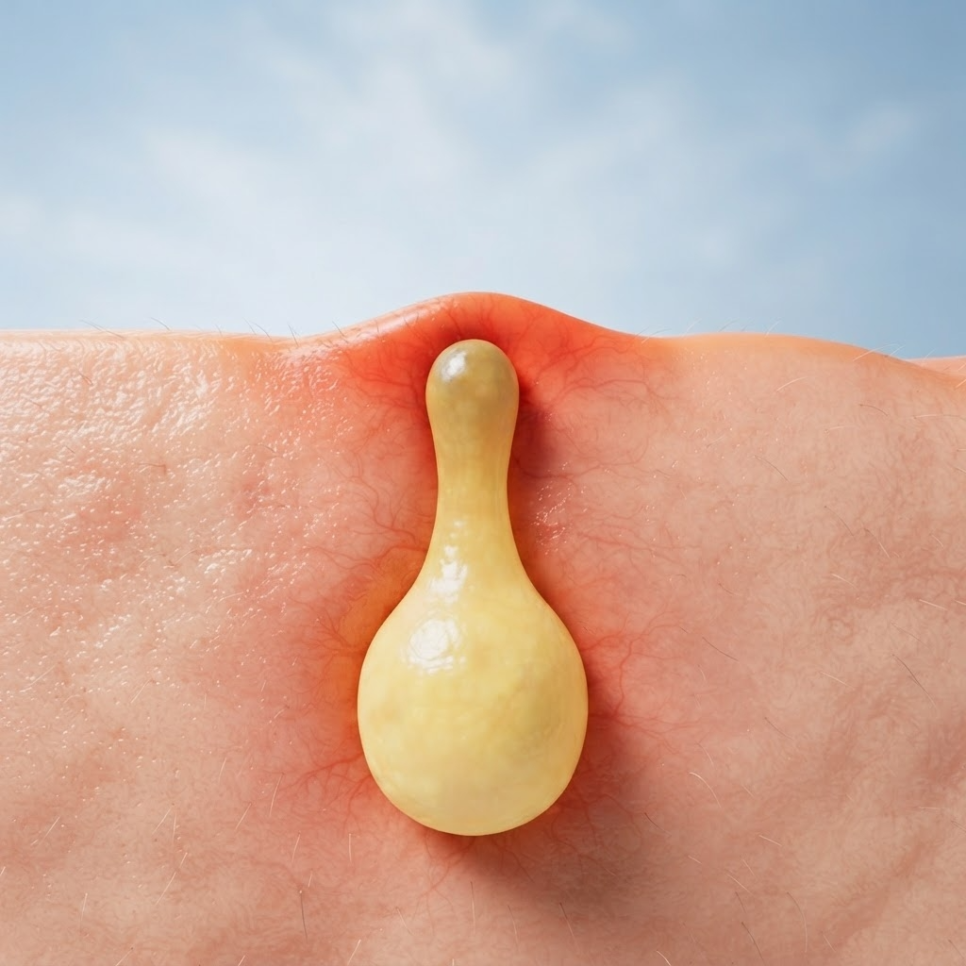
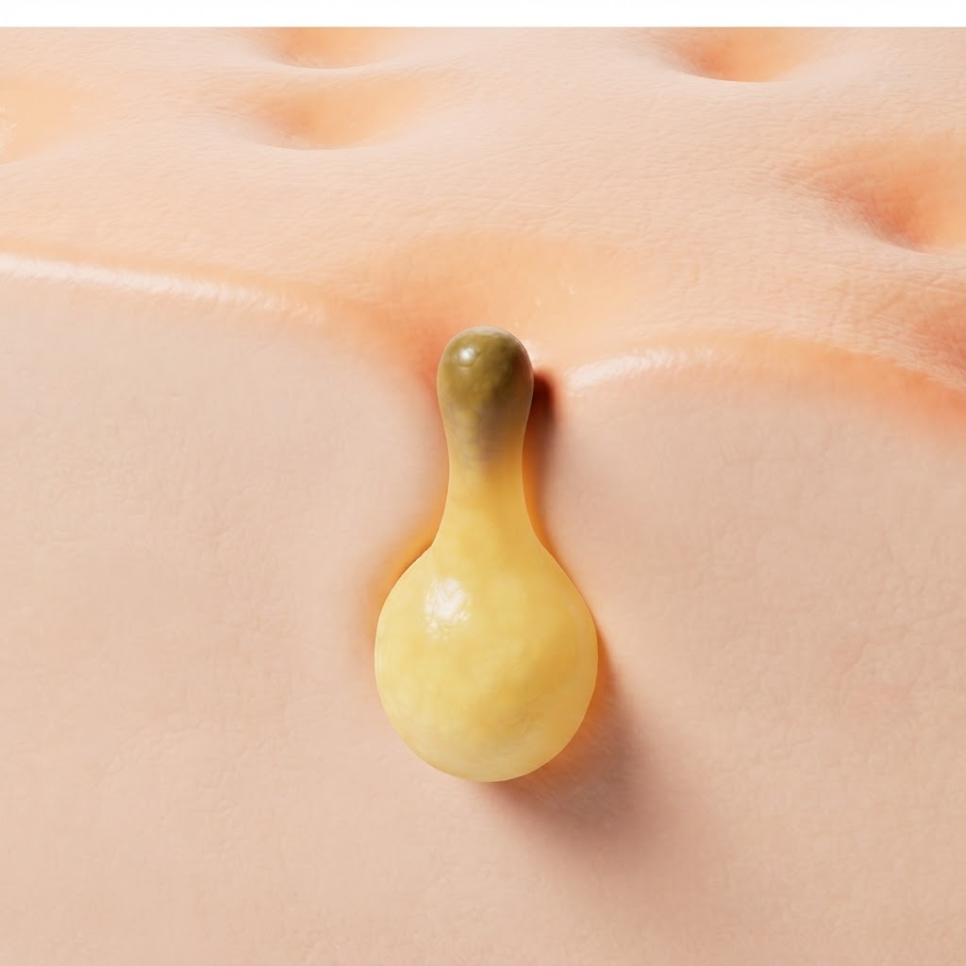
    A sebaceous cyst is a benign, sac-like growth that forms when sebum builds up beneath the skin.
    A sebaceous cyst forms when the opening of an oil gland becomes blocked, trapping sebum and dead skin cells beneath the skin instead of letting them drain normally, which creates a sac.

    As trapped sebum accumulates, it forms a larger sac under the skin,
    and because it keeps filling with more sebum, it can feel like a soft or firm lump to the touch.

    sebaceous cyst - image 3

    💡 Key Point
    Completely removing the cyst sac is generally necessary to help reduce the chance of recurrence.
    Draining only the contents tends to be a temporary fix, not a lasting solution.

    A cyst may start out feeling soft, but it can gradually become firmer over time.
    Rather than pressing on it yourself, getting an accurate diagnosis first is the safer approach.


    How Is a Sebaceous Cyst Different From Acne?

    Acne is inflammation near the top of a pore, while a sebaceous cyst is a sac that forms deep in the dermis — so the two conditions differ from the root cause up.
    Typical acne involves pus-filled inflammation near the upper part of a pore, while a sebaceous cyst involves a sac that forms deep within the dermis.

    sebaceous cyst - image 4

    sebaceous cyst - image 5

    Category Acne Sebaceous Cyst
    Location Upper pore Sac deep in the dermis
    When squeezed Only the upper portion of the oil gland drains Sebaceous material can leak from a tiny central opening
    If left untreated Scarring risk is relatively low If infected, the scarred area can expand
    📋 Acne vs. Sebaceous Cyst Checklist
    ✅ Acne: Inflammation at the pore opening; squeezing drains only the upper part of the oil gland
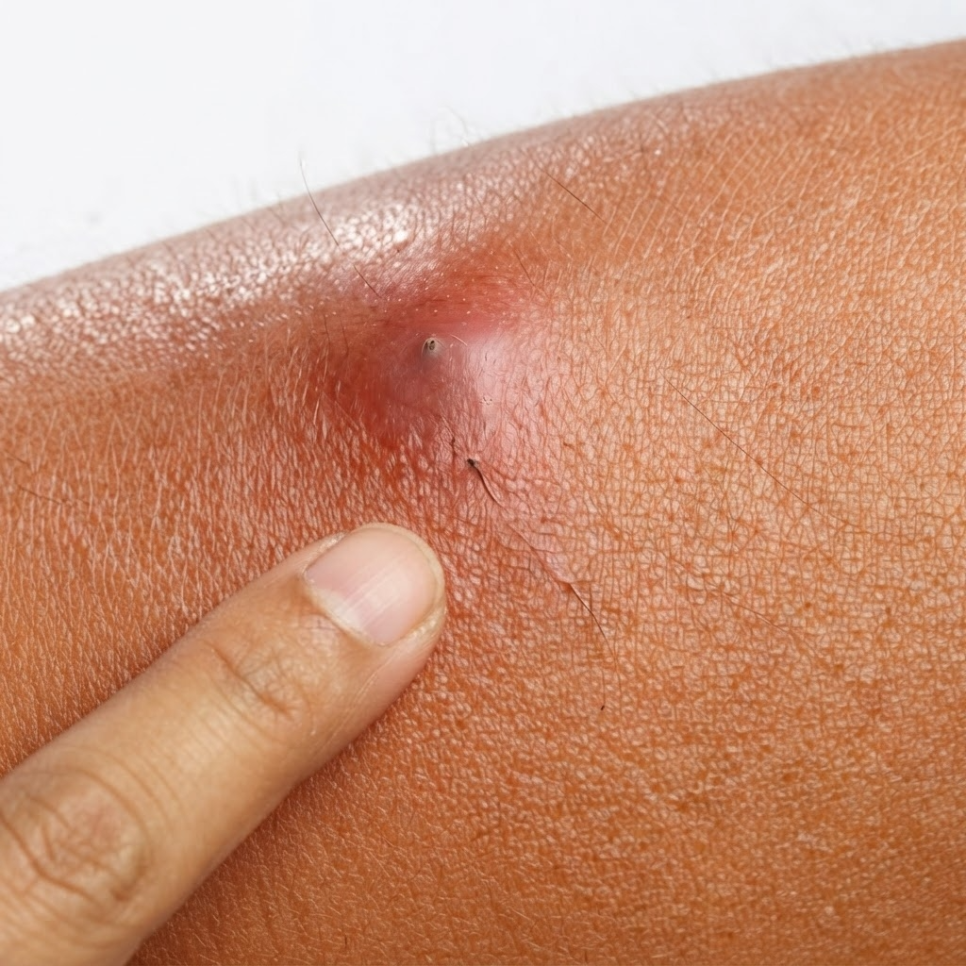
    ✅ Sebaceous cyst: A sac beneath the skin, often with a tiny visible opening at the center
    ✅ When a cyst is squeezed: Sebaceous material with a distinct odor often leaks out
    ✅ If left untreated: Bacterial infection can cause the scarred area to grow larger

    Forcing a cyst open can cause the sac to rupture and spread beneath the skin.
    This can damage surrounding tissue and trigger a stronger inflammatory response.


    What Excision Techniques Help Minimize Scarring From Sebaceous Cyst Removal?

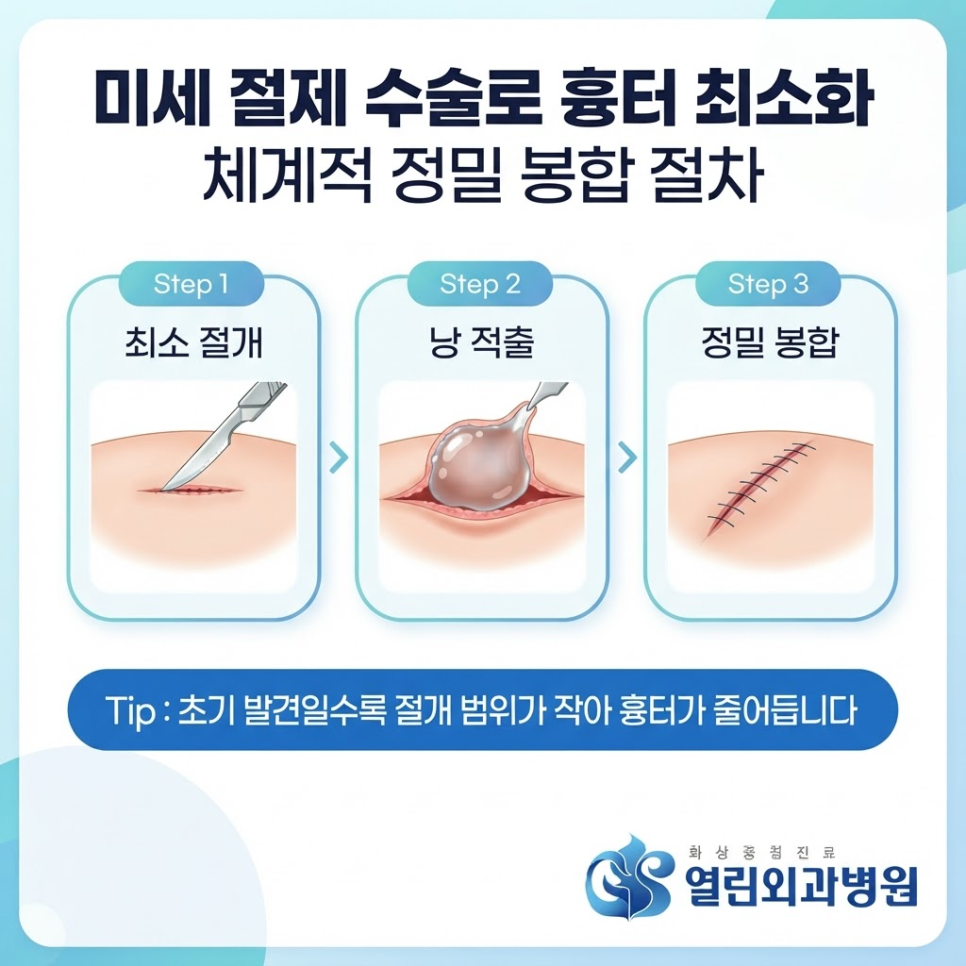
    Having a cyst removed early with minimal excision, before it grows larger, can help minimize scarring.
    On visible areas like the face or neck, concerns about a lasting mark are naturally greater.

    sebaceous cyst - image 6

    Advances in medical technique now allow the entire cyst wall to be drawn out and removed through a minimal incision — a method known as minimal excision.

    💡 Key Point
    Seeking treatment early tends to be more favorable for scar management.
    Treating a cyst before it grows larger can help keep the incision and suture marks smaller.

    sebaceous cyst - image 7

    🚀 What Surgical Treatment Can Offer
    A systematic, minimal excision approach can help limit the extent of tissue damage.
    Fine suture material can help make the resulting scar less noticeable.

    Available medical sources generally note that choosing a precise excision technique that removes the cyst completely is important for helping reduce the risk of recurrence.
    If you’re looking for a clinic in the Ansan area that offers systematic diagnosis and post-surgical care, you can find more information at Burn Care, [Ansan Yeorin Surgical Clinic] Home.


    Why Is Popping a Cyst by Hand Risky?

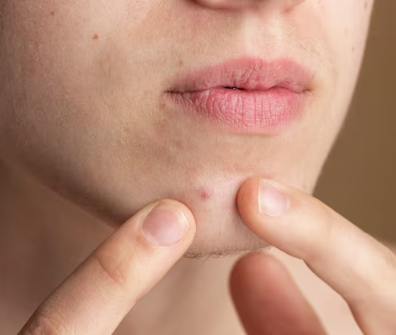
    Squeezing a cyst at home with unsanitary hands or tools carries real risk.
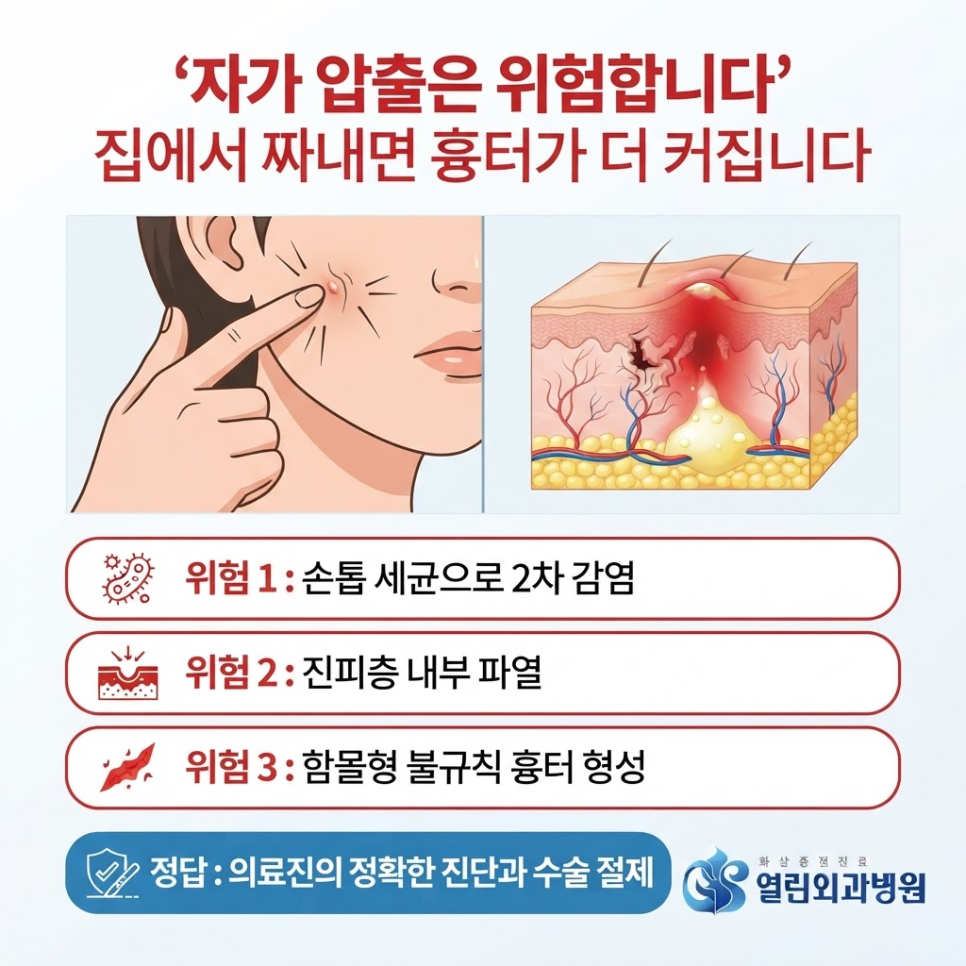
    Bacteria under the fingernails can enter through the pore and lead to a secondary infection.

    sebaceous cyst - image 8

    If the sac ruptures beneath the skin, it can leave an ulcer or a depressed scar.
    In some cases, this can result in a larger, more irregular mark than surgical treatment would.

    ⚠️ Caution
    Self-extraction can damage the dermis and lead to excessive pigmentation.
    Getting medical excision before the cyst becomes inflamed is the safer route.

    Rather than forcing extraction based on your own judgment, it’s advisable to get an accurate diagnosis from a medical professional and address the underlying cause.
    After surgery, thorough disinfection and consistent use of a healing ointment are recommended.
    Using sun protection alongside this can also help reduce the chance of pigmentation at the surgical site.


    Frequently Asked Questions

    1. Can a sebaceous cyst go away completely with medication or injections alone?
    Antibiotics or anti-inflammatory injections can temporarily ease inflammation and pain, but they don’t remove the cyst sac itself from the dermis.
    Because of this, recurrence is common, and surgical removal is generally needed to address the underlying cause.

    2. I’m concerned surgery might leave a large scar.
    Depending on the size and location of the cyst, a minimal excision technique may be an option.
    Because the sac is removed through an incision smaller than the cyst itself, followed by precise suturing, the resulting scar can often be kept relatively small.

    3. Can I shower or go about daily life right after sebaceous cyst surgery?
    Since the procedure is done under local anesthesia, many patients are able to return to daily activities the same day.
    That said, a waterproof bandage is needed to keep the suture site dry, and follow-up disinfection may be required for several days.

    4. If a cyst has ruptured and is very painful, can it be operated on right away?
    If inflammation is severe and the cyst has already ruptured, draining the area and calming the inflammation first — before removing the cyst wall — tends to be the approach that helps minimize tissue damage and scarring.

    sebaceous cyst - image 9

    sebaceous cyst - image 10


    References

    · Asan Medical Center, \”Epidermal Cyst,\” Disease Encyclopedia, Asan Medical Center. Read more
    · Seoul Times News, \”[Medical Column] Laser Minimal Excision Reduces Recurrence Compared to Cyst Extraction,\” Seoul Times News, 2025. Read more


    This article is intended for general health information purposes only and is not a substitute for individual diagnosis or treatment.
    If you’re experiencing symptoms, please consult a medical professional.

  • Appendectomy Scar Care: 3 Steps That May Help Prevent Discoloration

    Appendectomy Scar Care: 3 Steps That May Help Prevent Discoloration

    SummaryAppendectomy scar care depends heavily on how you handle the golden window right after your stitches come out. Here’s why scars can widen, the 3-step care routine by phase, and the daily habits that help prevent discoloration — all in one place.

    Even after your appendectomy stitches have fully healed,
    does the scar on your side still catch your eye every time you look?

    Two people can have the exact same surgery,
    yet one ends up with a scar that’s barely noticeable
    while the other is left with a red, thickened mark.

    That difference isn’t just about skin type —
    how you handle the days right after the stitches come out can matter too.

    When it comes to scar care,
    missing this early golden window often leads to a less-than-ideal result.

    Appendectomy scar care comes down to how you handle the golden window right after stitch removal, while your skin barrier is still rebuilding itself.

    This article walks through why these scars tend to widen, a 3-step care routine by phase, and the daily habits that help prevent discoloration.

    appendectomy scar care

    appendectomy scar care illustration 2

    Why do appendectomy scars often turn out larger than expected?

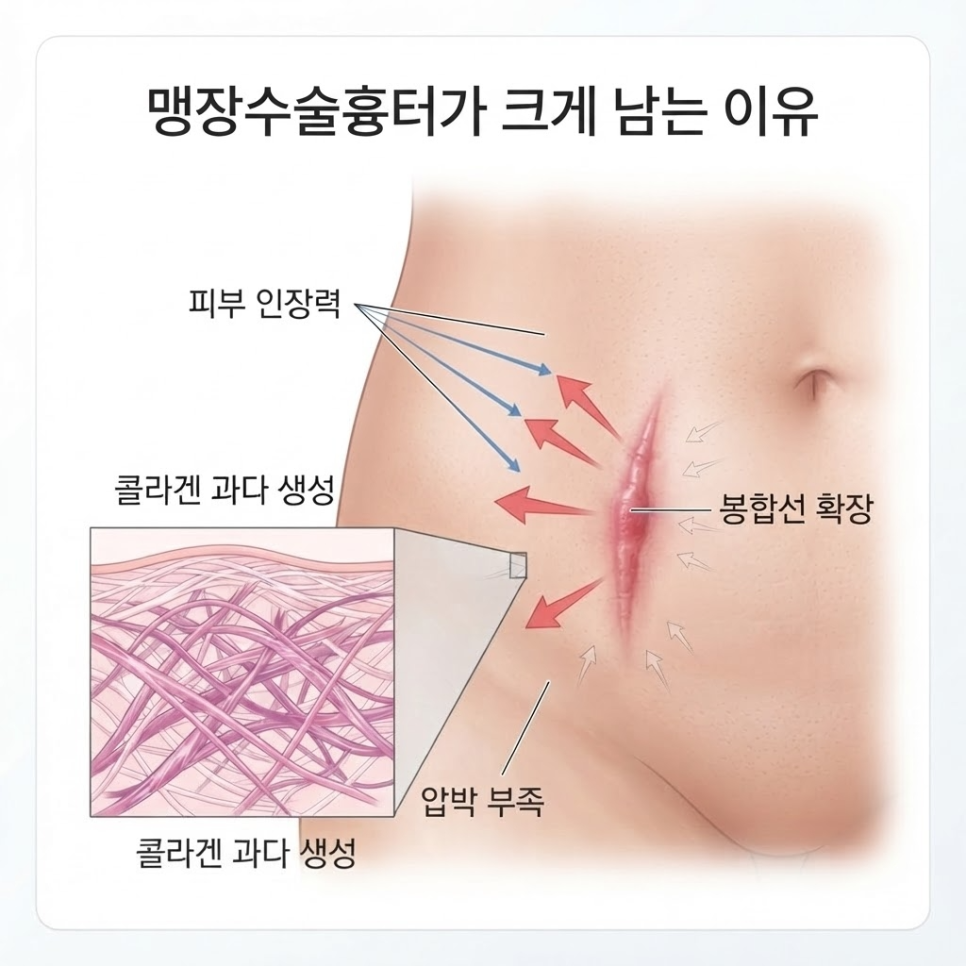
    The abdomen is an area where the skin is constantly being pulled,
    so without proper early care, a scar can end up wider than expected.

    An appendectomy scar is the natural mark left in the dermis as the incision site heals.

    Whether you had laparoscopic or open surgery, if collagen builds up excessively during healing,
    the mark can gradually thicken.

    On top of that,
    the abdomen is a spot where skin tension is especially strong,
    so frequent movement keeps pulling at the wound as it tries to close.

    appendectomy scar care illustration 3

    Without proper protection at this stage,
    the skin on either side of the incision line can stretch, widening the red mark.

    If hydration and physical support aren’t in place early on,
    the risk of the scar raising into a thicker, more visible ridge also increases.

    appendectomy scar care illustration 4

    💡 Key point
    Because the abdomen is under constant skin tension, how you care for it in the first few days after stitch removal is considered an important factor that can affect the eventual width and color of the scar.

    How should appendectomy scar care change over time?

    It can help to split recovery into three phases and adjust your care approach for each one.

    Appendectomy scar care is typically broken into three stages: right after surgery, after stitch removal, and one month and beyond.

    Phase Main Goal Care Method
    Right after surgery Prevent infection, keep the area moist Keep the wound disinfected; keep it fully waterproof
    After stitch removal Ease tension, block irritation Silicone gel products, protective tape
    One month and beyond Prevent hyperpigmentation Apply sunscreen thoroughly

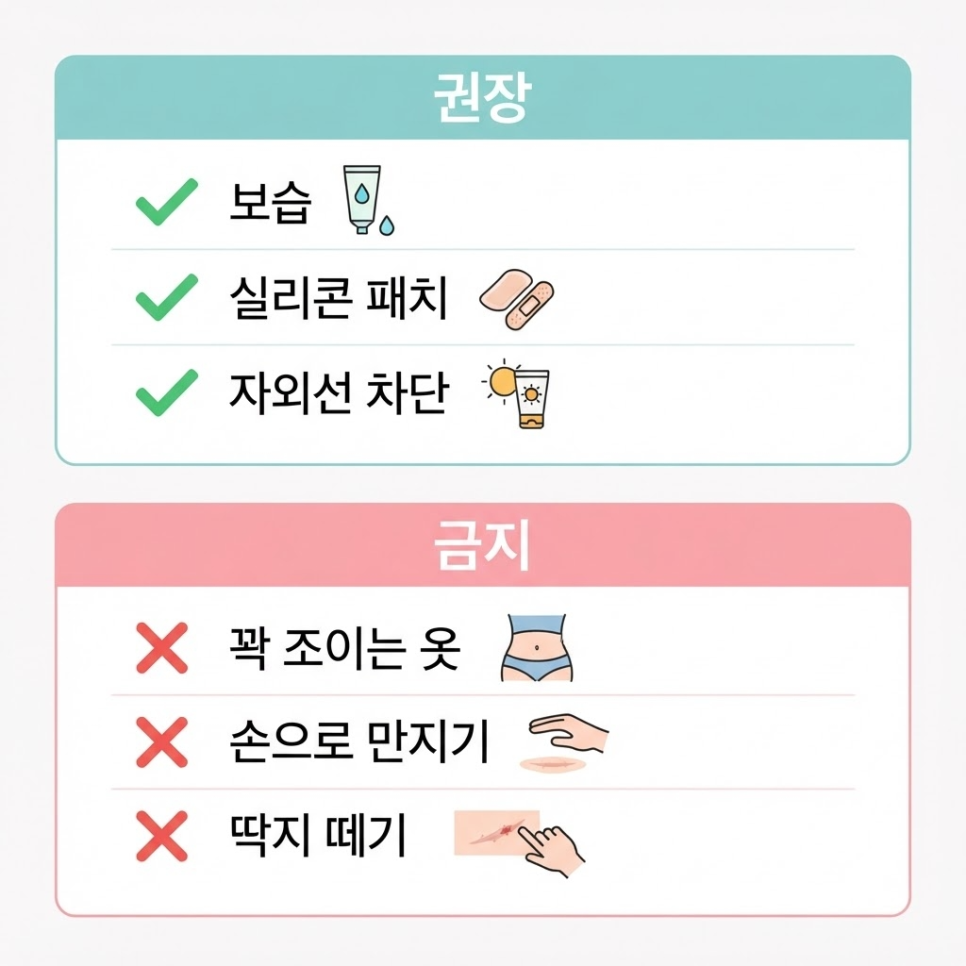
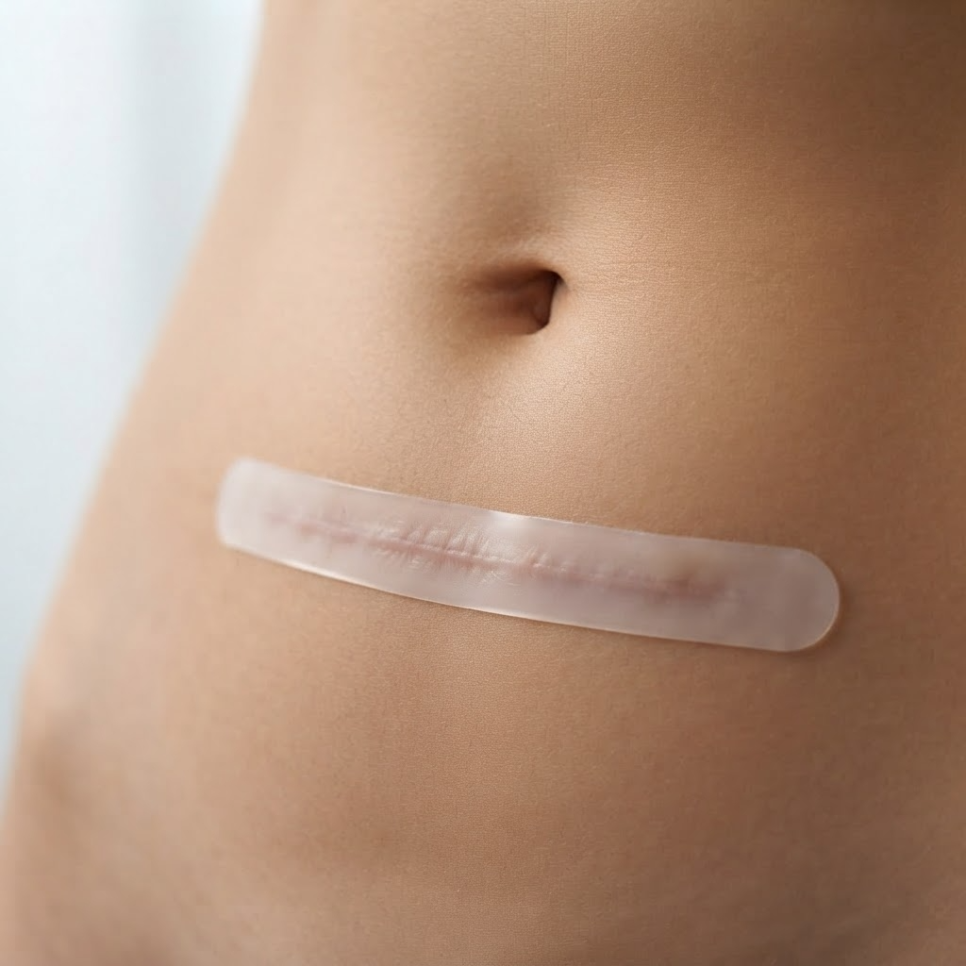
    Starting right after your stitches are removed, it helps to apply silicone-based products or protective tape
    so the area isn’t irritated.

    Irritation that reaches the dermis can lead to hyperpigmentation,
    so keeping the area consistently covered and moisturized is essential.

    appendectomy scar care illustration 5

    📋 Phase-by-phase care checklist
    ✅ Right after surgery: keep the wound disinfected; keep it fully waterproof so water doesn’t touch it directly
    ✅ After stitch removal: ease tension with silicone gel products or patches
    ✅ One month and beyond: prevent hyperpigmentation with sunscreen
    ✅ At every stage: don’t pick at scabs

    What daily habits help prevent scar discoloration?

    Even small changes to your daily habits can go a long way toward keeping a scar from darkening.

    Reducing two triggers — friction and UV exposure — can help prevent discoloration.

    Tight-waisted pants or leggings
    can speed up discoloration through constant friction, so it’s best to avoid them.

    Also,
    UV rays stimulate melanin production,
    which can turn a red mark into a darker, brownish one.

    So,
    when you’re outdoors, even if the scar is covered by clothing,
    it’s a good idea to apply a light layer of sunscreen underneath.

    appendectomy scar care illustration 6

    ⚠️ Caution
    Repeatedly touching the wound or forcibly picking at scabs can raise the risk of secondary infection and progression into a hypertrophic scar.
    💡 Key point
    Cutting down on just these two triggers — friction and UV exposure — may help slow how quickly a scar discolors.

    If, despite consistent care, a scar stays red and hard for a long time,
    self-care alone may not be enough.

    In that case, it’s safer to get an accurate diagnosis
    from a hospital that specializes in scar and burn scar treatment.

    👉 Visit the Ansan Open Surgery Hospital website, a burn treatment specialist, for more information.

    appendectomy scar care illustration 7


    Frequently Asked Questions

    1. When should I start caring for a surgical scar?
    Once the skin has fully closed, right after the stitches come out, using a dedicated silicone product can help support stable healing.

    2. Is it okay that the mark looks red and raised?
    Some temporary redness or puffiness is normal during early tissue repair, but if it keeps swelling, it needs professional evaluation and care.

    3. Can I use soap on it right away when showering?
    Once the scab has come off and the wound is fully closed, gentle rinsing with water is fine, but avoid scrubbing or any harsh friction.

    4. Which is better — ointment or a silicone patch?
    For a high-friction area like the abdomen, a silicone patch is useful because it reduces physical tension; depending on the area, combining it with an ointment can also work.

    5. If the scar becomes hard and lumpy, do I need to see a doctor?
    If it hardens or keeps growing in size, it could be progressing into a hypertrophic scar or keloid, so it’s better to see a specialist rather than rely on self-care alone.


    References

    · Seoul National University Hospital, “How to Manage Scar Treatment,” Hospital News, 2014. Read more
    · Yakup Gongnon (Pharmacist News), “All Pigmented Scars Require Both Treatment and Sun Protection,” Yakup Gongnon, 2016. Read more


    This article is intended for general health information purposes only and is not a substitute for individual diagnosis or treatment. If you have symptoms, please consult a specialist.

  • Epidermoid Cyst: 3 Reasons Not to Squeeze the Pus Yourself

    Epidermoid Cyst: 3 Reasons Not to Squeeze the Pus Yourself

    SummaryForcibly squeezing the pus out of an epidermoid cyst can rupture the cyst wall, leading to secondary infection and significant scarring. This guide covers what causes an epidermoid cyst, why you should never squeeze one yourself, how surgical excision works, and how to prevent recurrence.

    Have you ever had a lump that started giving off an odor and causing pain over a few days, decided a doctor’s visit felt like overkill, assumed it was just a pimple, and squeezed it yourself?

    In most cases, symptoms like this point to an epidermoid cyst — a small pocket that forms under the skin as dead skin cells build up.

    Even if it looks like all the yellowish pus has drained out, the firm cyst sac usually remains intact beneath the skin.

    Some people brush off a small bump on their body, squeeze it themselves, and end up with much worse swelling as a result.

    Epidermoid cyst

    Quick Preview
    · An epidermoid cyst is a benign sac that forms when dead skin cells and keratin build up beneath the skin.
    · When bacteria infect the cyst, it can fill with pus (an inflamed epidermoid cyst), causing pain and a foul odor.
    · Squeezing it yourself can rupture the sac, leading to secondary infection and scarring — the inflammation needs to settle first, then the sac itself is generally removed through surgical excision, which may help reduce the chance of recurrence.

    Epidermoid cyst illustration 2

    What Is an Epidermoid Cyst?

    An epidermoid cyst is a benign growth that forms when dead skin cells and waste material accumulate in a sac beneath the skin.

    An epidermoid cyst develops when epidermal cells become trapped beneath the skin’s surface, forming a sac that gradually fills with keratin, a protein found in skin cells.

    Skin normally goes through a constant cycle of shedding old cells and producing new ones.

    When epidermal cells become lodged beneath the skin for some reason, a sac forms at that spot and keeps filling with dead skin material.

    Epidermoid cyst illustration 3

    Over time, as the sac grows and bacteria invade it, the cyst can fill with pus, causing severe pain and a strong odor.

    This type of cyst doesn’t disappear on its own — as long as the sac wall remains, it tends to keep coming back.

    Epidermoid cyst illustration 4

    Key Point
    Why does it keep coming back? Even after the contents are squeezed out, if the sac wall (the cyst membrane) itself remains, it will refill with dead skin cells and keratin and grow larger again.

    What Are the Risks of Squeezing an Epidermoid Cyst Yourself?

    Squeezing the pus out of an epidermoid cyst by hand carries a high risk of secondary infection and scarring.

    Many people have mistaken it for a simple pimple, squeezed it hard, and watched it swell up almost immediately.

    Even though yellowish pus appears to drain out, the firm cyst sac usually remains intact beneath the skin.

    Epidermoid cyst illustration 5

    Strong pressure from squeezing can rupture the sac, pushing the waste material deep into the surrounding skin tissue.

    This can cause inflammation to spread rapidly, leaving nearby skin red and swollen, with worsening pain.

    The result is often a longer treatment period due to secondary infection, and even after healing, noticeable scarring can remain.

    According to sources such as Hidoc, cysts that form on the face are sometimes mistaken for acne and squeezed by hand, which can make the inflammation worse.

    Checklist
    ✅ Check whether the area around the lump is red and feels warm to the touch
    ✅ Press gently to see if there’s a sharp pain along with pus or discharge
    ✅ Watch for the lump growing larger or developing an odor
    ✅ Never try to force it open with your fingernails or a needle

    Epidermoid cyst illustration 6

    Caution
    Even if the lump temporarily shrinks after being squeezed, it can grow back over time if the sac remains. Don’t simply apply ointment on your own and leave it — keep monitoring your symptoms and seek care if they persist.

    How Is an Epidermoid Cyst Treated?

    The definitive treatment for this type of cyst is surgical excision, which removes the entire sac.

    If the cyst is already full of pus and severely inflamed, surgery right away may not be possible.

    In these cases, doctors typically start with antibiotics or partial drainage to calm the inflammation and reduce the pus first.

    Epidermoid cyst illustration 7

    Once the inflammation has settled sufficiently, the cyst wall and sac are cleanly excised.

    Some people put off surgery out of concern about scarring.

    However, having the cyst cleanly removed early on may help minimize scarring and lower the chance of recurrence.

    Stage Treatment
    Stage 1: Managing inflammation Antibiotics and partial drainage to relieve pain and reduce pus
    Stage 2: Surgical excision Complete removal of the cyst wall and sac under local anesthesia
    What to Expect After Surgery
    With proper medical guidance to control inflammation and fully remove the sac, patients may see a lower chance of recurrence and clearer-looking skin over time.

    If you’re concerned about skin issues like an epidermoid cyst or about scar management, you can find more information on the home page of Ansan Yeollin Surgery Hospital, which also provides burn treatment information.


    Frequently Asked Questions

    1. Can an epidermoid cyst rupture and disappear on its own?
    It may shrink temporarily as pus or discharge drains out, but in most cases the sac remains and the cyst grows back.

    2. Is surgical excision painful?
    The procedure is performed under local anesthesia, so patients generally feel relatively little pain during surgery.

    3. Is there a way to prevent epidermoid cysts?
    Keeping the skin clean and regularly managing dead skin buildup so pores stay clear can help.

    4. If an epidermoid cyst fills with pus, can it be treated with surgery right away?
    When inflammation is severe, immediate surgery is usually difficult. It’s common to first calm the inflammation with antibiotics before performing excision.


    References

    · Hidoc, “[Health Talk] A Lump on the Skin, the ‘Epidermoid Cyst’ — Is It Okay to Squeeze It Yourself?,” Hidoc, 2022. View source
    · Medical Today, “Removing an Epidermoid Cyst: How to Treat It Without Recurrence?,” Medical Today, 2025. View source


    This article is intended to provide general health information and is not a substitute for individual diagnosis or treatment. If you’re experiencing symptoms, please consult a physician.