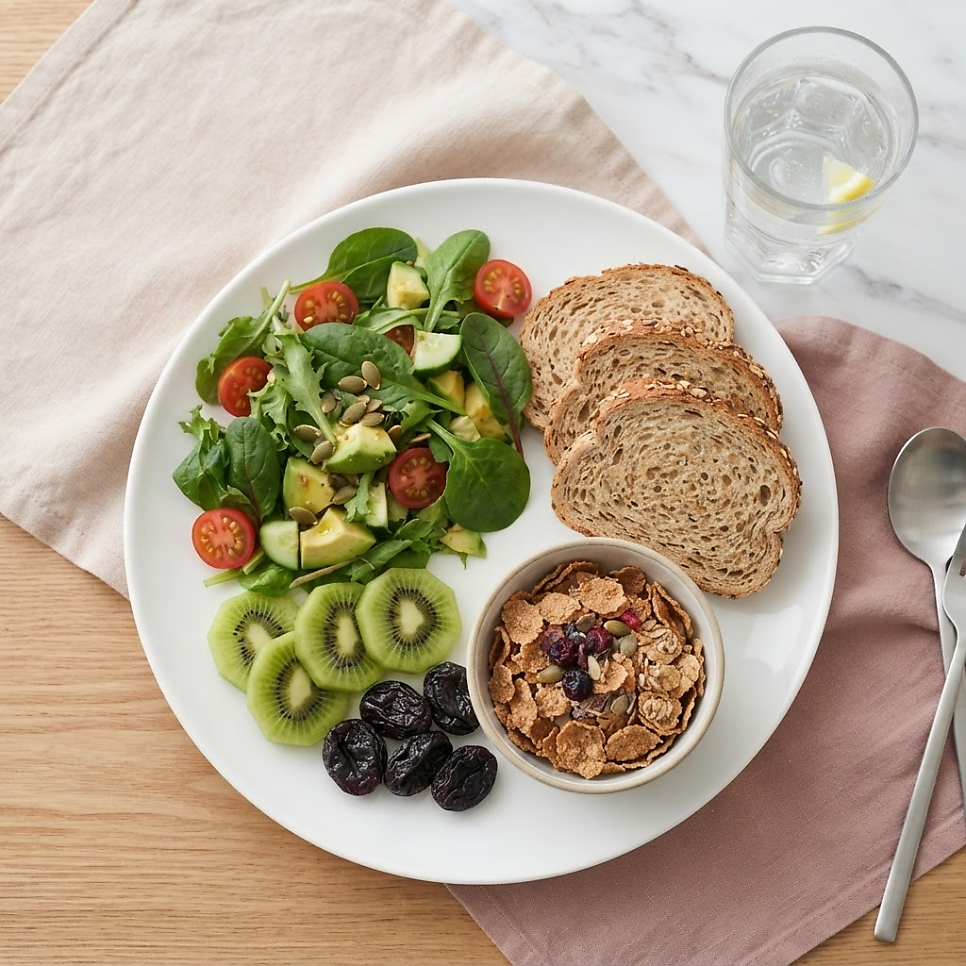
Category: Uncategorized

  • Endoscopy in Your 20s: 4 Fasting Rules Before Your Exam

    Endoscopy in Your 20s: 4 Fasting Rules Before Your Exam

    SummaryThink you’re too young in your 20s for an endoscopy? This guide covers why an upper endoscopy in your 20s matters, how it differs from a colonoscopy, how to choose between sedation and non-sedation options, and the fasting rules and precautions you need to know before the exam.

    It’s easy to assume you’re too young to worry about an endoscopy.

    Many people in their 20s brush off stomach discomfort as simple stress.

    But a 2014 National Health Insurance Service survey found that gastritis cases among people in their 20s were increasing by an average of 4.4% per year.

    Spicy delivery food and irregular eating habits are taking a toll on young adults’ digestive health.

    endoscopy in your 20s

    Article Preview
    An upper endoscopy in your 20s can be a helpful preventive step for protecting young adults’ digestive health.
    This article walks through the differences between an upper endoscopy and a colonoscopy, the features of sedation versus non-sedation options, and the fasting rules to follow before your exam.
    endoscopy in your 20s related image 2

    Should You Get an Upper Endoscopy in Your 20s?

    Yes — if you’re in your 20s and have chronic indigestion or a family history of stomach disease, it’s safer to get checked.

    An upper endoscopy in your 20s is a detailed exam designed to catch conditions like gastritis, ulcers, and polyps early, before they progress.

    The national health screening program covers stomach cancer screening from ages 40 to 74, but if you have symptoms, an exam is worth considering regardless of age.

    endoscopy in your 20s related image 3

    Habits like spicy delivery food, frequent late-night eating, and irregular meal times are considered major contributors to rising digestive disease among young adults.

    According to a 2014 survey by the National Health Insurance Service and the Kyunghyang Shinmun, gastritis cases among people in their 20s rose by an average of 4.4% per year, and women in their 20s were affected 2.2 times more often than men.

    If you frequently experience heartburn or chronic indigestion, it’s safer to get checked sooner rather than later.

    Key Points
    · Even without symptoms, regular endoscopy screening is recommended starting in your 20s if you have a family history of gastrointestinal disease.
    · Since people in their 20s aren’t covered under the national screening program, this exam can be done as an additional, self-pay (non-covered) test.

    How Is an Upper Endoscopy Different From a Colonoscopy?

    The two exams differ completely in what they examine and how you prepare.

    An upper endoscopy examines the esophagus, stomach, and duodenum, while a colonoscopy examines the entire colon and rectum.

    Because the exams serve different purposes, the preparation process differs as well.
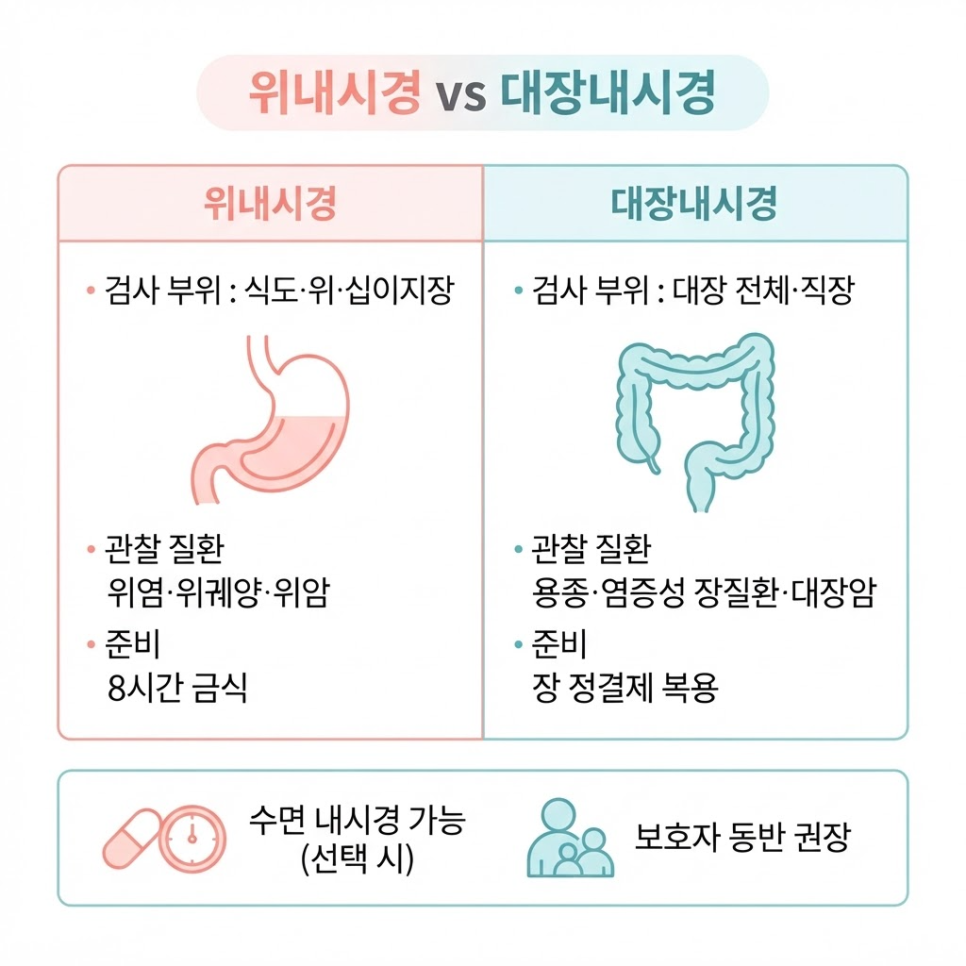
    endoscopy in your 20s related image 4

    Category Upper Endoscopy Colonoscopy
    Area Examined Esophagus, stomach, duodenum Entire colon and rectum
    Conditions Detected Gastritis, stomach ulcers, reflux esophagitis Colon polyps, inflammatory bowel disease
    Preparation Fasting for 8+ hours Bowel prep solution, dietary adjustments

    If you choose the sedation option, you’ll be given a sedative.

    It’s safer to bring someone with you on the day of the exam, and you should avoid driving or making important decisions afterward.

    If you feel dizzy or have a headache after the exam, it’s best to rest until it passes.
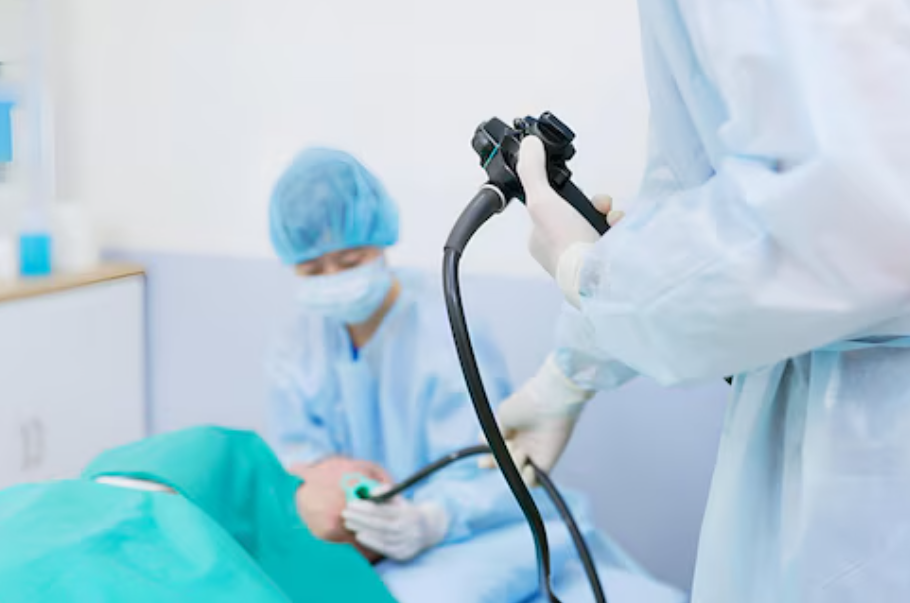
    endoscopy in your 20s related image 5

    Caution
    If you’re taking aspirin or blood thinners, be sure to discuss whether to stop them with your prescribing doctor before the exam.

    How Should You Fast Before an Endoscopy?

    Following the preparation rules closely is key to getting accurate exam results.

    If you don’t follow the rules, your exam may need to be rescheduled or its accuracy may suffer.
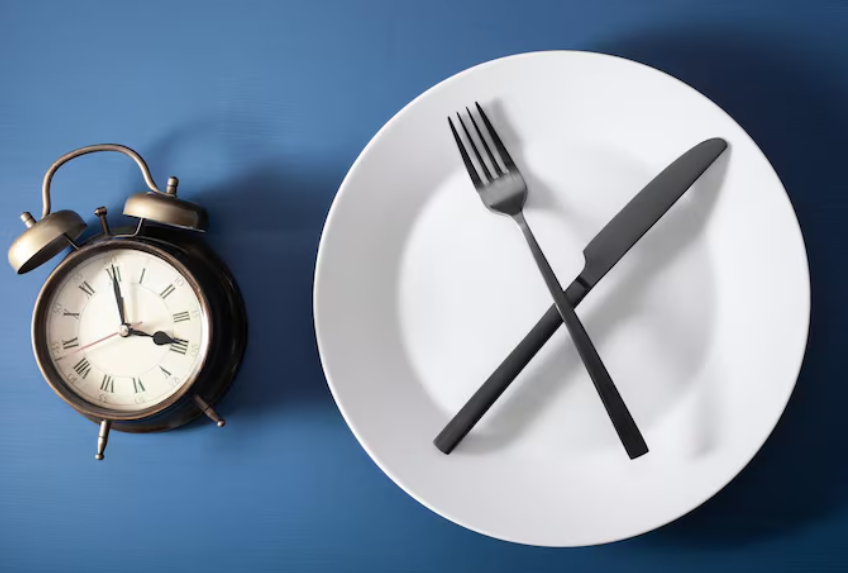
    endoscopy in your 20s related image 6

    Checklist
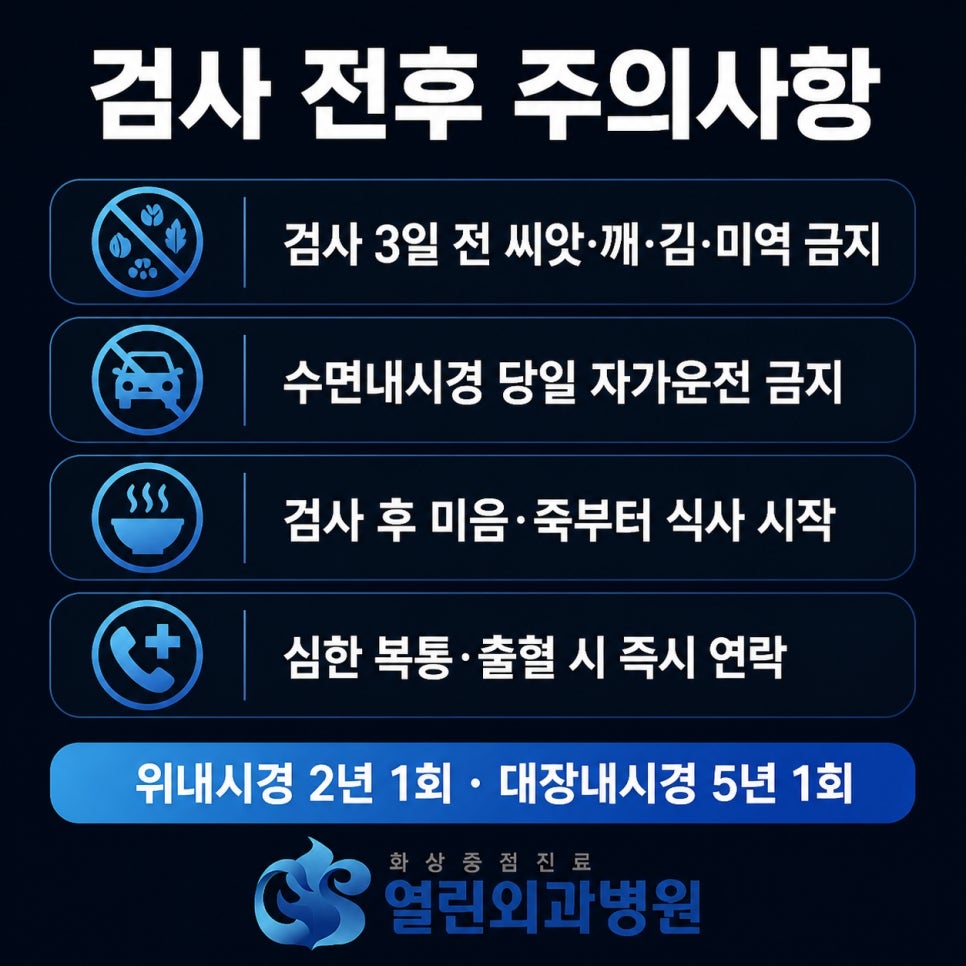
    ✅ Stop eating after 8 p.m. the night before the exam
    ✅ Discuss any medications you’re taking with your doctor beforehand
    ✅ For a colonoscopy, avoid fruit with seeds and multigrain rice starting 3 days before
    ✅ Avoid all water, coffee, and other beverages on the day of the exam

    endoscopy in your 20s related image 7

    Smoking on the day of the exam can stimulate stomach acid production and interfere with the procedure, so avoid it.

    Following these small precautions is the first step toward a safe exam.

    Key Points
    · For an upper endoscopy, fast for at least 8 hours before the exam; for a colonoscopy, follow the fasting schedule tied to your bowel prep solution.
    · If you choose sedation, avoid driving yourself on the day of the exam.
    Result
    Following the fasting and medication guidelines helps keep your digestive tract clear, which can support the detection of polyps or early-stage lesions.

    endoscopy in your 20s related image 8

    Being young doesn’t automatically mean perfect health.

    While your body still recovers quickly, it’s worth listening to the signals it sends and staying ahead with regular checkups.

    Talking with a trusted medical team is the first step, and you can find more hospital information at Burn Treatment Information, [Ansan Open Surgery Hospital] Home.

    Frequently Asked Questions

    1. Should people in their 20s get an upper endoscopy?
    The national health screening program covers stomach cancer screening starting at age 40, but if you’re in your 20s and have persistent heartburn, indigestion, or a family history, an exam is recommended.

    2. Which is better, sedation or non-sedation endoscopy?
    Non-sedation lets you return to your daily routine right after the exam, while sedation reduces gagging and discomfort for a more comfortable experience. You can choose based on your personal preference and condition.

    3. Can I drink water on the day of the exam?
    You should avoid water before an upper endoscopy too. Any water remaining in your stomach can obscure the view and make an accurate diagnosis harder, so complete fasting is necessary.

    4. When should I take the bowel prep solution before a colonoscopy?
    It’s typically taken in divided doses at times specified the day before the exam. Follow your hospital’s specific instructions on timing and method.

    5. Can I eat right after the exam?
    If a biopsy or polyp removal was performed, it’s safer to fast for the period your medical team advises, or start with easily digestible foods.


    References

    · Sisa Journal, “Stomach Cancer Screening Guidelines Change After 10 Years: Ages 40-74 Advised to Get an Upper Endoscopy Every 2 Years,” Sisa Journal, 2026. Read more
    · Kyunghyang Shinmun, “Gastritis: Women in Their 20s Affected 2.2 Times More Than Men,” Kyunghyang Shinmun, 2014. Read more


    This article is for general health information purposes only and is not a substitute for individual diagnosis or treatment. If you have symptoms, please consult a medical professional.
  • Ansan Proctology Clinic: 3 Signs of a Trustworthy One

    Ansan Proctology Clinic: 3 Signs of a Trustworthy One

    SummaryIf you’re considering an Ansan proctology clinic, start with the diagnostic criteria. This guide covers how to tell hemorrhoids, anal fissures, and fistulas apart, when conservative treatment versus surgery is appropriate, and the aftercare steps that help prevent recurrence — key points to consider when choosing an Ansan proctology clinic. Delaying treatment tends to make recovery take longer.

    A stinging sensation or a bit of blood doesn’t automatically mean
    you need to head straight into surgery.

    In the early stages, medication and lifestyle changes alone
    can often bring real improvement.

    The real problem is hesitating.
    The longer you put off a decision, the longer treatment tends to take.

    If you’re looking into an Ansan proctology clinic,
    let’s start with the criteria that separate surgical cases from conservative treatment.

    This article breaks down the criteria that confuse people looking for an Ansan proctology clinic.
    You’ll find what to look for in a trustworthy Ansan proctology clinic, how to tell hemorrhoids, fissures, and fistulas apart,
    and the aftercare steps that help prevent recurrence — all in one place.

    Ansan proctology clinic

    Does Anal Pain Always Require Surgery?

    No.
    Depending on how severe the symptoms are, medication or lifestyle adjustments alone can lead to significant improvement.

    Anal disease is an umbrella term for conditions like hemorrhoids, anal fissures, and anal fistulas that affect the anal canal and surrounding tissue.

    Because the cause and stage differ from patient to patient,
    it’s difficult to self-diagnose based on symptoms alone.

    ⚠️ Caution
    The longer you delay diagnosis, the longer treatment tends to take — and in some cases, symptoms worsen to the point where surgery becomes necessary.

    How Do Hemorrhoids, Anal Fissures, and Anal Fistulas Differ?

    These three conditions have entirely different causes and symptom patterns.
    Identifying which one matches your symptoms is the first step toward treatment.

    Ansan proctology clinic related image 3

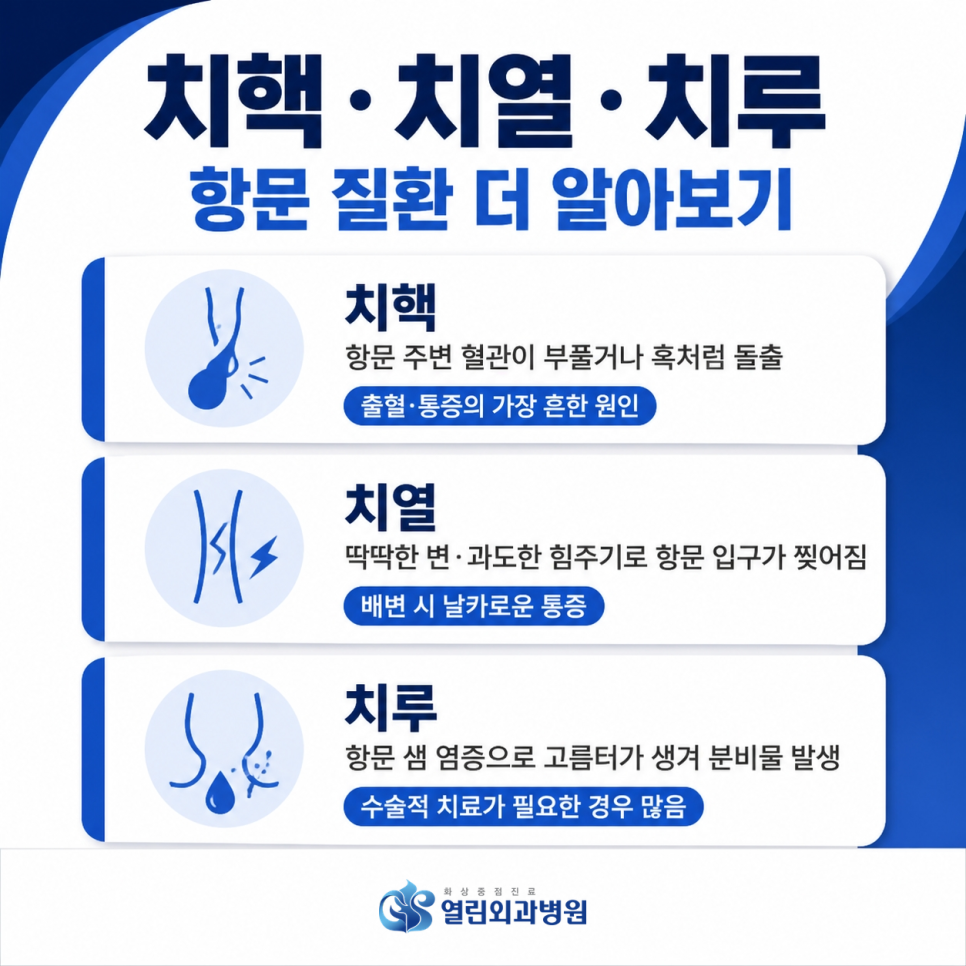
    Condition Main Symptoms Characteristics
    Hemorrhoids Painless bleeding, tissue protruding from the anus A common anal condition
    Anal fissure Sharp pain during bowel movements, bright red bleeding Often caused by hard stool or excessive straining
    Anal fistula Pus-like discharge, recurring inflammation Usually requires surgical treatment

    Ansan proctology clinic related image 4


    What Criteria Matter Most When Choosing an Ansan Proctology Clinic?

    A trustworthy Ansan proctology clinic is one with clinically experienced doctors and precise diagnostic equipment working together.

    Because the cause and stage of each condition vary from patient to patient,
    a one-size-fits-all approach falls short of what a reliable Ansan proctology clinic should offer.

    Ansan proctology clinic related image 2

    💡 Key Point
    Check whether the clinic appropriately distinguishes between non-surgical conservative treatment and surgical treatment based on the stage of the condition.

    Second, check whether the clinic has the medical equipment needed for precise examinations.

    Only by closely assessing internal conditions that aren’t visible to the eye
    can diagnostic accuracy be improved and the risk of misdiagnosis reduced.


    What Diagnostic System Is Needed for an Accurate Diagnosis?

    A clinic with an accurate diagnostic system is one equipped with precision ultrasound and similar equipment, and one that offers a tailored treatment plan without unnecessary procedures.

    Ansan proctology clinic related image 5

    What worries people most when looking for an Ansan proctology clinic
    is the pain and burden associated with surgery.

    But surgery isn’t necessary in every case.
    In the early stages, medication or lifestyle changes can often provide sufficient relief.

    So rather than defaulting to surgery,
    look for a clinic that accurately identifies the cause and lays out a step-by-step treatment plan.

    Ansan proctology clinic related image 6

    📋 Checklist
    ✅ Has precision ultrasound and other diagnostic equipment
    ✅ Offers a tailored treatment plan without unnecessary procedures
    ✅ Runs a pain management program for surgical cases
    ✅ Has systems in place to protect patient privacy and personal information

    Once you’ve gone through this checklist,
    remember: the longer you hesitate, the longer treatment tends to take.


    What Aftercare Helps Prevent Recurrence After Treatment?

    A private, comfortable care environment paired with clear aftercare guidance may help support recurrence prevention.

    Since this involves a sensitive area of the body, it’s also worth checking
    whether consultations take place in a private, separate space.

    Ansan proctology clinic related image 7

    Everyday care — like proper sitz bath technique and getting enough dietary fiber —
    needs to go hand in hand with treatment to help prevent recurrence.

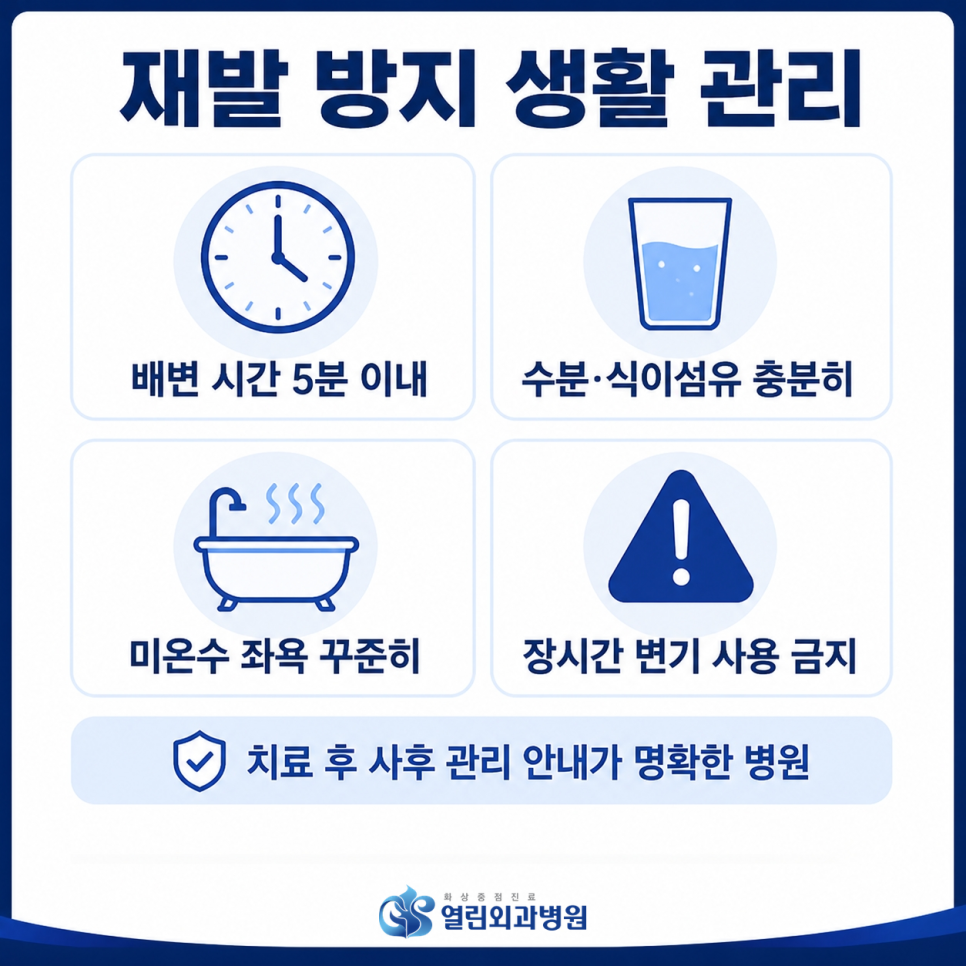
    In fact, research suggests that simply keeping bowel movements under 5 minutes
    can help lower the risk of anal disease.
    Putting the phone down while on the toilet
    is also known to help improve bowel habits.

    🚀 Benefits of Proper Care
    Combining a systematic diagnosis with good lifestyle habits may help lower the chance of recurrence and support a smoother return to daily life.

    Ansan proctology clinic related image 8

    If you’re also curious about other surgical conditions beyond anal disease,
    take a look at the link below as well.
    Burn treatment information — [Ansan Open Surgery Clinic] Home

    We encourage you to use accurate information to find the right medical facility
    and take the steps needed to recover.

    A little attention and courage now can make a real difference in your quality of life.

    Ansan proctology clinic related image 9

    Ansan proctology clinic related image 10

    Ansan proctology clinic related image 11

    Ansan proctology clinic related image 12

    Ansan proctology clinic related image 13


    Frequently Asked Questions

    1. Does anal pain always mean I need surgery?
    Not necessarily. Depending on the severity and type of condition, conservative treatments like medication, sitz baths, and dietary changes can be tried first. An exact diagnosis requires a proper exam.

    2. What lifestyle habits help prevent anal disease?
    Keeping bowel movements under 5 minutes and getting enough water and dietary fiber can help. It’s also best to avoid sitting on the toilet for long periods or using your phone while on the toilet.

    3. What’s the most effective way to do a sitz bath?
    Soaking in warm water around 38°C (100°F) for about 3 to 5 minutes is generally recommended. Doing this after bowel movements and before bed can help with circulation.

    4. Can I go about my day right after the exam?
    Basic exams and ultrasound testing usually don’t disrupt daily life much, so it’s often possible to return to work or go about your day the same day.


    References

    · Asan Medical Center, \”Hemorrhoids,\” Disease Encyclopedia, Asan Medical Center Health Information. View source
    · Seoul National University Health Care Center, \”Don’t Ignore Pain Around the Anus: Hemorrhoids, Anal Fissures, and Anal Fistulas.\” View source
    · Hidoc, \”Using Your Phone on the Toilet for Over 5 Minutes Raises Hemorrhoid Risk by 46%,\” Latest Research, 2026. View source


    This article is intended for general health information purposes only and is not a substitute for individual diagnosis or treatment. If you have symptoms, please consult a medical professional.
  • Appendectomy Scar Care: 3 Steps That May Help Prevent Discoloration

    Appendectomy Scar Care: 3 Steps That May Help Prevent Discoloration

    SummaryAppendectomy scar care depends heavily on how you handle the golden window right after your stitches come out. Here’s why scars can widen, the 3-step care routine by phase, and the daily habits that help prevent discoloration — all in one place.

    Even after your appendectomy stitches have fully healed,
    does the scar on your side still catch your eye every time you look?

    Two people can have the exact same surgery,
    yet one ends up with a scar that’s barely noticeable
    while the other is left with a red, thickened mark.

    That difference isn’t just about skin type —
    how you handle the days right after the stitches come out can matter too.

    When it comes to scar care,
    missing this early golden window often leads to a less-than-ideal result.

    Appendectomy scar care comes down to how you handle the golden window right after stitch removal, while your skin barrier is still rebuilding itself.

    This article walks through why these scars tend to widen, a 3-step care routine by phase, and the daily habits that help prevent discoloration.

    appendectomy scar care

    appendectomy scar care illustration 2

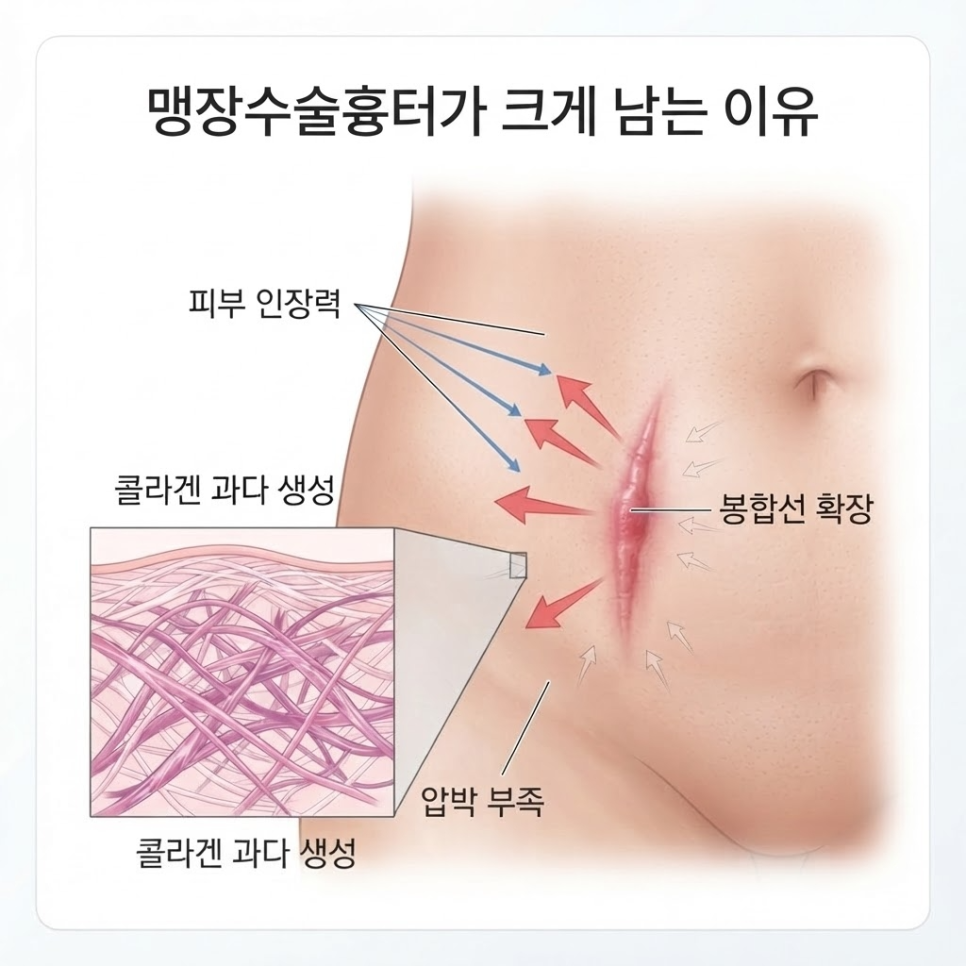
    Why do appendectomy scars often turn out larger than expected?

    The abdomen is an area where the skin is constantly being pulled,
    so without proper early care, a scar can end up wider than expected.

    An appendectomy scar is the natural mark left in the dermis as the incision site heals.

    Whether you had laparoscopic or open surgery, if collagen builds up excessively during healing,
    the mark can gradually thicken.

    On top of that,
    the abdomen is a spot where skin tension is especially strong,
    so frequent movement keeps pulling at the wound as it tries to close.

    appendectomy scar care illustration 3

    Without proper protection at this stage,
    the skin on either side of the incision line can stretch, widening the red mark.

    If hydration and physical support aren’t in place early on,
    the risk of the scar raising into a thicker, more visible ridge also increases.

    appendectomy scar care illustration 4

    💡 Key point
    Because the abdomen is under constant skin tension, how you care for it in the first few days after stitch removal is considered an important factor that can affect the eventual width and color of the scar.

    How should appendectomy scar care change over time?

    It can help to split recovery into three phases and adjust your care approach for each one.

    Appendectomy scar care is typically broken into three stages: right after surgery, after stitch removal, and one month and beyond.

    Phase Main Goal Care Method
    Right after surgery Prevent infection, keep the area moist Keep the wound disinfected; keep it fully waterproof
    After stitch removal Ease tension, block irritation Silicone gel products, protective tape
    One month and beyond Prevent hyperpigmentation Apply sunscreen thoroughly

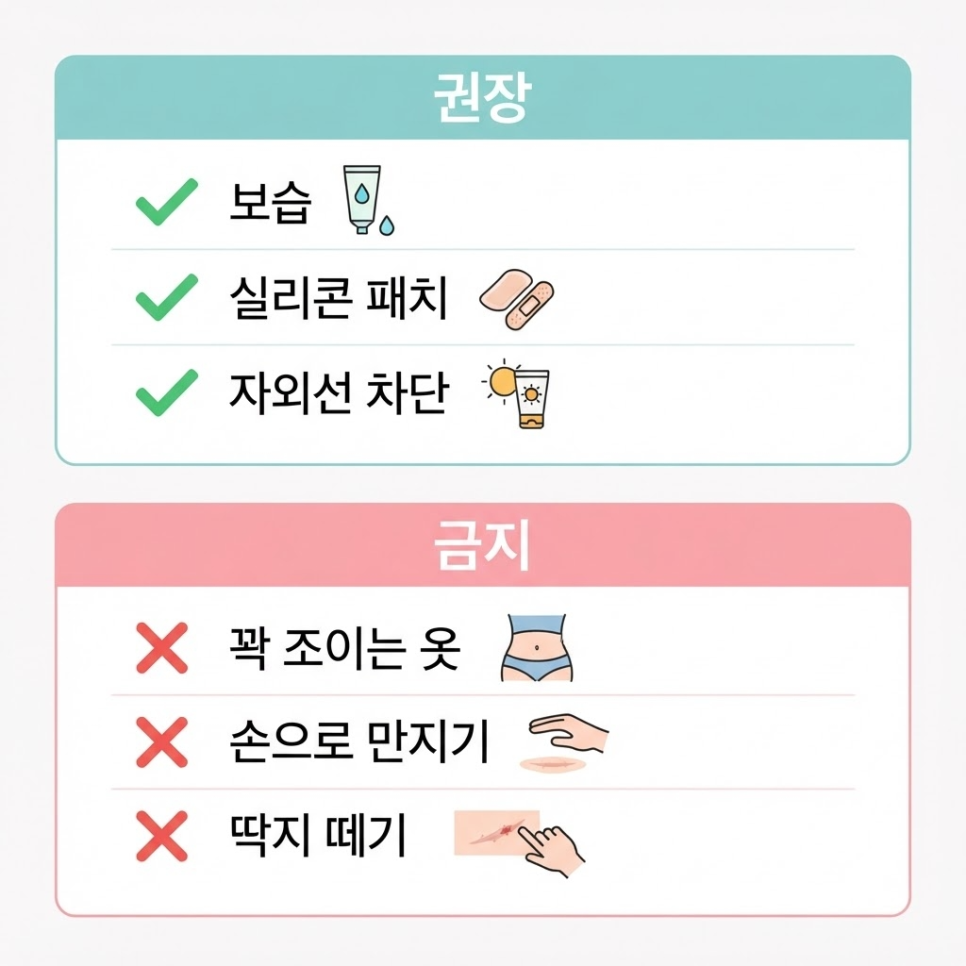
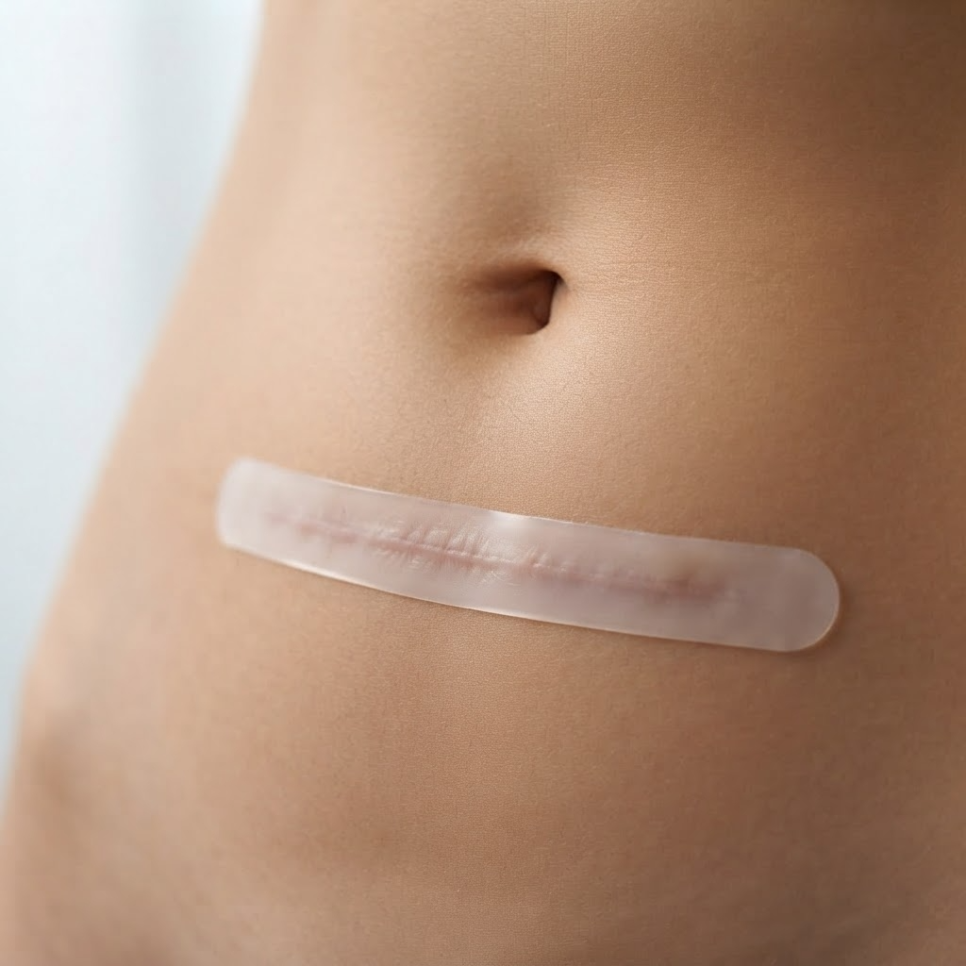
    Starting right after your stitches are removed, it helps to apply silicone-based products or protective tape
    so the area isn’t irritated.

    Irritation that reaches the dermis can lead to hyperpigmentation,
    so keeping the area consistently covered and moisturized is essential.

    appendectomy scar care illustration 5

    📋 Phase-by-phase care checklist
    ✅ Right after surgery: keep the wound disinfected; keep it fully waterproof so water doesn’t touch it directly
    ✅ After stitch removal: ease tension with silicone gel products or patches
    ✅ One month and beyond: prevent hyperpigmentation with sunscreen
    ✅ At every stage: don’t pick at scabs

    What daily habits help prevent scar discoloration?

    Even small changes to your daily habits can go a long way toward keeping a scar from darkening.

    Reducing two triggers — friction and UV exposure — can help prevent discoloration.

    Tight-waisted pants or leggings
    can speed up discoloration through constant friction, so it’s best to avoid them.

    Also,
    UV rays stimulate melanin production,
    which can turn a red mark into a darker, brownish one.

    So,
    when you’re outdoors, even if the scar is covered by clothing,
    it’s a good idea to apply a light layer of sunscreen underneath.

    appendectomy scar care illustration 6

    ⚠️ Caution
    Repeatedly touching the wound or forcibly picking at scabs can raise the risk of secondary infection and progression into a hypertrophic scar.
    💡 Key point
    Cutting down on just these two triggers — friction and UV exposure — may help slow how quickly a scar discolors.

    If, despite consistent care, a scar stays red and hard for a long time,
    self-care alone may not be enough.

    In that case, it’s safer to get an accurate diagnosis
    from a hospital that specializes in scar and burn scar treatment.

    👉 Visit the Ansan Open Surgery Hospital website, a burn treatment specialist, for more information.

    appendectomy scar care illustration 7


    Frequently Asked Questions

    1. When should I start caring for a surgical scar?
    Once the skin has fully closed, right after the stitches come out, using a dedicated silicone product can help support stable healing.

    2. Is it okay that the mark looks red and raised?
    Some temporary redness or puffiness is normal during early tissue repair, but if it keeps swelling, it needs professional evaluation and care.

    3. Can I use soap on it right away when showering?
    Once the scab has come off and the wound is fully closed, gentle rinsing with water is fine, but avoid scrubbing or any harsh friction.

    4. Which is better — ointment or a silicone patch?
    For a high-friction area like the abdomen, a silicone patch is useful because it reduces physical tension; depending on the area, combining it with an ointment can also work.

    5. If the scar becomes hard and lumpy, do I need to see a doctor?
    If it hardens or keeps growing in size, it could be progressing into a hypertrophic scar or keloid, so it’s better to see a specialist rather than rely on self-care alone.


    References

    · Seoul National University Hospital, “How to Manage Scar Treatment,” Hospital News, 2014. Read more
    · Yakup Gongnon (Pharmacist News), “All Pigmented Scars Require Both Treatment and Sun Protection,” Yakup Gongnon, 2016. Read more


    This article is intended for general health information purposes only and is not a substitute for individual diagnosis or treatment. If you have symptoms, please consult a specialist.

  • Constipation After Colonoscopy: Why 3 Days With No Bowel Movement Is Often Normal

    Constipation After Colonoscopy: Why 3 Days With No Bowel Movement Is Often Normal

    SummaryWorried because it’s been 3 days with no bowel movement after your colonoscopy? This guide covers the medical causes behind constipation after colonoscopy, typical recovery timelines, hydration tips, dietary adjustments, and the warning signs that mean it’s time to see a doctor. Check it out below.

    You scheduled your health checkup and got through the colonoscopy without any issues,
    but the next day your lower abdomen feels heavy and there’s no sign of a bowel movement — does that sound familiar?

    You cleared your bowels out completely the day before the exam,
    so it’s only natural to worry when three days pass with still no results.

    But constipation after colonoscopy is generally considered a natural part of the recovery process.

    Constipation after colonoscopy

    This article explains the medical causes of constipation after colonoscopy
    and how to get your bowel movements back on track.

    Let’s go through everything step by step — from hydration tips and dietary adjustments to the warning signs that call for medical attention.

    Key Points
    ✔ Constipation after colonoscopy is usually a temporary effect of the bowel prep solution, and it often resolves within 2 to 4 days.
    ✔ Drinking lukewarm water and eating a gentle diet are generally recommended to help support your bowels’ recovery.
    ✔ If there’s no bowel movement for more than 4 days along with fever or bloody stool, contact your doctor right away.

    Constipation after colonoscopy - image 2

    What Causes Constipation After Colonoscopy?

    The short answer: the bowel prep solution you took before the exam
    flushes out both the water and the beneficial bacteria in your gut all at once.

    Constipation after colonoscopy is a temporary delay in bowel movements
    that occurs while your gut, having been completely emptied, works on producing new stool.

    Bowel prep solutions work by triggering intense fluid loss in a short amount of time.

    In the process, not just waste but also the beneficial bacteria and moisture layer that kept your intestinal lining flexible get washed away too.

    Constipation after colonoscopy - image 3

    Key Points
    ✔ According to related research, gut microbial counts can drop to as little as one-third of normal levels right after taking a bowel prep solution.
    ✔ The same research found that it can take two weeks or longer for the microbial balance to return to pre-exam levels.

    Since your gut is completely empty, it can take at least 24 to 48 hours — sometimes several days longer — for newly eaten food to form into stool.

    The air pumped into your colon during the procedure to help doctors examine the intestinal walls can also temporarily slow bowel contractions, which is another contributing factor.


    How Can You Help Your Bowels Recover Faster?

    Managing constipation after colonoscopy starts with soothing, not stimulating, your gut.
    Rather than reaching for an over-the-counter laxative out of frustration,
    the first step should be soothing your intestinal lining with plenty of fluids.

    Bowel motility recovery is the process of rehydrating dehydrated intestinal tissue
    so stool can move smoothly instead of hardening.

    Constipation after colonoscopy - image 4

    Using a stimulant laxative right away on intestinal lining that’s still sensitive
    can actually add more strain, so it’s best to hold off.

    A basic approach that can help is drinking at least 1.5 liters of lukewarm water a day, spread across several servings.

    Constipation after colonoscopy - image 5

    Checklist
    ✅ Drink at least 8 glasses of lukewarm water spread throughout the day
    ✅ Start with soft porridge or rice water on the day of the exam and the day after
    ✅ Take light walks to encourage intestinal motility
    ✅ Try to have regular bowel movements without straining too hard
    Result
    👍 Consistently staying hydrated and taking light walks can help normalize bowel movements within 2 to 3 days.

    Lukewarm water is gentler than cold water
    and helps prevent intestinal cramping while providing mild, comfortable stimulation.

    Light walking can also help promote intestinal motility.


    What Should You Eat After a Colonoscopy?

    Diet plays a big role in constipation after colonoscopy recovery.
    Some people, relieved that the exam is over, jump straight into spicy or greasy food,
    but this can strain your emptied-out gut and lead to indigestion, trapped gas, and further delays.

    A recovery-phase diet means gradually transitioning back to your normal diet
    through easy-to-digest foods that reduce the burden on your gut.

    Constipation after colonoscopy - image 6

    That said, tough insoluble fiber
    can actually cause clumping if your bowel motility hasn’t recovered yet.

    So in the early stages, it’s safer to stick to gentle, low-irritation foods like those listed below.

    Stage Recommended Foods Foods to Avoid
    First 1–2 days Porridge, rice water, cooked vegetables Spicy food, fried food, carbonated drinks
    After day 3 Soluble fiber, probiotic foods Alcohol, spicy seasonings

    Spicy food, carbonated drinks, and alcohol
    can interfere with your gut’s recovery, so it’s safest to avoid them for at least 3 days.


    What Extra Precautions Are Needed After Polyp Removal?

    If you also had a polyp removed during your procedure,
    preventing bleeding should take priority over general constipation management.

    Post-polypectomy precautions are guidelines for avoiding actions that raise abdominal pressure
    while the removal site heals, in order to prevent bleeding.

    Precautions
    ⚠ If the removed area was large or there were multiple polyps, your doctor may recommend avoiding heavy lifting, running, hiking, and abdominal exercises for at least 1 to 2 weeks.
    ⚠ Straining too hard during a bowel movement raises abdominal pressure and can cause delayed bleeding.
    ⚠ A small amount of blood can be normal, but if bleeding continues or is accompanied by black stool or dizziness, contact your doctor immediately.

    Rather than straining hard just because a bowel movement feels difficult,
    it’s safer to soften your stool with fluids and probiotics.

    If you have other surgical questions beyond gut health,
    the Ansan Open Surgery Hospital homepage, a burn treatment specialist, also offers additional medical information you can check out.

    Constipation after colonoscopy - image 7


    Frequently Asked Questions

    1. It’s been 3 days since my exam and I still haven’t had a bowel movement. Is that dangerous?
    Since your gut was completely emptied, constipation after colonoscopy is normal for about 2 to 4 days while new stool forms. If you don’t have other symptoms like abdominal pain or vomiting, it’s fine to wait a bit longer while drinking more fluids.

    2. Can I just take an over-the-counter laxative right away?
    Using a stimulant laxative on intestinal lining that’s still sensitive isn’t recommended. Rather than self-medicating, it’s safer to encourage bowel movement naturally through hydration and light exercise, and consult your doctor if needed.

    3. I had a polyp removed — is it okay to strain during a bowel movement?
    Raising abdominal pressure too much while the removal site is healing carries a risk of bleeding. Avoid straining hard, and instead help stool pass smoothly with fluids and probiotics.

    4. How long is it normal for constipation after colonoscopy to last?
    Bowel movements usually resume within 2 to 4 days, though in some cases it can take up to 1 to 2 weeks for bowel function to fully stabilize. If it lasts longer than that or symptoms get worse, you should see a doctor.

    5. What symptoms mean I should see a doctor right away?
    If you go 4 days or more with no bowel movement at all, along with severe abdominal bloating, persistent lower abdominal pain, fever, or bloody stool, you should return to the facility where you had your exam for immediate evaluation.


    References

    · Jalanka J, et al., “Effects of bowel preparation on the human gut microbiome and metabolome,” Scientific Reports (Nature), 2019. View source
    · Byun Seung-ju (Gastroenterologist), “What Causes Constipation After a Colonoscopy?,” Hidoc, 2023. View source
    · “Post-Colonoscopy Gut Microbiota Dysbiosis: Mechanisms, Clinical Consequences, and the Role of Diet in Microbiota Recovery,” Gastroenterology Insights (MDPI), 2025. View source


    This article is intended for general health information purposes only and is not a substitute for individual diagnosis or treatment. Please consult a physician if you have symptoms.

  • Burn First Aid: 15-Minute Golden Window Explained

    Burn First Aid: 15-Minute Golden Window Explained

    SummaryBurn first aid centers on cooling the area under running cool water for 15–20 minutes. Together with Ansan Yeollin Surgical Hospital near Gojan Station, let’s look at burn stages and how the clinic manages wound care.

    Even a brief brush against hot soup or a hot iron can leave skin red and stinging within seconds.
    In the panic of the moment, plenty of people reach first for ice, or apply home remedies like alcohol or toothpaste.

    In reality, the golden window for burn first aid is just the first 15 minutes after the injury,
    and how you use that time can make a real difference in whether a scar forms.

    Burn first aid

    This article covers the correct order of steps for burn first aid and the actions you should never take.

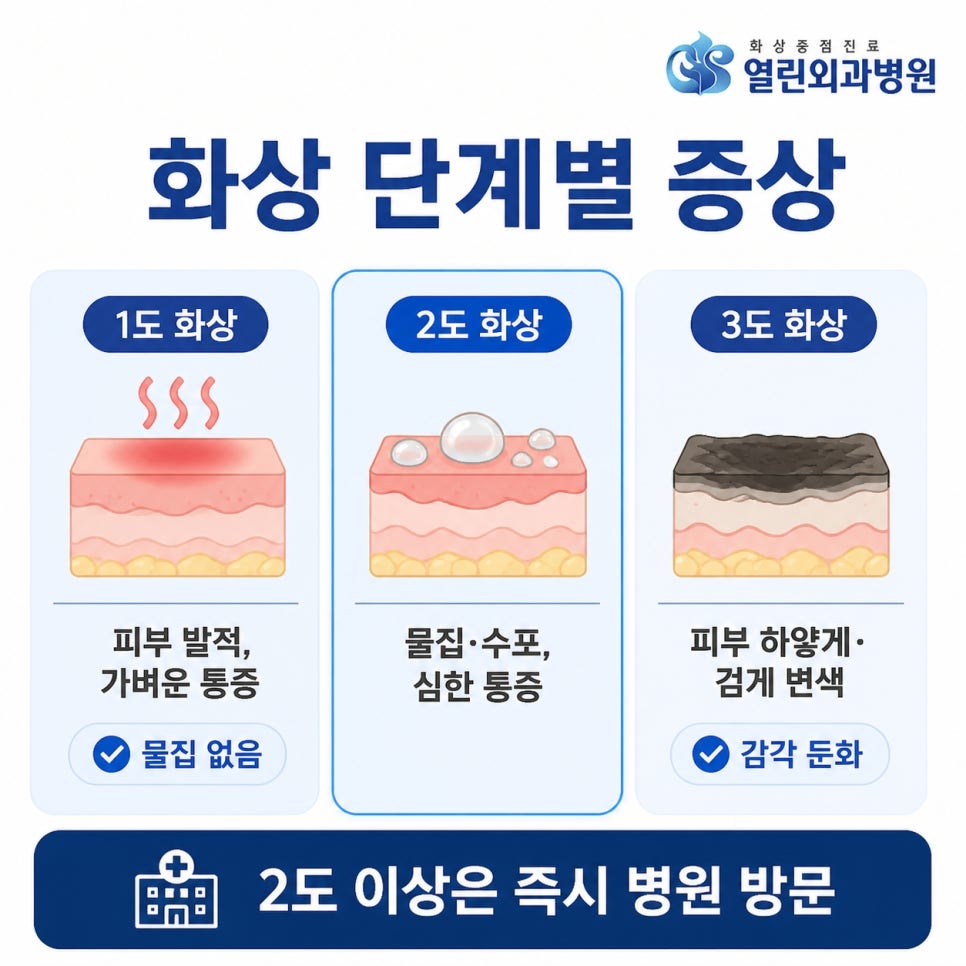
    We’ll also explain how to tell first-, second-, and third-degree burns apart by symptom,
    along with how Ansan Yeollin Surgical Hospital near Gojan Station approaches wound care.

    Burn first aid illustration 2

    What Should You Do Right After a Burn? Burn First Aid Steps

    The first thing to do right after a burn is to cool the affected area under cool running water.
    Burn first aid means the initial response that draws heat out of the skin and helps prevent secondary infection before the damage goes any deeper.

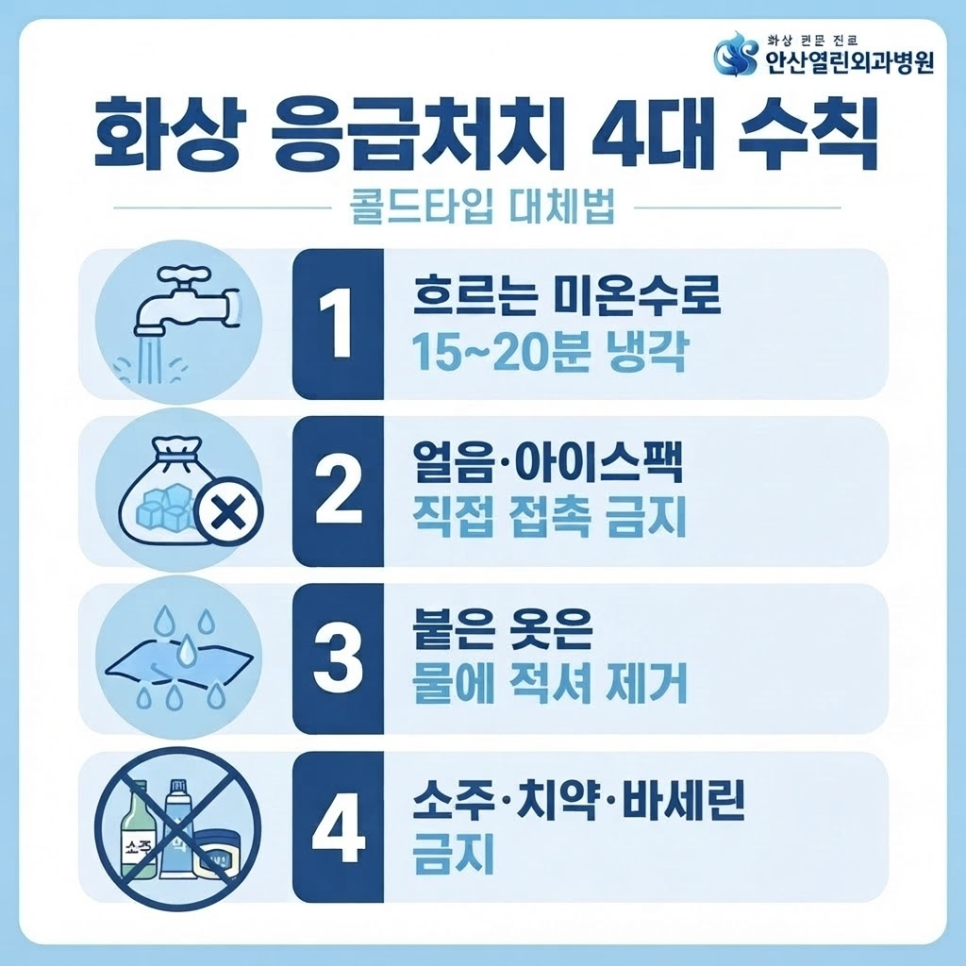
    Remove the source of heat right away, then cool the area under running tap water at roughly 15–20°C (about 59–68°F).

    Avoid placing ice or ice water directly on the skin.
    Doing so can make blood vessels constrict suddenly, which may actually worsen tissue damage.

    Burn first aid illustration 3

    If hot liquid soaked through clothing, don’t force the fabric off.
    Keep water running over it and ease it away slowly for safety.

    The key is to keep cooling the area for about 15–20 minutes, until the burning sensation eases.

    Burn first aid illustration 4

    Key Points
    1. Cool the area for 15–20 minutes under lukewarm or cool running water
    2. Never place ice or an ice pack directly on the skin
    3. If clothing sticks to the burn, don’t pull it off — soak it with water and ease it away
    4. Keep the burned area raised above heart level to help reduce swelling
    Precautions
    ⚠️ Do not apply home remedies such as alcohol, soybean paste, toothpaste, or aloe
    ⚠️ Do not apply petroleum jelly or other oil-based ointments while the area still feels hot
    ⚠️ Do not pop blisters with your hands

    Burn first aid illustration 5


    How Do You Tell Burn Degrees (1st, 2nd, 3rd) Apart?

    Burns are classified from first- to third-degree based on how deep the skin damage goes.
    Symptoms and the care needed differ significantly by degree, so telling them apart matters.

    Burn first aid illustration 6

    Type Depth of Damage Main Symptoms
    First-degree burn Epidermis (outer layer) Redness, mild pain, no blistering
    Second-degree burn Dermis Blistering, severe pain, infection risk
    Third-degree burn Subcutaneous fat layer White or blackened skin discoloration, reduced pain sensation

    First-degree burns affect only the outer layer of skin and tend to heal on their own within a few days, while blistering is the defining feature of second-degree burns.

    Third-degree burns can damage nerves so severely that pain sensation may actually be reduced, which is why surgical evaluation is essential.

    Burn first aid illustration 7

    Checklist
    ✅ Is the skin red and still warm to the touch? (Possibly first-degree)
    ✅ Have blisters formed with clear or yellowish fluid? (Possibly second-degree)
    ✅ Is sensation reduced, or has the skin turned white? (Possibly third-degree)
    ✅ Is the face, hands, feet, a joint, or a large area affected? (Seek care immediately)

    How Does the Hospital Treat Burn Wounds?

    The goal of surgical treatment is to prevent secondary infection and help minimize scarring.
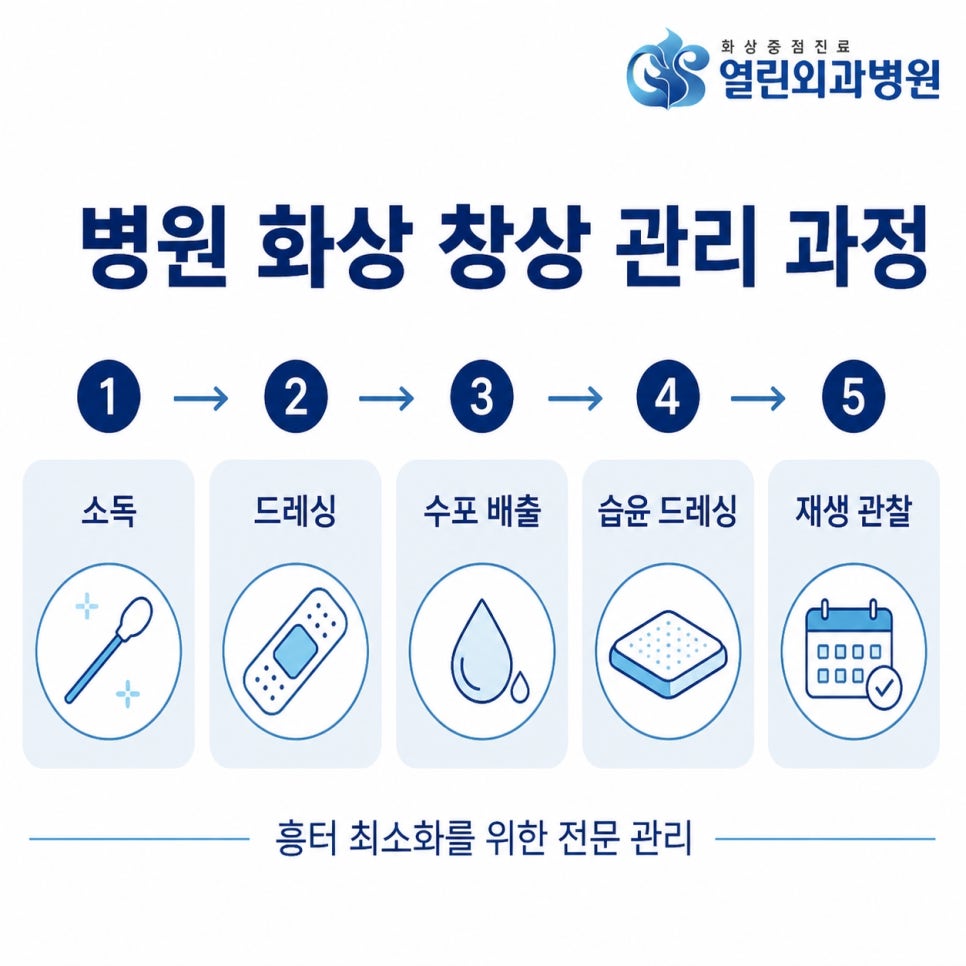
    Wound care refers to the full process of disinfection, dressing, and maintaining a moist environment to support skin regeneration.

    In the early stage, disinfection and specialized dressing materials help keep out contaminants, and if a blister is large, medical staff drain only the fluid using sterilized instruments.

    Trying to do this at home on your own can sometimes make an infection worse.
    Professional wound care, such as that offered near Gojan Station at Yeollin Surgical Hospital, is generally recommended for this reason.

    Burn first aid illustration 8

    After initial care, a customized moist foam dressing is applied to absorb fluid and protect the wound.

    While the skin regenerates, ongoing disinfection and monitoring alongside it may help reduce the likelihood of scarring.

    Burn first aid illustration 9

    Key Points
    1. Blisters act as a natural protective barrier — don’t pop them yourself
    2. Keep water from getting directly on the dressed area
    3. Avoid scratching, even if the healing skin feels itchy
    4. Keep using sunscreen after treatment to help prevent discoloration

    Scar Prevention and Choosing a Hospital: What to Check

    Reducing the risk of scarring is generally understood to involve preventing early infection and maintaining a moist wound environment.
    Even after the skin finishes regenerating, thorough sun protection for 3–6 months can help prevent discoloration.

    Burn first aid illustration 12

    Takeaways
    · Proper initial cooling and disinfection may help reduce the risk of scarring
    · Consistently maintaining a moist dressing may help support the pace of skin regeneration
    · Keeping up sun protection after treatment can help prevent discoloration

    If you have a second-degree burn or worse — one with blistering or skin discoloration — or a burn on the face, hands, feet, or a joint, you should see a doctor without delay.

    Ansan Yeollin Surgical Hospital is located near Gojan Station (376 Hwarang-ro, Danwon-gu, Ansan-si, Gyeonggi-do) and also provides emergency care, allowing for prompt visits even in sudden situations.

    Burn first aid illustration 13

    If you’d like information on surgical conditions beyond burns,
    check out the Burn Treatment Information, [Ansan Yeollin Surgical Hospital] Home page.


    Burn first aid illustration 11

    Frequently Asked Questions

    1. Can I apply petroleum jelly or ointment to a burn right away?
    Applying petroleum jelly or other oil-based ointments while the area is still hot can trap heat inside and make the wound deeper. Cool the burn first, then get professional disinfection and care.

    2. Should I just leave a blister alone?
    Small blisters protect the tissue underneath, so it’s best not to pop them. However, if a blister is large or very painful, it’s safer to have medical staff drain it with sterilized instruments.

    3. What can I do to help prevent a burn scar?

    It’s important to prevent early infection and keep the wound in a moist environment rather than letting it dry out. Even after healing, thorough sun protection for 3–6 months can help prevent discoloration.

    4. When should I visit a hospital after first aid?
    Second-degree burns or worse with blistering or skin discoloration, and burns on the face, hands, feet, or joints, need prompt surgical evaluation. Getting the wound checked early at a nearby facility, such as Yeollin Surgical Hospital near Gojan Station, is a good idea.


    References

    · Korea Disease Control and Prevention Agency, “Burns,” National Health Information Portal. View source (publication year to be confirmed)
    · Asan Medical Center Newsroom, “Don’t Use Ice on a Burn,” Asan Medical Center. View source (publication year to be confirmed)


    This article is intended for general health information purposes only and is not a substitute for individual diagnosis or treatment. If you have symptoms, please consult a physician.

  • Unsedated Endoscopy: Why the Pain Lasts Only 10-15 Minutes

    Unsedated Endoscopy: Why the Pain Lasts Only 10-15 Minutes

    SummaryWorried about pain during an unsedated endoscopy? Here’s a medically informed overview of the exam duration, fasting preparation, and breathing techniques that may help reduce gagging.

    Lying on the exam table, the procedure lasts at most 10 to 15 minutes — but how that short window feels can vary considerably, from a manageable experience to a difficult one.

    That’s why reactions to unsedated endoscopy vary so widely from person to person.
    Some people find it more manageable than expected, while others say they’d rather not go through it again.

    So why do people react so differently to the same exam?

    💡 Quick preview
    Unsedated upper endoscopy is performed using only a local throat anesthetic, with no sedative, so no recovery time is needed and you can typically return to your normal routine right after the exam.
    That said, you may feel gagging or a foreign-body sensation as the scope passes through your throat — this can often be reduced with proper breathing and preparation beforehand.
    Below, we cover the actual pain level, exam duration, and tips that may help you get through an unsedated endoscopy more comfortably.

    unsedated upper endoscopy

    What Is an Unsedated Upper Endoscopy?

    An unsedated upper endoscopy is a procedure in which a doctor inserts an endoscope to examine the inside of the stomach without a sedative, using only a local anesthetic applied to the throat.

    It’s typically chosen by people who are wary of sedation-related risks or who prefer not to lose consciousness, even briefly.

    unsedated upper endoscopy illustration 3

    Before the exam, you hold a local anesthetic in your mouth and throat before swallowing it, which numbs the area and can reduce discomfort as the scope passes through.

    That said, the numbing isn’t complete, so a brief foreign-body sensation may remain as the scope enters.

    One notable advantage is that no separate recovery time is needed.
    You can typically drive or return to work right after the exam, which can be helpful for working professionals with limited time to spare.

    unsedated upper endoscopy illustration 4

    🚀 Key benefits of an unsedated exam
    · No separate recovery time needed after the exam
    · You can drive yourself and return to your routine the same day
    · Lower risk of side effects associated with sedatives

    How Painful Is an Unsedated Endoscopy, Really?

    In short, it tends to feel less like sharp, cutting pain and more like gagging and pressure.

    As the scope passes through the throat into the esophagus, a strong gag reflex can occur.

    Tensing your throat at this point can cause friction against the scope, which may increase discomfort or, in some cases, lead to minor bleeding — so staying relaxed matters.

    unsedated upper endoscopy illustration 2

    According to health information from Asan Medical Center, the duration of an unsedated upper endoscopy varies by patient but is generally around 10 to 15 minutes.

    If a polyp is removed or a biopsy is taken, the exam may run a bit longer.

    The actual observation time is short, but breathing incorrectly can make the exam feel much longer than it is.
    Breathing slowly and following your medical team’s guidance may help reduce discomfort.

    unsedated upper endoscopy illustration 5

    📋 Step-by-step overview of the exam
    1. Take an anti-foaming agent and hold the throat anesthetic in your mouth
    2. Lie on your side on the exam table and bite down on the mouthpiece
    3. The endoscope is inserted to examine the stomach (about 10-15 minutes)
    4. Results are discussed after the exam

    What Preparation and Breathing Techniques Help Reduce Pain and Gagging?

    Fasting properly beforehand and using the right breathing technique during the exam may help reduce pain and gagging.

    According to Asan Medical Center, you should fast for at least 8 hours before an upper endoscopy.
    Typically, this means eating a light dinner around 6 p.m. the day before, then avoiding all food and water — including water — from midnight onward.

    unsedated upper endoscopy illustration 6

    If food remains in the stomach, it not only makes observation harder but also raises the risk of reflux if gagging occurs.

    Once the exam begins, it helps to breathe slowly in through your nose and out through your mouth, using deep abdominal breathing.

    Trying to swallow saliva tenses the throat muscles and can worsen discomfort, so it’s better to simply let saliva drain out naturally.

    unsedated upper endoscopy illustration 7

    Relaxing your shoulders and neck and keeping your gaze lowered can also help ease tension.
    Staying calm may help reduce the gag reflex for some people.

    ⚠️ Things to keep in mind on exam day
    · Tell your medical team in advance about any essential medications, such as blood pressure medicine
    · Let saliva drain out naturally during the exam instead of trying to swallow it
    · Try not to suppress burping, since it lets the stomach expand enough for a thorough exam
    · Avoid eating or drinking for about 30 minutes, until the throat anesthetic wears off

    If an unsedated exam feels too daunting, sedated (sleep) endoscopy is also an option.
    It’s worth choosing based on your own sensitivity to gagging and your schedule for the day. You can also find more information about other services at [Ansan Open Surgery Hospital] Home.

    unsedated upper endoscopy illustration 8


    Frequently Asked Questions

    1. When can I eat after the exam?
    Answer: You can typically drink water or have a light meal about 30 minutes to an hour after the throat anesthetic fully wears off. Swallowing food before the numbness has worn off can risk it entering the airway, so caution is needed.

    2. My throat feels scratchy and sore after the exam — is that normal?
    Answer: The scope can cause minor irritation to the throat lining, so mild discomfort may last a day or two. Drinking lukewarm water frequently can help with recovery.

    3. Can I switch from unsedated to sedated once the exam has started?
    Answer: Once the exam has begun, switching to sedation is difficult. If you tend to have a strong gag reflex or feel especially anxious, it’s best to discuss your options with your doctor beforehand and choose the method that suits you.

    4. Who is a good candidate for an unsedated upper endoscopy?
    Answer: It tends to suit people who need to return to their routine right away without recovery time, or who are concerned about sedation-related side effects. Those with a very strong gag reflex may find sedated endoscopy more comfortable instead.


    References

    · Asan Medical Center, “Esophagogastroduodenoscopy (EGD),” Health Information, Asan Medical Center. View here
    · Asan Medical Center, “Upper Endoscopy (Unsedated),” Health Screening Information, Asan Medical Center. View here


    This article is intended for general health information purposes only and is not a substitute for individual diagnosis or treatment. Please consult a physician if you have symptoms.

  • Hemorrhoid Cushion Guide: 3 Reasons to Choose High-Density Foam

    Hemorrhoid Cushion Guide: 3 Reasons to Choose High-Density Foam

    SummaryWhen shopping for a hemorrhoid cushion, a soft, plush cushion isn’t necessarily the better choice. This guide covers why high-density material is generally considered more effective than soft padding, the structural principle behind reducing pressure on the anal area, correct sitting posture, and a practical buying checklist to help you choose a cushion that may ease hemorrhoid-related discomfort.

    It’s easy to assume that a plusher cushion means less pain.
    But the softer a cushion is, the more it tends to sink the moment you sit down,
    which can let the anal area press right against the seat anyway.

    When comparing cushion options,
    high-density support, not softness, is generally considered the more important factor for comfort.
    So if you overlook this when choosing a hemorrhoid cushion, you can easily end up wasting your money.

    💡 Quick preview
    This article explains the structural principle behind how a hemorrhoid cushion redistributes pressure away from the anal area.
    It also walks through a checklist for choosing the right donut cushion based on high-density material,
    plus the correct sitting posture that can help reduce pain.

    Why Does a Hemorrhoid Cushion Have a Hole in the Middle?

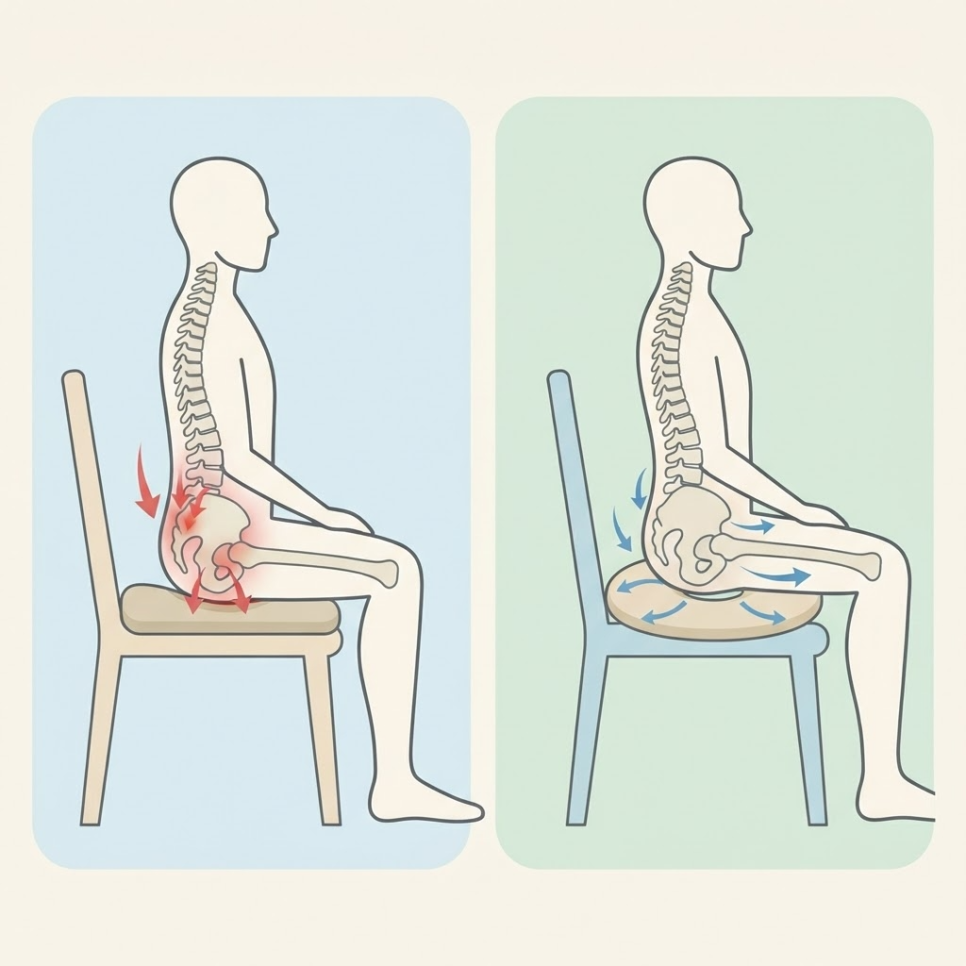
    In short, the hole in the center of a hemorrhoid cushion is designed to shift body weight onto the left and right buttocks,
    reducing the pressure that would otherwise concentrate on the anal area.

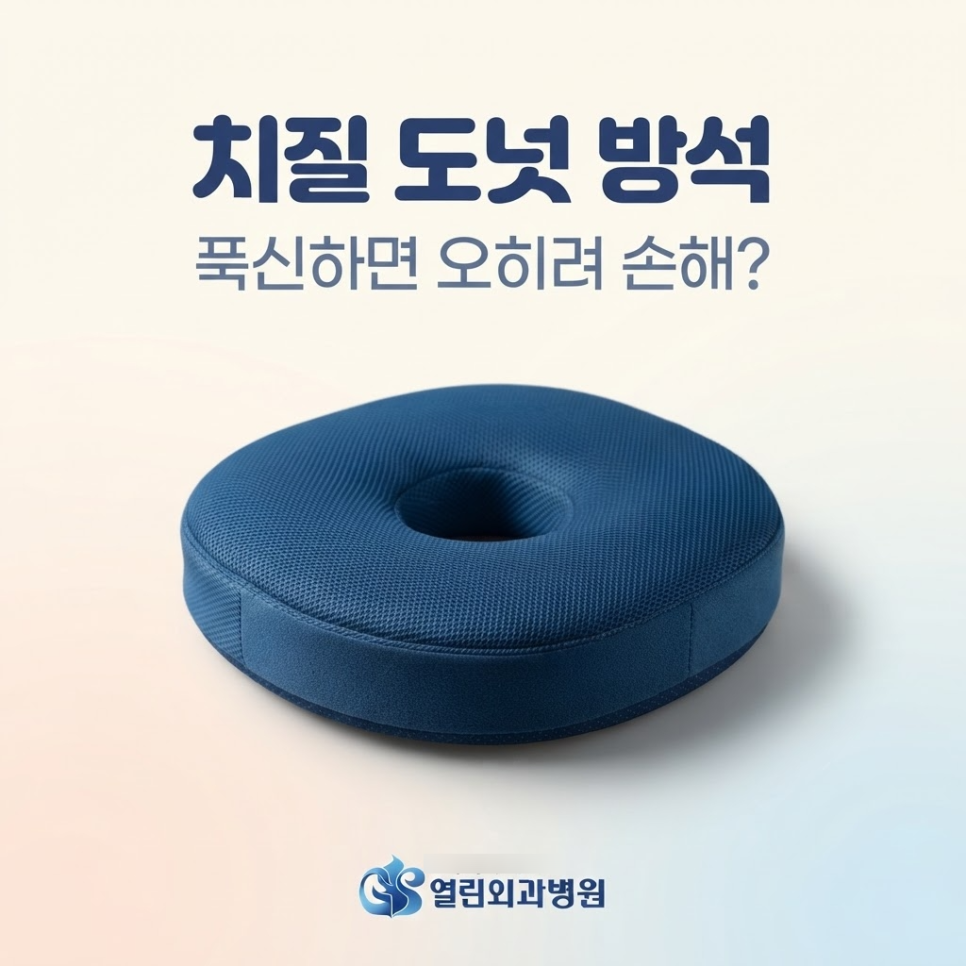
    A hemorrhoid cushion is a weight-distributing support cushion with a hole cut into the center so the anal area doesn’t press directly against the seat when you sit down.

    hemorrhoid cushion

    When you sit on a regular cushion, a large share of your body weight lands right in the center of your buttocks, near the anus.
    Repeated pressure in this area can cause the blood vessels within the hemorrhoidal cushion tissue to swell, which may worsen pain.

    In fact, prolonged sitting is considered a major contributor to hemorrhoids, since it puts continuous pressure on the veins around the anus,
    slowing blood flow and allowing hemorrhoids to progress.

    A donut-style cushion with an open center changes this picture.
    Body weight is spread more evenly across the buttocks and pelvic bones,
    which may help ease the pressure placed on the blood vessels around the anus.

    Hemorrhoid cushion illustration 2

    Key point
    · Pressure concentration on the anal area with a regular cushion: high
    · Pressure concentration on the anal area with a hemorrhoid (donut) cushion: low (distributed across the buttocks)

    Hemorrhoid cushion illustration 3

    For people already dealing with hemorrhoid symptoms, this kind of cushion can be more than just a comfort item —
    it can serve as a practical tool for reducing everyday pressure that aggravates symptoms.
    That said, it’s important to understand that a cushion alone will not make hemorrhoids go away.


    Why Should You Choose a High-Density Hemorrhoid Cushion?

    The answer is simple. A cushion that’s too soft will compress under your body weight and lose its shape,
    so a high-density material is generally recommended to help the pressure-relief effect last longer.

    A high-density hemorrhoid cushion is one built with enough resilience and support that it doesn’t flatten out under body weight.

    Choosing a high-density foam suited to your body is essentially a way of confirming ahead of time
    that the cushion has enough resilience and support not to bottom out.

    A cushion that’s too soft will sink flat the moment you sit down and won’t do its job.
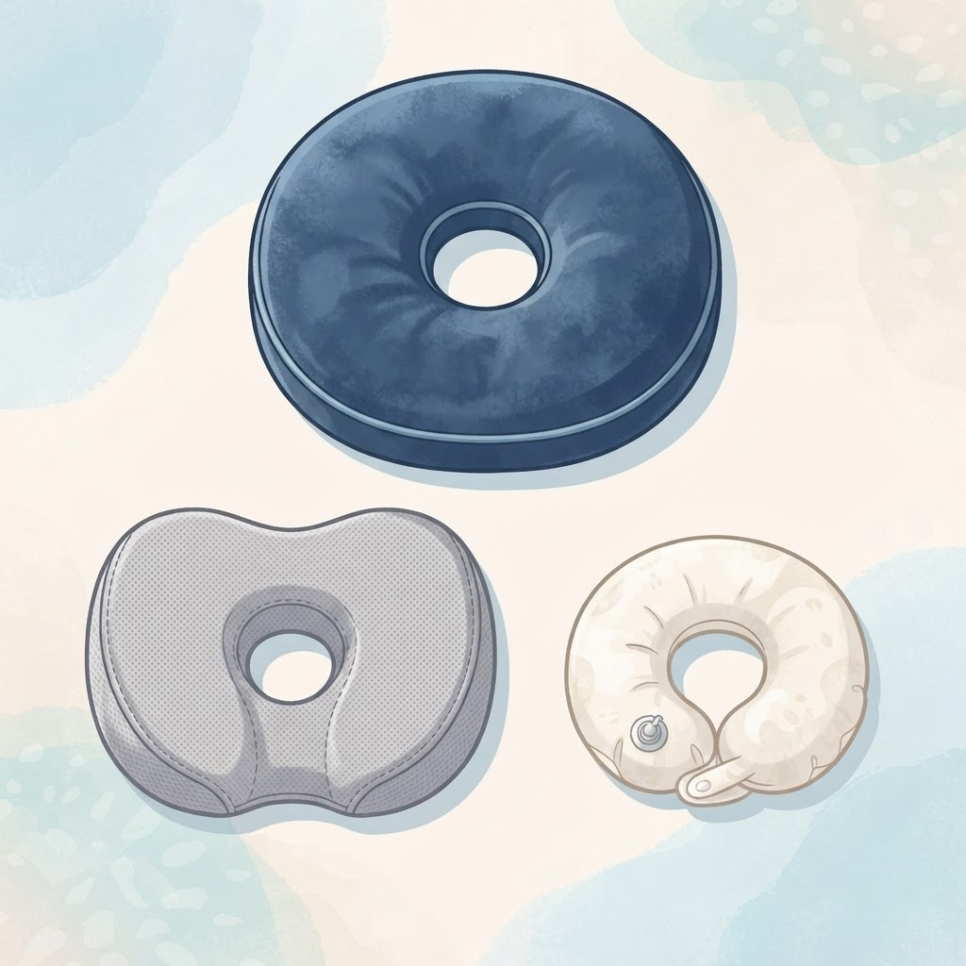
    Look for high-density memory foam or a similarly firm, high-density foam with the right amount of bounce.

    Also check whether the cover is breathable enough to prevent sweat buildup during long periods of sitting.
    A practical tip: check whether the cover is removable and washable for hygiene.

    Hemorrhoid cushion illustration 4

    Buying checklist
    ✅ Is it made of high-density memory foam that firmly supports your body weight?
    ✅ Is the center hole sized appropriately for your body?
    ✅ Does it have a breathable mesh cover?
    ✅ Is the cover removable and washable for hygiene?

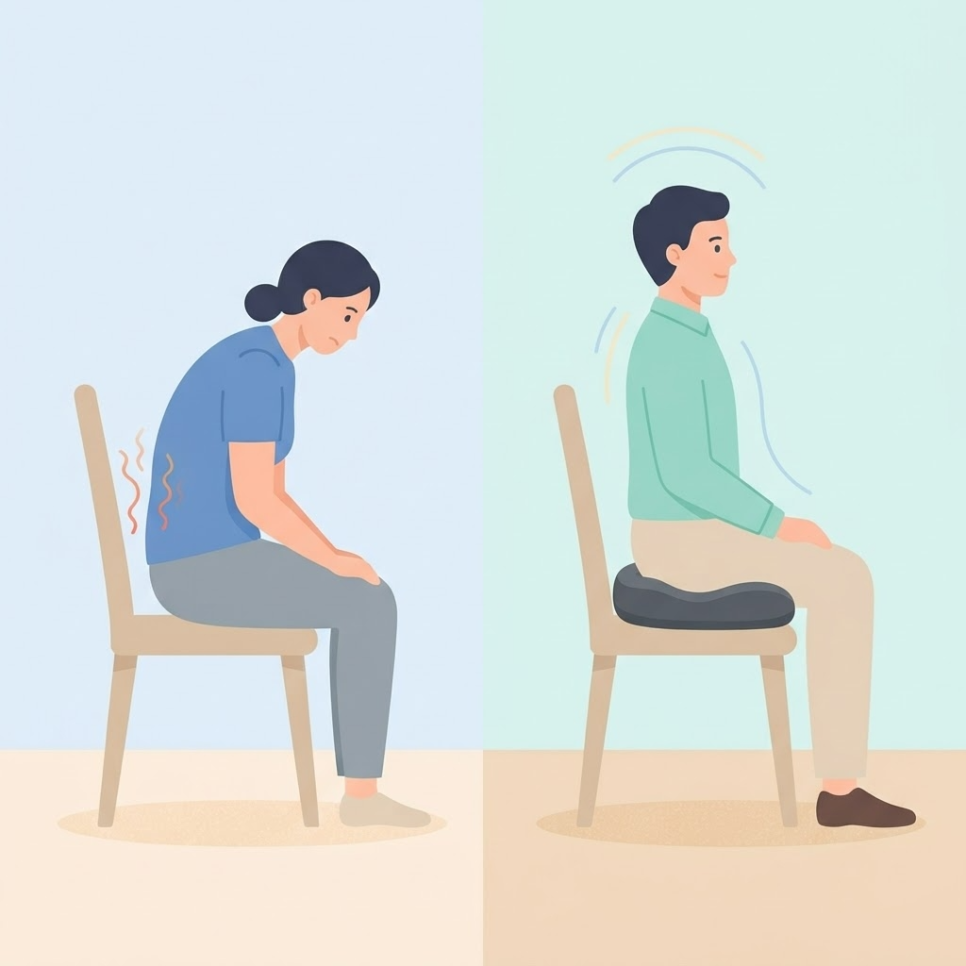
    What’s the Correct Sitting Posture for Using a Donut Cushion?

    The key is to sit all the way back so the anal area lines up with the center hole,
    keeping your back straight as you sit.

    Correct sitting posture means sitting all the way back on the donut cushion so the anal area is centered precisely over the hole, with your back and lower back held straight.

    Hemorrhoid cushion illustration 5

    Slouching or leaning back as if lying down can twist the pelvis,
    causing pressure to build up again in specific spots.

    It’s best to keep your lower back against the backrest and hold your back and lower back straight.
    Even with a good cushion, staying seated in one position for long stretches should still be avoided.

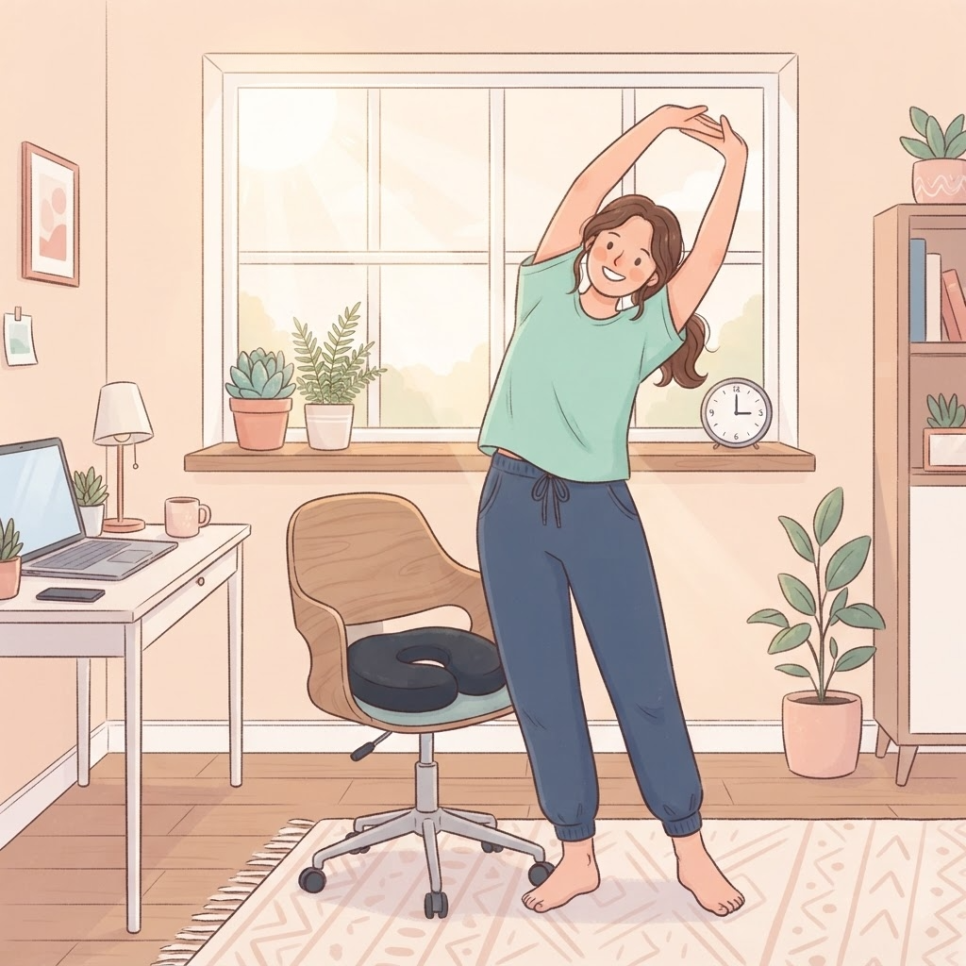
    Make it a habit to stand up and stretch for about 5 minutes after roughly every 50 minutes of sitting.

    Hemorrhoid cushion illustration 6

    Things to watch out for
    ⚠ Even with a cushion, avoid sitting continuously for more than 50 minutes.
    ⚠ If symptoms worsen or bleeding recurs, don’t rely on a cushion alone to manage it.
    Potential benefits of good posture
    ✅ May help maintain pelvic balance and ease pressure on the veins around the anus
    ✅ May help reduce the strain on the pelvis and spine that comes from long periods of sitting

    Hemorrhoid cushion illustration 7

    If your symptoms don’t improve — or get worse — despite using a cushion and adjusting your posture,
    that may be a sign that lifestyle changes alone aren’t enough.
    In that case, it’s best to get an accurate diagnosis from a medical professional rather than try to manage it on your own.
    You can also check the [Ansan Open Surgery Hospital] website for related information.


    Frequently Asked Questions

    1. Is it okay to use a hemorrhoid cushion all day?
    The cushion itself is fine to use for extended periods, but staying in one seated position for a long time still puts strain on the veins around the anus, so it’s best to stand up and stretch about every 50 minutes.

    2. Is a softer, plusher cushion better for pain relief?
    No. A cushion that’s too soft compresses under your body weight and can let the anal area touch the seat, so a high-density product with firmer support tends to be more effective.

    3. Can it be used in a car driver’s seat, not just an office chair?
    Yes, it can. Just make sure the cushion’s height doesn’t interfere with pedal operation or your view of the road before using it.

    4. Will using a hemorrhoid cushion alone make hemorrhoids go away completely?
    No. The cushion is only a supplementary tool that helps reduce physical irritation and pain. If symptoms persist or worsen, you should combine professional medical care with lifestyle changes.

    5. How should I care for the cushion cover?
    Choosing a product with a removable, washable mesh cover helps you keep it hygienic and reduces issues from sweat or moisture over time.


    References

    · Korea Disease Control and Prevention Agency (KDCA), “Hemorrhoids,” National Health Information Portal. Visit source
    · Asan Medical Center, “Hemorrhoids,” Disease Encyclopedia, Asan Medical Center Health Information. Visit source

    This article is intended to provide general health information and is not a substitute for individual diagnosis or treatment. If you have symptoms, please consult a physician.

  • Colonoscopy Polyp Removal: 3 Reasons It Typically Doesn’t Hurt (Ansan Endoscopy Guide)

    Colonoscopy Polyp Removal: 3 Reasons It Typically Doesn’t Hurt (Ansan Endoscopy Guide)

    SummaryIs colonoscopy polyp removal really painless? The colon lining has very few pain-sensing nerves, so removal typically causes little to no discomfort. Here’s a full rundown of the symptoms that call for an Ansan endoscopy, plus pre- and post-procedure precautions and what recovery looks like.

    Some patients book a colonoscopy, then keep pushing the date back.
    Ask why, and nine times out of ten you’ll hear something similar.

    “If they find a polyp, they remove it right there on the spot — that means cutting tissue, doesn’t it?
    How can that not hurt?”

    Here’s the short answer: colonoscopy polyp removal causes little to no pain in most cases.
    The reason is built into the anatomy itself.

    Key Point
    This article walks through why colonoscopy polyp removal typically isn’t painful, the main symptoms that call for an Ansan endoscopy, what actually happens during an upper or lower endoscopy, and what to watch for before and after the procedure, in order.
    Putting off screening out of fear of pain can carry a far greater risk.

    Colonoscopy polyp removal

    Why Doesn’t Colonoscopy Polyp Removal Hurt?

    Short answer: removing a colon polyp typically causes little to no pain on its own.
    The colon lining is tissue with almost no nerve fibers that transmit pain signals.

    Skin and muscle are dense with pain-sensing nerve endings, but
    the mucosal layer inside the colon is structurally different.

    That’s why looping a snare around a polyp and cutting it away causes little to no sensation in the moment.
    Sedation (sleep endoscopy) is also commonly offered alongside the procedure at endoscopy centers in Korea.

    With the patient under light sedation, the exam and the procedure happen together, so any perceived discomfort is reduced further.

    Key Point
    ✔ The colon lining has almost no pain-sensing nerves, so removal causes little discomfort.
    ✔ Most procedures are performed under sedation, with reduced consciousness.
    ✔ What patients notice afterward is usually not pain but bloating from the gas used during the exam.

    Putting off screening out of fear of pain is actually the riskier choice.
    Early-stage polyps rarely cause symptoms,
    so without regular Ansan endoscopy checkups, they can go undetected longer than they should.


    Colonoscopy polyp removal illustration 2

    What Symptoms Call for an Ansan Endoscopy?

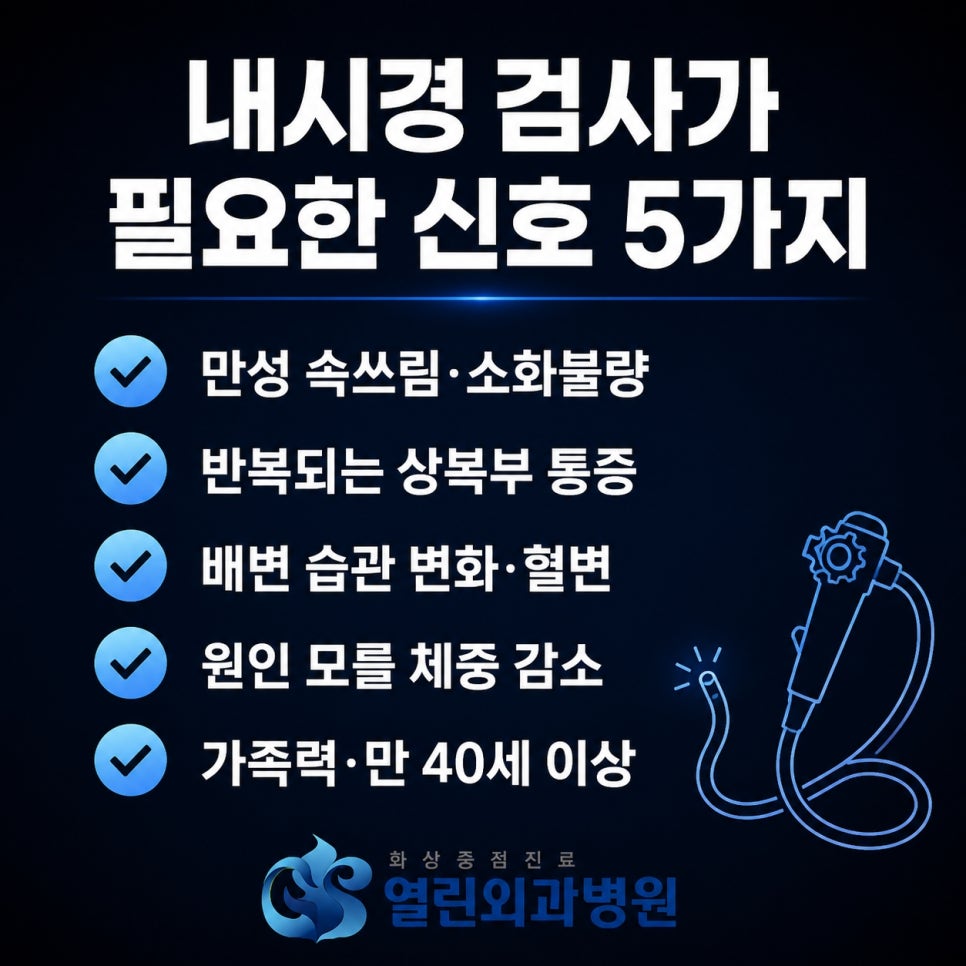
    If heartburn, blood in the stool, or unexplained weight loss keeps recurring, it’s worth checking the condition of the lining.
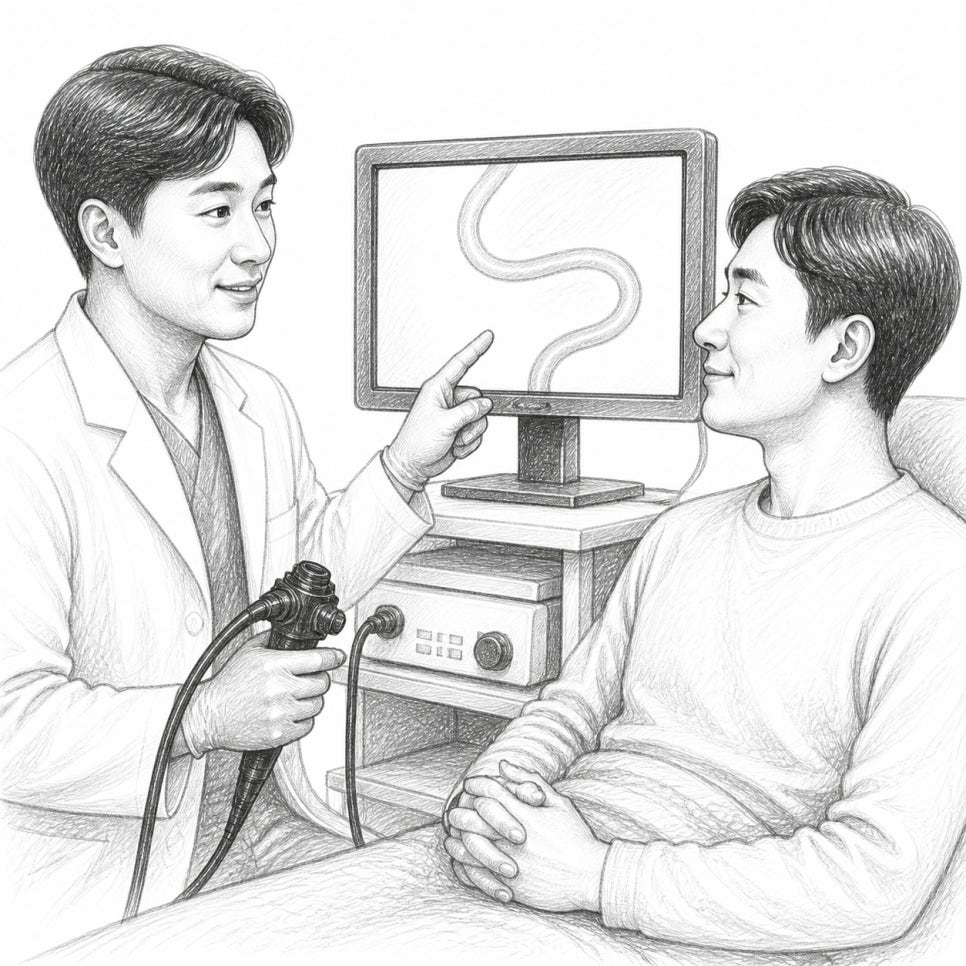
    Endoscopy is a diagnostic procedure that uses a flexible, articulated scope to directly examine the lining of the digestive tract.

    If upper abdominal pain keeps coming back or heartburn lingers for a long stretch,
    it’s worth checking for changes in the esophageal or stomach lining.

    In particular, sudden bloating after meals or
    unexplained weight loss are signs that call for a closer look.

    For the colon, a sudden change in bowel habits, blood in the stool, and persistent lower abdominal pain are the main warning signs.

    Colonoscopy polyp removal illustration 3

    Checklist
    ✅ Chronic heartburn or indigestion that won’t go away
    ✅ Recurring upper abdominal pain or a sense of fullness
    ✅ Changes in bowel frequency or visible blood in the stool
    ✅ A family history of colorectal or stomach cancer
    ✅ Age 40 or older and eligible for the national cancer screening program

    Digestive conditions often show few clear symptoms in the early stages.
    That’s why checking the condition of the lining with regular Ansan endoscopy screening matters.

    The earlier a condition is found, the easier it generally is to plan the next steps for care.


    How Do Upper and Lower Endoscopies Differ?

    The two exams differ in purpose and preparation.
    An upper endoscopy examines the upper digestive tract, while a colonoscopy examines the lining of the lower digestive tract.

    Before the procedure, the care team reviews any underlying conditions and
    current medications with the patient.

    If you’re taking aspirin or a blood thinner, whether to pause it beforehand should be discussed with your doctor
    to help lower the risk of bleeding.

    Colonoscopy polyp removal illustration 4

    Category Upper Endoscopy Colonoscopy
    Fasting time At least 8 hours of fasting Fasting and bowel prep starting about 12 hours prior
    Duration About 5–10 minutes About 15–30 minutes
    Main purpose Early diagnosis of gastritis, ulcers, and stomach cancer Polyp detection with immediate removal, and colitis diagnosis

    If a suspicious lesion turns up during the exam, a tissue biopsy can be taken on the spot, or
    in the case of a colon polyp, removal can be performed during the same procedure.


    What Should You Watch For Before and After the Procedure?

    Following the dietary guidance for the 3 days before the exam and managing your first meal afterward is usually enough for a safe recovery.
    Bowel prep before endoscopy is the process of clearing the bowel so that small lesions aren’t missed.

    For a colonoscopy, avoid fruit with seeds, sesame seeds, laver, and seaweed starting 3 days before the exam.
    If residue is left on the bowel lining, small polyps can be harder to spot.

    Colonoscopy polyp removal illustration 5

    ⚠️ Precautions for a Safe Recovery
    1. No driving on the day of a sedation endoscopy: sedatives can impair judgment, so plan on public transit or having someone accompany you.
    2. Managing your first meal afterward: if you had a biopsy or polyp removed, it’s best to start with a bland rice porridge or gruel about 1–2 hours after the procedure.
    3. Review your medications: be sure to discuss blood pressure or diabetes medication with your care team beforehand.
    What Recovery Typically Looks Like
    Patients who follow the basic guidelines are generally able to return to daily activities the same day, though individual recovery can vary.
    Choosing a facility with proper equipment and a dedicated gastroenterology team can help make the screening more comfortable.

    Colonoscopy polyp removal illustration 6

    Our clinic also provides digestive endoscopy screening to
    help look after the digestive health of the local community.

    If you’d like to learn more about the hospital’s departments and screening equipment,
    you can find an overview at Burn Treatment, [Ansan Yeorin Surgical Hospital] Home.

    Colonoscopy polyp removal illustration 7


    Frequently Asked Questions

    1. Is there a risk I won’t wake up from sedation, or is it dangerous?
    Sedatives used for sleep endoscopy induce a state of conscious sedation, unlike general anesthesia. Oxygen saturation and pulse are monitored in real time during the procedure, which helps it be carried out in a properly managed setting.

    2. Does removing a colon polyp hurt a lot?

    Because the colon lining has almost no pain-sensing nerve fibers, colonoscopy polyp removal itself causes little to no pain. That said, the gas used during the exam can cause temporary bloating.

    3. How often should I get an endoscopy?
    As a general guideline, an upper endoscopy is recommended once every 2 years from age 40, and a colonoscopy once every 5 years from age 50. If polyps have previously been found or there’s a family history, the interval may be shortened to every 1–3 years.

    4. Can I take my usual medications or antacids on the day of the exam?
    Blood pressure medication is often taken with a small amount of water early on the morning of the exam, but diabetes medication or insulin is usually withheld due to the risk of low blood sugar. Be sure to tell your care team about all medications you’re taking beforehand.

    5. Does the polyp removal site need any special care afterward?
    The removal site generally heals on its own. That said, avoid strenuous exercise and alcohol on the day of the procedure and the following day, and contact your clinic right away if you notice bleeding or severe abdominal pain.

    Colonoscopy polyp removal illustration 8

    Colonoscopy polyp removal illustration 9

    Colonoscopy polyp removal illustration 10


    References

    · Asan Medical Center, “Polyp of Colon,” Disease Encyclopedia, Asan Medical Center. View
    · Colorectal Cancer Screening Guideline Revision Committee, “Colorectal Cancer Screening Guidelines,” National Cancer Center / National Cancer Screening Program, 2015. View
    · Gastric Cancer Screening Guideline Revision Committee, “Gastric Cancer Screening Guidelines,” National Cancer Center / National Cancer Screening Program, 2015. View

    Colonoscopy polyp removal illustration 14


    This article is provided for general health information purposes and is not a substitute for individual diagnosis or treatment. If you have symptoms, please consult a physician.

  • Hyperbaric Oxygen Therapy for Burns: Why the 24-48 Hour Golden Window Matters

    Hyperbaric Oxygen Therapy for Burns: Why the 24-48 Hour Golden Window Matters

    SummaryHere’s what you need to know about hyperbaric oxygen therapy for burns: how it works, why the 24-48 hour golden window matters, what the treatment process looks like, and a checklist to help you prepare.

    If a burn from hot water or fire hasn’t even started to scab over after a week,
    it may be more than just a slow recovery.

    In many cases, the underlying issue is reduced blood flow to the damaged tissue, which cuts off its oxygen supply.
    One approach that’s drawn attention for speeding up recovery in these situations is hyperbaric oxygen therapy for burns.

    💡 Quick preview
    This article breaks down how hyperbaric oxygen therapy for burns works, why the golden window matters for recovery, and what to check before starting treatment.
    Read on for the 3 mechanisms that help reduce swelling and lower scarring risk, plus why the 24-48 hour window is so critical.

    hyperbaric oxygen therapy for burns

    What Is Hyperbaric Oxygen Therapy for Burns?

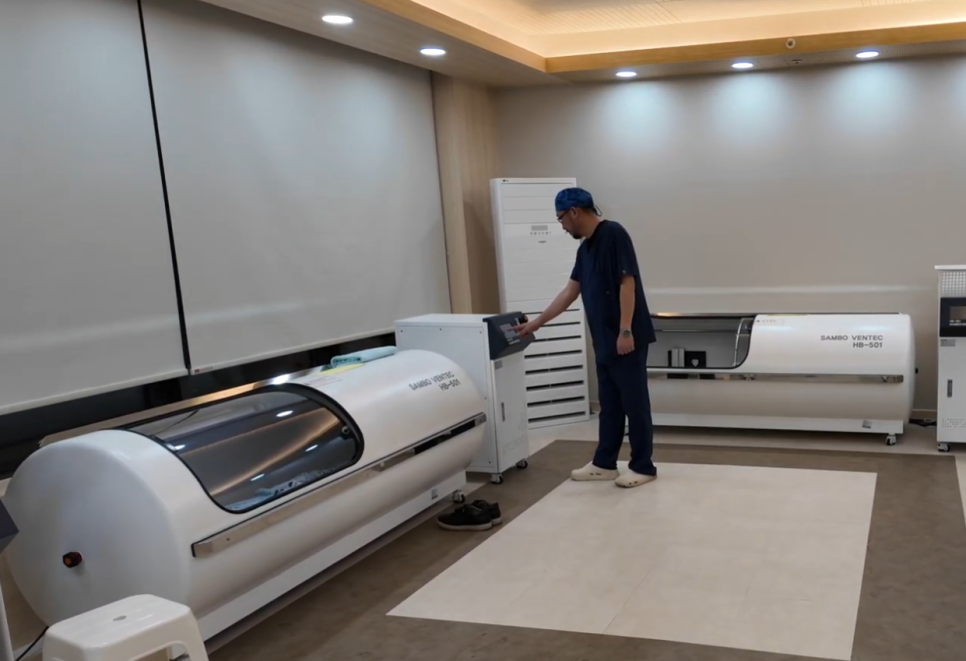
    Hyperbaric oxygen therapy for burns is a treatment in which patients breathe highly concentrated oxygen in an environment with air pressure higher than normal atmospheric pressure, in order to support the recovery of damaged tissue.
    It’s administered inside a sealed piece of equipment called a hyperbaric chamber.

    Under normal breathing conditions, oxygen struggles to reach deep into damaged skin tissue.
    When pressure is increased, however, oxygen dissolves not only into red blood cells but also into blood plasma (serum).

    If this is your first time hearing about the concept, you’re probably wondering how much it actually helps with skin recovery.
    The key idea is that it delivers oxygen directly to injured areas where circulation is compromised.

    hyperbaric oxygen therapy for burns illustration 3

    💡 Key point
    The high-concentration oxygen inhaled under pressure travels through the bloodstream deep into damaged skin, helping to lay the groundwork for cell regeneration.

    hyperbaric oxygen therapy for burns illustration 4


    What Are the Core Mechanisms Behind Faster Recovery?

    Hyperbaric oxygen therapy supports recovery through three main mechanisms: reducing swelling, promoting new blood vessel formation, and supporting white blood cell function.
    When skin tissue is damaged, localized swelling develops and blood flow drops sharply.

    If this state continues, tissue oxygen levels fall further and recovery slows down.
    High-concentration oxygen helps stimulate the formation of new microvessels, allowing fresh blood supply to return to the area.

    hyperbaric oxygen therapy for burns illustration 5

    Elevated blood oxygen levels help reduce swelling
    and support the bactericidal function of white blood cells, which can help guard against secondary infection.

    Together, these combined effects help activate the skin’s regeneration cycle,
    which may in turn help lower the likelihood of scarring.

    🚀 Potential benefits
    ✅ Reduced swelling and improved blood flow at the injury site
    ✅ Support for white blood cell function that may help prevent infection
    ✅ Encouragement of new microvessel and skin cell formation

    Why Does the 24-48 Hour Golden Window Matter So Much?

    The “golden window” in burn care refers to the first 24 to 48 hours after injury, a period that’s understood to help minimize cell death and support the body’s recovery capacity.
    The faster the initial response, the more the extent of damage may be limited.

    hyperbaric oxygen therapy for burns illustration 6

    Prompt, appropriate first aid and care during this period is understood to have a positive effect on outcomes.
    That said, this timeframe reflects general clinical guidance for burn injuries
    and isn’t an absolute standard that applies identically to every patient.

    Missing the golden window raises the risk of deeper tissue damage,
    so it’s advisable to seek a professional evaluation and prompt care immediately after injury.

    ⚠️ A note of caution
    Simply waiting for natural healing without intervention can allow the area of tissue death to expand, so it’s best to get appropriate care within the initial golden window.

    What Does the Hyperbaric Oxygen Treatment Process Look Like?

    Hyperbaric oxygen therapy generally follows this sequence: consultation and evaluation → entering the chamber → progress check.
    Understanding these steps ahead of time can help you receive care safely.

    1. Consultation and evaluation: Medical staff assess the patient’s condition and determine whether the treatment is appropriate.
    2. Entering the chamber: Pressure is raised gradually while the patient breathes high-concentration oxygen for 60 to 90 minutes.
    3. Progress check: Skin recovery is evaluated and the number of remaining sessions is adjusted accordingly.

    hyperbaric oxygen therapy for burns illustration 7

    📋 Checklist
    ✅ Does the facility have equipment that meets recognized safety standards?
    ✅ Is the treatment supervised by qualified medical staff?
    ✅ Were you given clear instructions on equalizing (ear pressure adjustment) before treatment?

    If you’re looking for a specialized hospital that offers hyperbaric oxygen therapy,
    the homepage of Ansan Yeorin Surgery Hospital, a hospital specializing in burn treatment, is a good place to find more information.

    hyperbaric oxygen therapy for burns illustration 8


    Frequently Asked Questions

    1. Is the treatment painful or uncomfortable?
    As pressure increases, you may feel ear fullness similar to what you experience on an airplane. Swallowing or pinching your nose while gently blowing (equalizing) usually resolves this.

    2. How long does each session take, and how many sessions are needed?
    A single session typically takes 60 to 90 minutes, and the total number of sessions varies depending on the severity of the burn and how recovery progresses.

    3. Can it be combined with regular wound dressing?
    Yes. When combined with standard wound care and dressing, it may support skin regeneration alongside those treatments.

    4. Can every burn patient receive this treatment?
    Eligibility depends on the depth and extent of the burn as well as overall health, so it should be decided based on a physician’s evaluation.

    5. Does it completely eliminate scarring after treatment?
    It may help lower the risk of scarring, but results vary by individual and complete scar removal isn’t guaranteed.

    hyperbaric oxygen therapy for burns illustration 9

    hyperbaric oxygen therapy for burns illustration 10

    If you need emergency burn care in the Ansan area, it’s worth checking in advance whether a hospital has dedicated burn specialists and the proper dressing materials on hand.
    Facilities like Yeorin Surgery Hospital, located at 376 Hwarang-ro, Danwon-gu, Ansan-si, Gyeonggi-do, can serve as a reference for the kind of care infrastructure to look for.

    hyperbaric oxygen therapy for burns illustration 11


    References

    · NCBI StatPearls, “Hyperbaric Treatment of Thermal Burns,” StatPearls Publishing, 2023. View source
    · Journal of Burn Care & Research, “Hyperbaric Oxygen Therapy in Burn Care: A Systematic Review of Current Evidence,” Oxford University Press, 2025. View source
    · Doctors News, “Why Is Hyperbaric Oxygen Therapy Needed for Acute Burns?”, Korean Medical Association, 2023. View source


    This article is intended for general health information purposes only and is not a substitute for individual diagnosis or treatment. If you have symptoms, please consult a physician.

  • Anal Itching During Pregnancy: 3 Causes and How to Manage It After Birth

    Anal Itching During Pregnancy: 3 Causes and How to Manage It After Birth

    SummaryHere’s everything you need to know about anal itching during pregnancy — the causes, how to tell it apart from hemorrhoids, safe sitz bath care, and whether it naturally improves after childbirth.

    There are moments when even sitting still in the same position can feel unbearable.

    That’s exactly what it can feel like when the area around the anus becomes almost intolerably itchy during pregnancy.

    It’s tempting to just tell yourself “it’ll go away once I give birth,” but each day can feel painfully long while you wait.

    In fact, anal itching during pregnancy often isn’t just a minor skin issue — it’s frequently a sign of changes happening inside the body.

    In this article, we’ll walk through the hormonal and circulatory causes behind anal itching during pregnancy, how to tell early hemorrhoid symptoms apart from ordinary itching, and safe sitz bath care methods you can try without medication.
    We’ll also look at whether symptoms are likely to improve naturally after childbirth.

    Anal itching during pregnancy

    What Causes Anal Itching During Pregnancy?

    Anal itching during pregnancy is a form of pruritus that develops when hormonal shifts and increased blood flow make the mucous membrane around the anus more sensitive.

    In most cases, the underlying cause traces back to a pregnancy hormone called progesterone.

    During pregnancy, progesterone levels rise sharply.

    This hormone slows down bowel movement, which makes constipation more likely.

    When constipation sets in, straining during bowel movements places extra pressure on the area and irritates the anal mucosa.

    Anal itching during pregnancy - related image 2

    On top of that, the growing uterus presses on blood vessels near the pelvis, disrupting normal circulation.

    This can lead to swollen veins — known as venous congestion — and as the skin stretches, it may cause intense itching or discomfort.

    In fact, as the uterus expands during the third trimester, it often presses more forcefully on these veins, which can make symptoms worse.

    💡 Key Point
    During pregnancy, rising progesterone combined with pressure on pelvic blood vessels can slow bowel movement, cause constipation, and lead to venous congestion — together, these factors can contribute to both anal itching and hemorrhoids.

    Anal itching during pregnancy - related image 3


    Could It Be More Than Itching? The Link to Hemorrhoids

    Pregnancy-related hemorrhoids occur when pressure on the lower body and constipation cause the veins around the anus to expand, protrude, or become inflamed.

    If the itching is simply from dryness, that’s a relatively mild cause — but in many cases, it can actually be an early sign of hemorrhoids.

    Anal itching during pregnancy - related image 4

    If you notice a small amount of blood after a bowel movement, or feel something protruding, hemorrhoids may already be developing.

    This is a symptom that some pregnant women experience, especially in the later stages of pregnancy.

    Even so, many people put off addressing it simply out of embarrassment.

    The longer it goes untreated, the more the discomfort tends to worsen, and it can carry over into greater discomfort after delivery — so early attention matters.

    📋 Checklist
    ✅ Do you feel a lingering sense of incomplete emptying or heaviness around the anus after a bowel movement?
    ✅ Do you notice bright red blood when wiping, or a sense that something is there?
    ✅ Do you have sharp pain or itching that doesn’t go away even after scratching?
    ⚠️ Caution
    If two or more of these apply to you, it’s safer not to rely on self-care alone — consider seeing an OB-GYN or a colorectal specialist.

    Safe Care Habits You Can Start Today

    Sitz baths and lifestyle adjustments are commonly used conservative care options for pregnant women, who need to be cautious about medication, to help ease symptoms safely.

    Even small changes in habit can make symptoms noticeably lighter.

    Anal itching during pregnancy - related image 5

    A commonly recommended method is a warm-water sitz bath.

    Soaking for just 5 to 10 minutes, 2 to 3 times a day, can help improve blood circulation and ease venous congestion.

    That said, water that’s too hot can actually irritate the area further, so it’s best to keep the temperature close to body temperature.

    After a sitz bath, drying the area completely is essential.

    A damp environment can make itching worse, so gently pat the area dry with a soft towel or use a hair dryer on the cool setting.

    A fiber-rich diet and plenty of water to prevent constipation are also basic habits worth keeping up.

    Care Method How To Precautions
    Sitz bath Warm water, 2–3 times a day, 5–10 minutes Avoid hot water; dry completely afterward
    Diet Fiber-rich foods, adequate water intake Preventing constipation is key
    Ointments/suppositories Use only as prescribed by your doctor Never purchase or use on your own
    🚀 Takeaway
    Consistently practicing warm-water sitz baths along with thorough drying may help reduce venous congestion around the anus and ease itching.

    Anal itching during pregnancy - related image 6


    Does Anal Itching Go Away After Giving Birth?

    In short, symptoms improve naturally after childbirth for many people, but they don’t disappear on their own for everyone.

    After delivery, progesterone levels return to normal and pelvic pressure is relieved, which often reduces venous congestion as well.

    However, if hemorrhoids had progressed significantly by late pregnancy or were left untreated for a long time, pain or itching can continue after delivery.

    In that case, it’s a good idea to keep up sitz baths and dietary management during postpartum recovery, and if symptoms persist for more than 4 to 6 weeks, seeing a colorectal specialist is recommended.

    Whether during pregnancy or after delivery, consulting a specialist rather than simply enduring the symptoms may support a smoother recovery.

    If anal pain or bleeding keeps recurring, it’s easy to confuse hemorrhoids with an anal fistula, but the two conditions have different causes and treatment approaches.
    If you’d like to learn more about related symptoms, you’re welcome to check the colorectal care information at [Ansan Yeolin Surgical Hospital] Home.


    Frequently Asked Questions

    1. If I have anal itching during pregnancy, does that automatically mean I have hemorrhoids?
    Not necessarily — but it’s often an early symptom caused by dilated blood vessels. If symptoms persist, it’s safer not to ignore them and to consult an OB-GYN or colorectal specialist.

    2. Is it safe to use an ointment during pregnancy, or could it affect the baby?
    Some ointments and suppositories prescribed specifically for pregnant women are considered relatively safe. That said, never buy and apply one on your own — always consult your doctor and use only what’s prescribed.

    3. How many times a day should I do a sitz bath?
    Generally, 2 to 3 times a day — for example, morning and evening — is appropriate. Doing it gently after a bowel movement can help too. Keeping each session under 10 minutes helps reduce skin irritation.

    4. Will this itching and hemorrhoids go away on their own after I give birth?
    In many cases, symptoms improve naturally once hormone levels return to normal and pelvic pressure is relieved after delivery. That said, depending on severity, some continued postpartum care may still be needed.

    5. What’s the most basic habit for preventing anal itching during pregnancy?
    A fiber-rich diet and drinking enough water to prevent constipation are the most fundamental steps. Avoiding long periods of sitting and making warm-water sitz baths a regular habit can help as well.

    Anal itching during pregnancy - related image 7


    References

    · Cleveland Clinic, “Hemorrhoids While Pregnant: Causes & Treatment,” Cleveland Clinic, 2023. Read more
    · Abd El Naby S. A. et al., “Hemorrhoids during pregnancy: Sitz bath vs. ano-rectal cream: A comparative prospective study of two conservative treatment protocols,” Women and Birth (PubMed), 2017. Read more
    · Korea Disease Control and Prevention Agency (KDCA), “Anal Itching,” National Health Information Portal, 2023. Read more

    This article is intended for general health information purposes only and is not a substitute for individual diagnosis or treatment. If you’re experiencing symptoms, please consult a medical professional.